Ford Fusion: Side Panel Sheet Metal Repairs / Rear Door Skin Panel. Removal and Installation
Special Tool(s) /
General Equipment
| Grinder |
| Knife |
| MIG/MAG Welding Equipment |
Materials
| Name |
Specification |
Metal Bonding Adhesive
TA-1, TA-1-B, 3M™ 08115, LORD Fusor® 108B |
-
|
Seam Sealer
TA-2-B, 3M™ 08308, LORD Fusor® 803DTM |
-
|
Flexible Foam Repair
3M™ 08463, LORD Fusor® 121 |
-
|
Removal
-
 WARNING:
Before beginning any service procedure in this
section, refer to Safety Warnings in section 100-00 General Information.
Failure to follow this instruction may result in serious personal
injury.
WARNING:
Before beginning any service procedure in this
section, refer to Safety Warnings in section 100-00 General Information.
Failure to follow this instruction may result in serious personal
injury.
Refer to: Health and Safety Precautions (100-00 General Information, Description and Operation).
-
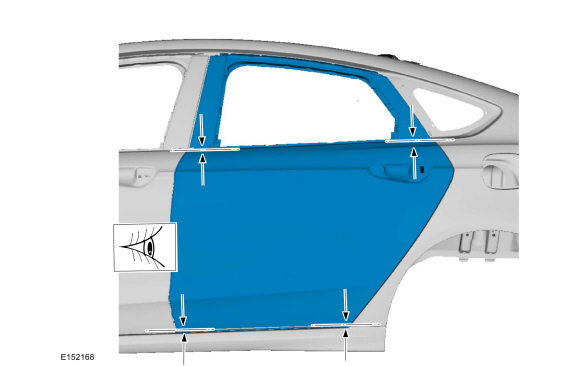
NOTE:
Left hand (LH) side shown, right hand (RH) side similar.
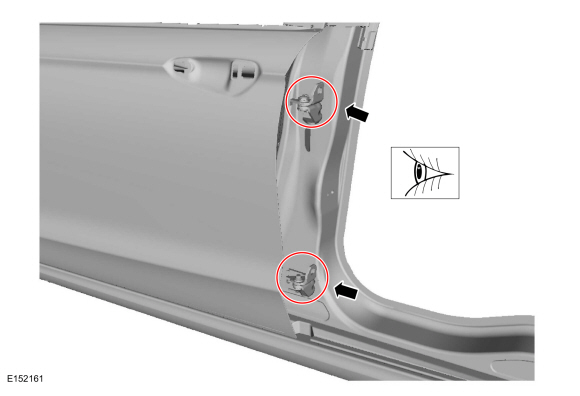
Inspect the upper and lower door hinges for wear or damage, install new or rebuild as necessary.
-
Remove the rear door window glass.
Refer to: Rear Door Window Glass (501-11 Glass, Frames and Mechanisms, Removal and Installation).
-
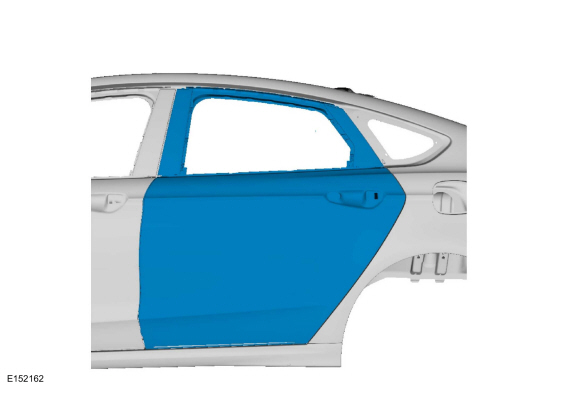
Remove the rear door.
Refer to: Rear Door (501-03 Body Closures, Removal and Installation).
-
Remove the rear door upper moulding.
Refer to: Rear Door Upper Moulding (501-08 Exterior Trim and Ornamentation, Removal and Installation).
-
Remove the exterior rear door handle.
Refer to: Exterior Rear Door Handle (501-14 Handles, Locks, Latches and Entry Systems, Removal and Installation).
-
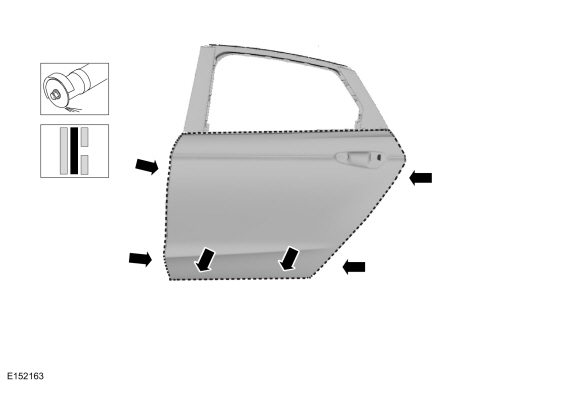
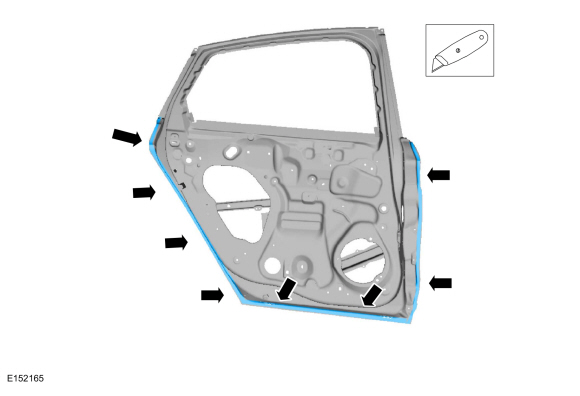
Carefully cut through the outer panel only.
Use the General Equipment: Grinder
-
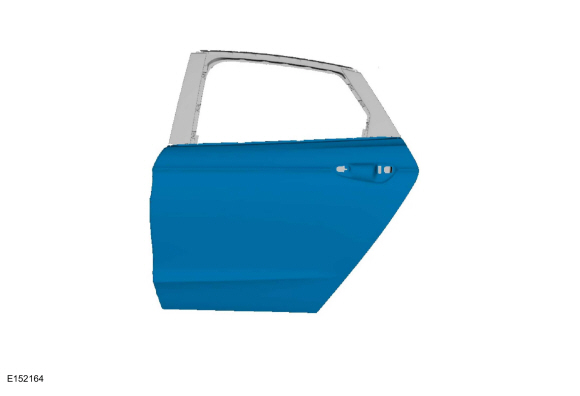
Remove the outer door panel.
-
Remove the remaining portion of the rear door panel hem flange.
Use the General Equipment: Knife
Installation
NOTE:
Left hand (LH) side shown, right hand (RH) side similar.
-
 WARNING:
Before beginning any service procedure in this
section, refer to Safety Warnings in section 100-00 General Information.
Failure to follow this instruction may result in serious personal
injury.
WARNING:
Before beginning any service procedure in this
section, refer to Safety Warnings in section 100-00 General Information.
Failure to follow this instruction may result in serious personal
injury.
Refer to: Health and Safety Precautions (100-00 General Information, Description and Operation).
-
Remove the e-coat from the mating surface.
-
Remove all adhesive and foreign materials from the door shell to outer door panel mating surfaces.
-
NOTE:
Hem closing and panel alignment must be completed before the adhesive has begun to cure.
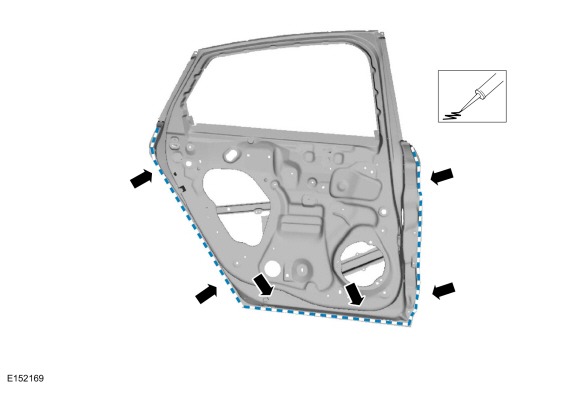
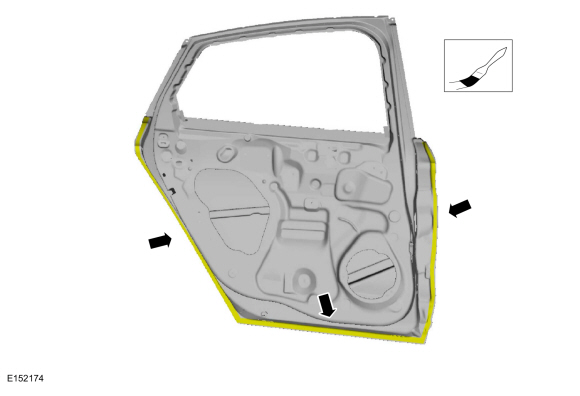
Apply adhesive to the door shell mating surface.
Material: Metal Bonding Adhesive
/ TA-1, TA-1-B, 3M™ 08115, LORD Fusor® 108B
-
Install the outer door panel and using a door panel
installation tool or hammer and dolly method, partially close the door
hem flange around the perimeter of the door assembly.
-
Install the rear door, check for proper alignment and adjust as necessary.
-
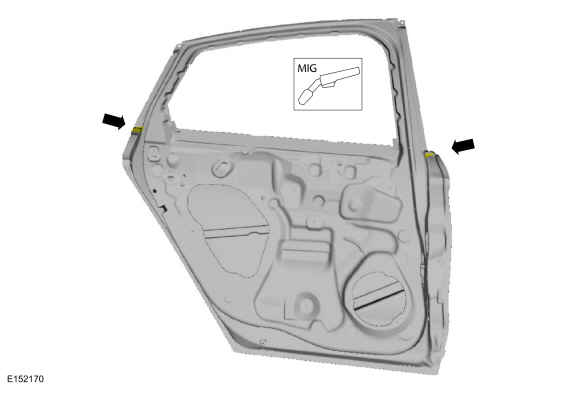
Carefully open the door and tack weld to lock panel in place.
Use the General Equipment: MIG/MAG Welding Equipment
-
Remove the door from the vehicle.
-
Using a door panel installation tool or hammer and dolly
method, finish closing the door hem flange around the entire perimeter
of the door assembly. Smooth any residual adhesive squeeze-out in to the
seam to act as a seam sealer.
-
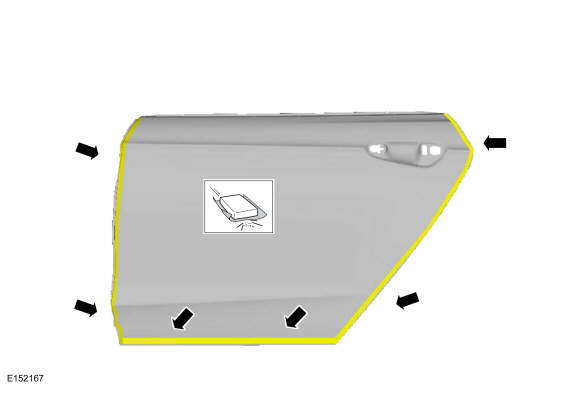
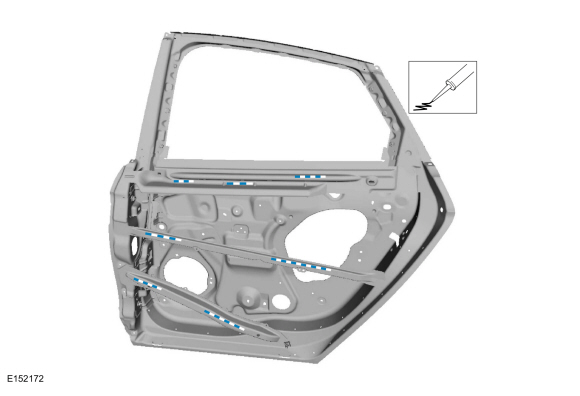
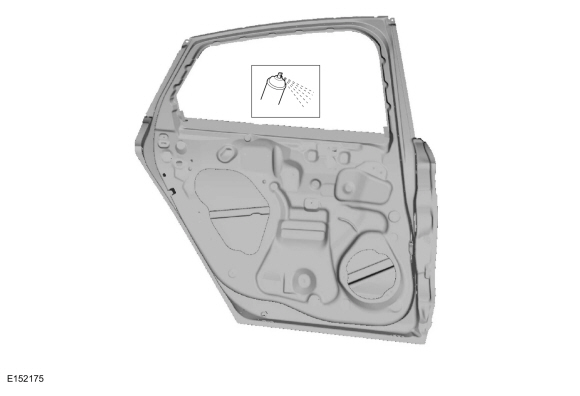
NOTE:
Outer door panel removed for illustration purpose.
Apply foam sealant as indicated.
Material: Flexible Foam Repair
/ 3M™ 08463, LORD Fusor® 121
-
Sand and clean the door hem flange.
-
Prime the door flange area using a Ford approved paint system.
-
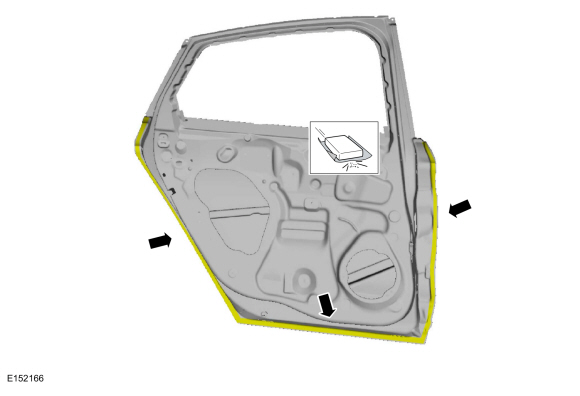
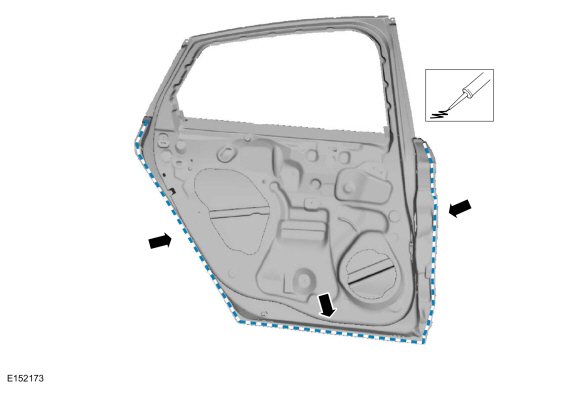
Apply seam sealer as indicated.
Material: Seam Sealer
/ TA-2-B, 3M™ 08308, LORD Fusor® 803DTM
-
Refinish the door seam using a Ford approved paint system.
-
Install the rear door.
Refer to: Rear Door (501-03 Body Closures, Removal and Installation).
-
Refinish the door using a Ford approved paint system.
-
Install the window glass.
Refer to: Rear Door Window Glass (501-11 Glass, Frames and Mechanisms, Removal and Installation).
-
Install the rear door handle.
Refer to: Exterior Rear Door Handle (501-14 Handles, Locks, Latches and Entry Systems, Removal and Installation).
-
Install the rear door upper moulding.
Refer to: Rear Door Upper Moulding (501-08 Exterior Trim and Ornamentation, Removal and Installation).
-
Restore corrosion protection.
Refer to: Corrosion Prevention (501-25 Body Repairs - General Information, General Procedures).
Special Tool(s) /
General Equipment
Resistance Spotwelding Equipment
Spherical Cutter
Hot Air Gun
Air Body Saw
8 mm Drill Bit
MIG/MAG Welding Equipment
Spot Weld Drill Bit
Locking Pliers
Materials
Name
Specification
Metal Bonding AdhesiveTA-1, TA-1-B, 3M™ 08115, LORD Fusor® 108B
-
Seam SealerTA-2-B, 3M™ 08308, LORD Fusor® 803..
Other information:
Special Tool(s) /
General Equipment
Hose Clamp Remover/Installer
Removal
NOTICE:
The turbocharger compressor vanes can be damaged by even the
smallest particles. When removing any turbocharger or engine air intake
system component, ensure that no debris enters the system. Failure to
do so may result in damage to the turbocharger.
NOTE:
Removal steps in this procedure may c..
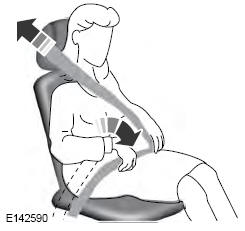
WARNING: If your vehicle is
involved in a crash, have the seatbelts
and associated components inspected
as soon as possible. Failure to follow this
instruction could result in personal injury
or death.
All safety restraints in the vehicle are
combination lap and shoulder belts. The
driver seatbelt has the first type of locking
mode, and the front outboard passenger
and rear seat seatbelts..


 Side Panel. Removal and Installation