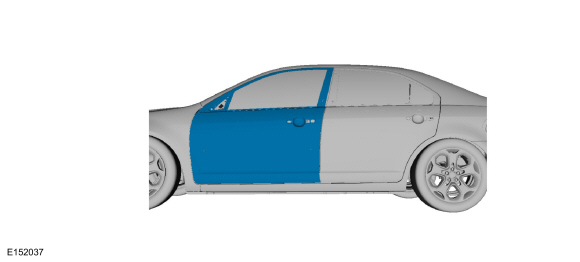
Ford Fusion: Side Panel Sheet Metal Repairs / Front Door Skin Panel. Removal and Installation
Special Tool(s) /
General Equipment
| Grinder |
| Knife |
| MIG/MAG Welding Equipment |
Materials
| Name |
Specification |
Metal Bonding Adhesive
TA-1, TA-1-B, 3M™ 08115, LORD Fusor® 108B |
-
|
Seam Sealer
TA-2-B, 3M™ 08308, LORD Fusor® 803DTM |
-
|
Flexible Foam Repair
3M™ 08463, LORD Fusor® 121 |
-
|
Removal
NOTE:
Left Hand (LH) side shown, Right Hand (RH) side similar.
-
 WARNING:
Before beginning any service procedure in this
section, refer to Safety Warnings in section 100-00 General Information.
Failure to follow this instruction may result in serious personal
injury.
WARNING:
Before beginning any service procedure in this
section, refer to Safety Warnings in section 100-00 General Information.
Failure to follow this instruction may result in serious personal
injury.
Refer to: Health and Safety Precautions (100-00 General Information, Description and Operation).
-
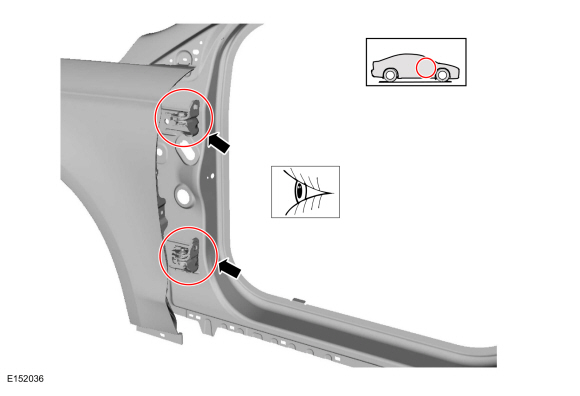
Inspect the upper and lower door hinges for wear or damage, install new or rebuild as necessary.
-
Remove the exterior mirror.
Refer to: Exterior Mirror (501-09 Rear View Mirrors, Removal and Installation).
-
Remove the window glass.
Refer to: Front Door Window Glass (501-11 Glass, Frames and Mechanisms, Removal and Installation).
-
Remove the front door.
Refer to: Front Door (501-03 Body Closures, Removal and Installation).
-
Remove the front door handle.
Refer to: Exterior Front Door Handle (501-14 Handles, Locks, Latches and Entry Systems, Removal and Installation).
-
Remove the front door upper moulding.
Refer to: Front Door Upper Moulding (501-08 Exterior Trim and Ornamentation, Removal and Installation).
-
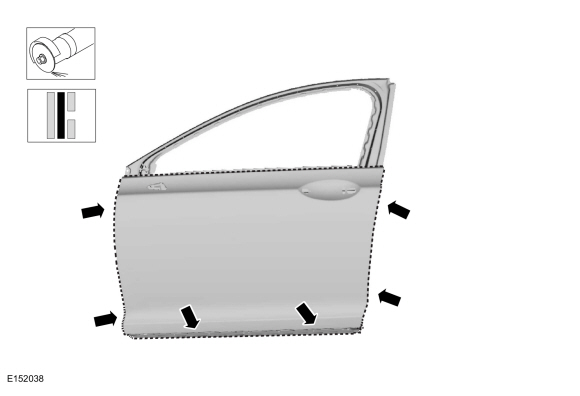
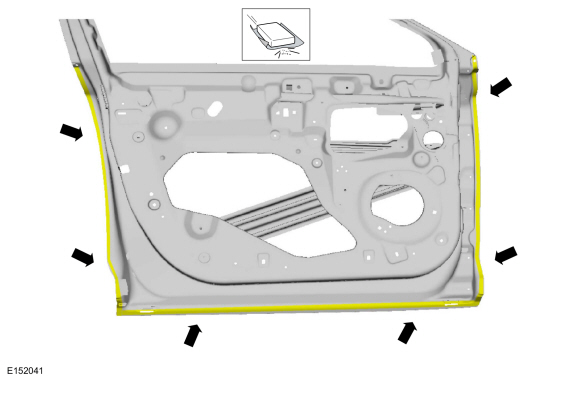
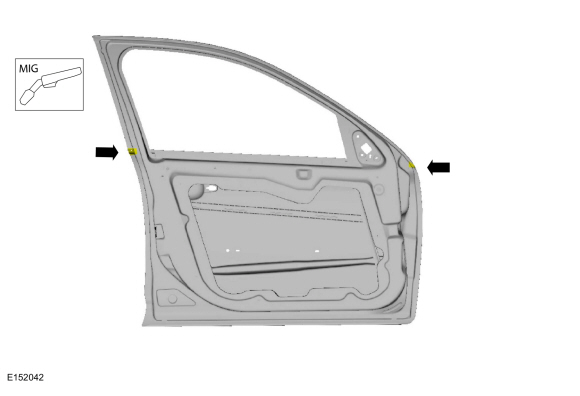
Carefully cut through the outer panel only.
Use the General Equipment: Grinder
-
Remove the outer door panel.
-
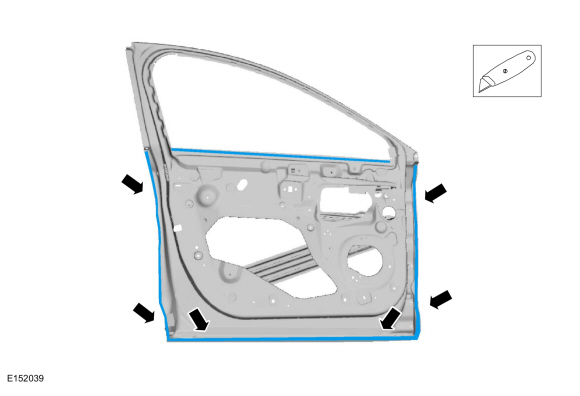
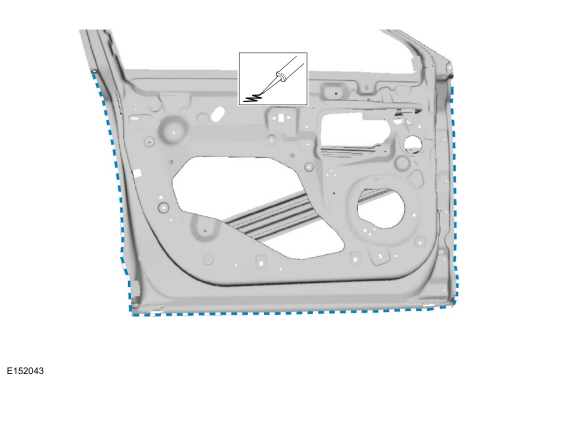
Remove the remaining portion of the front door panel hem flange.
Use the General Equipment: Knife
Installation
NOTE:
Left Hand (LH) side shown, Right Hand (RH) side similar.
-
 WARNING:
Before beginning any service procedure in this
section, refer to Safety Warnings in section 100-00 General Information.
Failure to follow this instruction may result in serious personal
injury.
WARNING:
Before beginning any service procedure in this
section, refer to Safety Warnings in section 100-00 General Information.
Failure to follow this instruction may result in serious personal
injury.
Refer to: Health and Safety Precautions (100-00 General Information, Description and Operation).
-
Remove the e-coat from the mating surface.
-
Remove all adhesive and foreign materials from the door shell to outer door panel mating surfaces.
-
NOTE:
Hem closing and panel alignment must be completed before the adhesive has begun to cure.
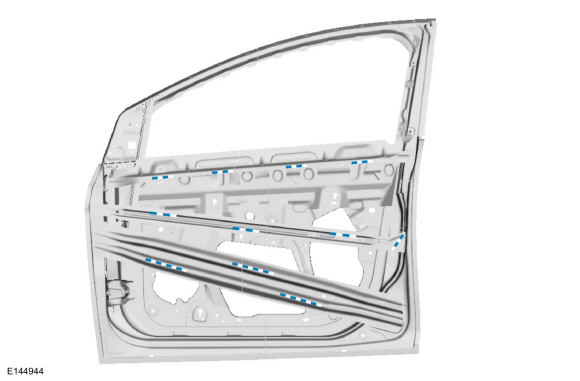
Apply adhesive to the door shell mating surface.
Material: Metal Bonding Adhesive
/ TA-1, TA-1-B, 3M™ 08115, LORD Fusor® 108B
-
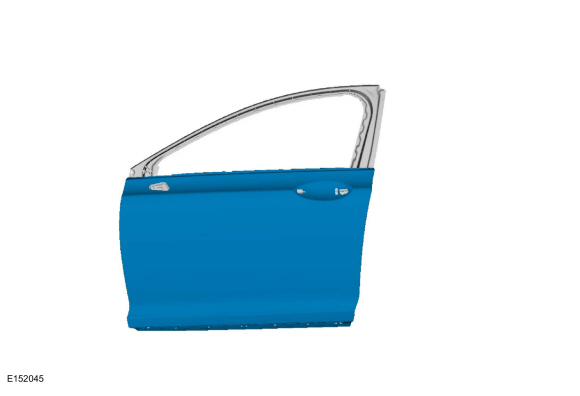
Install the new outer door panel and using a door panel
installation tool or hammer and dolly method, partially close the door
hem flange around the perimeter of the door assembly.
-
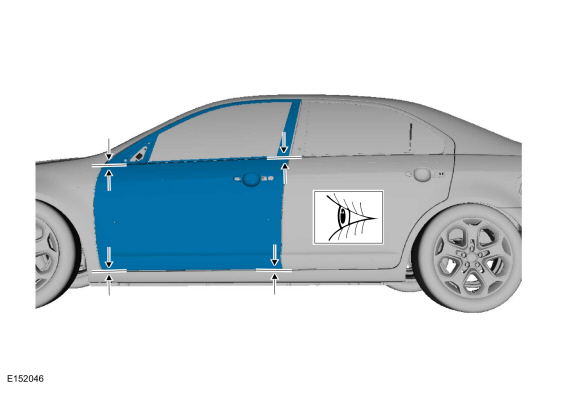
Install the door and check for proper alignment and adjust as necessary.
-
Carefully open the door and tack weld to lock panel in place.
Use the General Equipment: MIG/MAG Welding Equipment
-
Remove the door from the vehicle.
-
Using a door panel installation tool or hammer and dolly
method, finish closing the door hem flange around the entire perimeter
of the door assembly. Smooth any residual adhesive squeeze-out in to the
seam to act as a seam sealer.
-
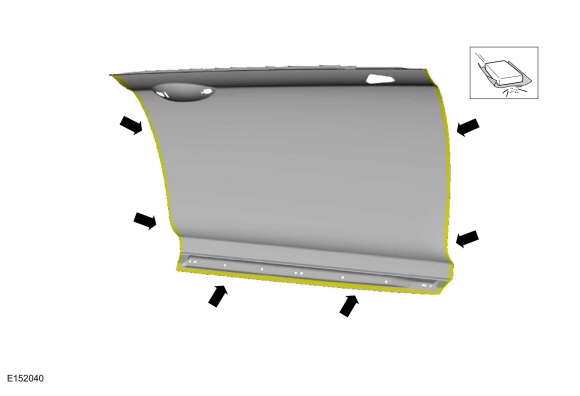
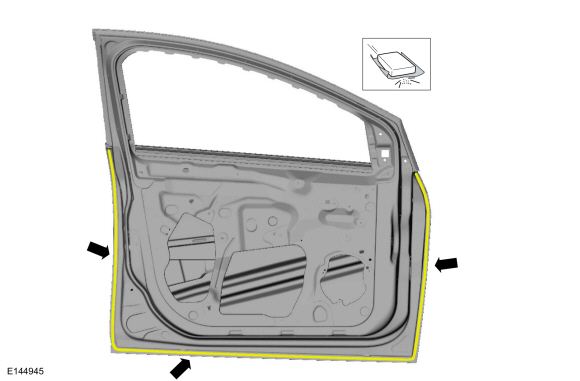
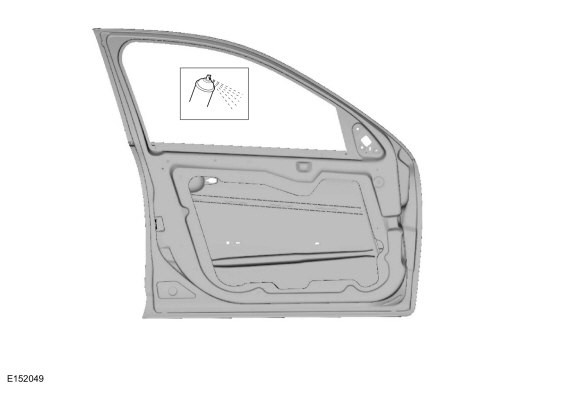
NOTE:
Outer door panel removed for illustration purpose.
Apply foam sealant as indicated.
Material: Flexible Foam Repair
/ 3M™ 08463, LORD Fusor® 121
-
Sand and clean the door hem flange.
-
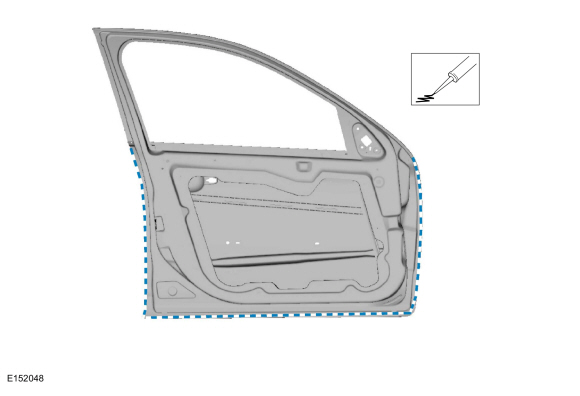
Apply seam sealer as indicated.
Material: Seam Sealer
/ TA-2-B, 3M™ 08308, LORD Fusor® 803DTM
-
Prime the flange seam using a Ford approved primer.
-
Refinish the door seam using a Ford approved paint system.
-
Install the front door.
-
Refinish the door using a Ford approved paint system.
-
Install the exterior front door handle.
Refer to: Exterior Front Door Handle (501-14 Handles, Locks, Latches and Entry Systems, Removal and Installation).
-
Install the window glass.
Refer to: Front Door Window Glass (501-11 Glass, Frames and Mechanisms, Removal and Installation).
-
Install the exterior mirror.
Refer to: Exterior Mirror (501-09 Rear View Mirrors, Removal and Installation).
-
Install the front door upper moulding.
Refer to: Front Door Upper Moulding (501-08 Exterior Trim and Ornamentation, Removal and Installation).
-
Restore corrosion protection.
Refer to: Corrosion Prevention (501-25 Body Repairs - General Information, General Procedures).
Special Tool(s) /
General Equipment
Grinder
Knife
MIG/MAG Welding Equipment
Materials
Name
Specification
Metal Bonding AdhesiveTA-1, TA-1-B, 3M™ 08115, LORD Fusor® 108B
-
Seam SealerTA-2-B, 3M™ 08308, LORD Fusor® 803DTM
-
Flexible Foam Repair3M™ 08463, LORD Fusor® 121
-
Removal
WARNING:
Before beginnin..
Other information:
Inspection
NOTE:
Deployable devices such as airbags, pretensioners and
inflatable belt inflators, may deploy alone or in various combinations
depending on the impact event.
NOTE:
Always refer to the appropriate workshop manual procedures prior to carrying out vehicle repairs affecting the SRS and seatbelt system.
NOTE:
The SRS must be fully operational and free of faults before rel..
Special Tool(s)
MASTERTECH MTS-4000 ANALYZER257-00018
EngineEAR107-R2100Chassis EarsJSP97170 Squeak And Rattle Kit164-R4900
Marksman Ultrasonic Leak DetectorTRATP-9370
Diagnostic Theory
The shortest route to an accurate diagnosis results from:
System knowledge, including comparison with a known good system.
System history, i..


 Rear Door Skin Panel. Removal and Installation