Ford Fusion: Roof Sheet Metal Repairs / Roof Panel. Removal and Installation
Special Tool(s) /
General Equipment
| Resistance Spotwelding Equipment |
| Spherical Cutter |
| Grinder |
| Knife |
| Spot Weld Drill Bit |
| Locking Pliers |
Materials
| Name |
Specification |
Metal Bonding Adhesive
TA-1, TA-1-B, 3M™ 08115, LORD Fusor® 108B |
-
|
Seam Sealer
TA-2-B, 3M™ 08308, LORD Fusor® 803DTM |
-
|
Flexible Foam Repair
3M™ 08463, LORD Fusor® 121 |
-
|
Removal
-
NOTICE:
Before beginning any service procedure in this
section, refer to Safety Warnings in section 100-00 General Information.
Failure to follow this instruction may result in serious personal
injury.
NOTICE:
Adequately protect all glass, exterior finish and
interior trim from contamination during entire repair procedure.
Remove the following items:
-
Refer to: Health and Safety Precautions (100-00 General Information, Description and Operation).
-
Depower the SRS.
Refer to: Supplemental Restraint System (SRS) Depowering and Repowering (501-20B Supplemental Restraint System, General Procedures).
-
Remove the headliner.
Refer to: Headliner (501-05 Interior Trim and Ornamentation, Removal and Installation).
-
Remove the side air curtains.
Refer to: Side Curtain Airbag (501-20B Supplemental Restraint System, Removal and Installation).
-
Remove the windshield and rear window glass.
Refer to: Fixed Glass (501-11 Glass, Frames and Mechanisms, General Procedures).
-
Remove the audio unit antenna.
Refer to: Audio Unit Antenna (415-00 Information and
Entertainment System - General Information - Vehicles With:
AM/FM/CD/SYNC/Sony Audio System)
.
Refer to: Audio Unit Antenna (415-00 Information and
Entertainment System - General Information - Vehicles With:
AM/FM/CD/SYNC)
.
Refer to: Audio Unit Antenna (415-00 Information and Entertainment System - General Information - Vehicles With: SYNC 3, Removal and Installation).
-
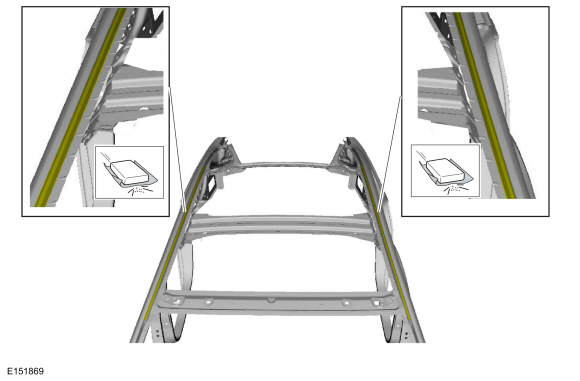
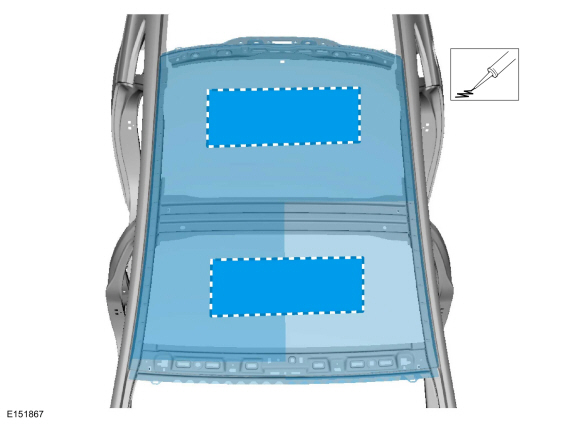
NOTE:
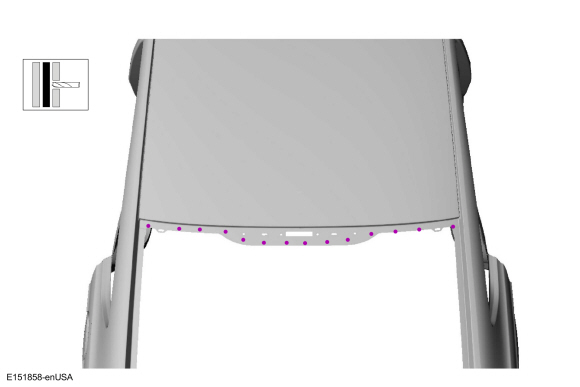
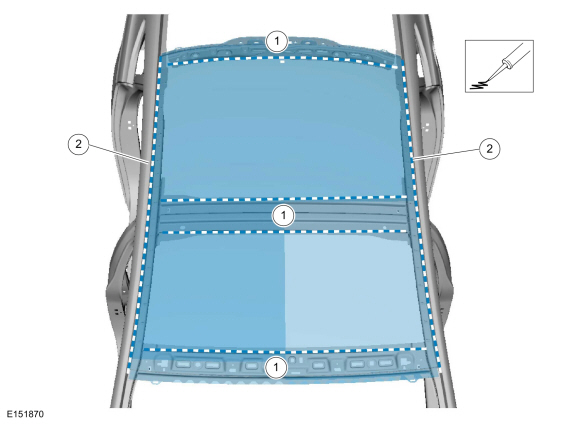
Cut the outer panel only.
Carefully cut the the inner edge of the roof panel ditch on each side.
Use the General Equipment: Spherical Cutter
-
Remove the spot welds at the windshield opening.
Use the General Equipment: Spot Weld Drill Bit
-
Remove the spot welds at the rear window glass opening area.
Use the General Equipment: Spot Weld Drill Bit
-
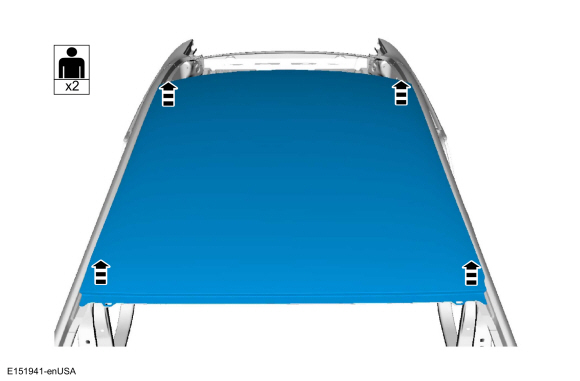
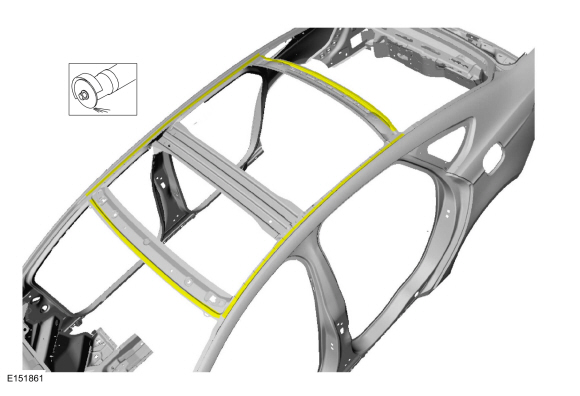
NOTE:
Leave as much NVH foam as possible intact on the roof bows.
Separate the roof panel from the roof reinforcements.
Use the General Equipment: Knife
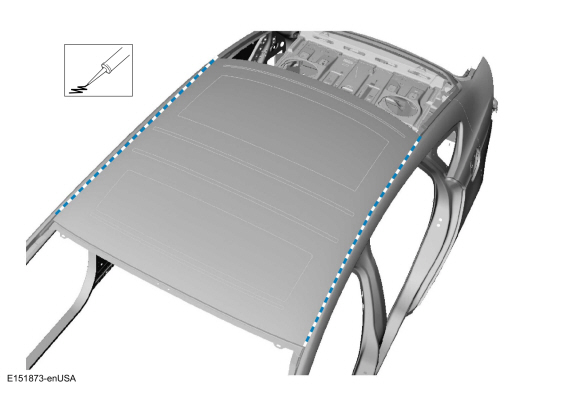
-
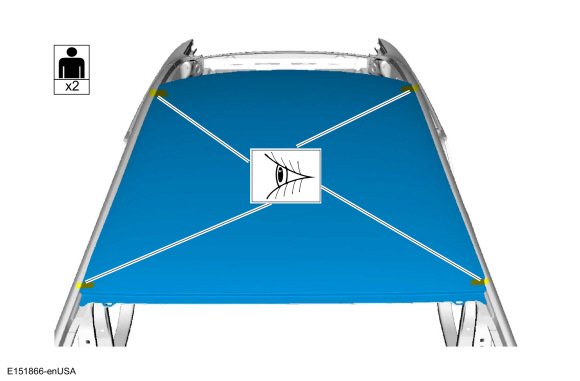
With the help of an assistant, remove the roof panel.
-
Remove the remaining portion of the outer roof panel flange.
Use the General Equipment: Grinder
-
Clean area and remove any remaining residue.
Installation
-
Abrade flange roof panel mating area.
Use the General Equipment: Grinder
-
With the help of an assistant, install the roof panel to the vehicle.
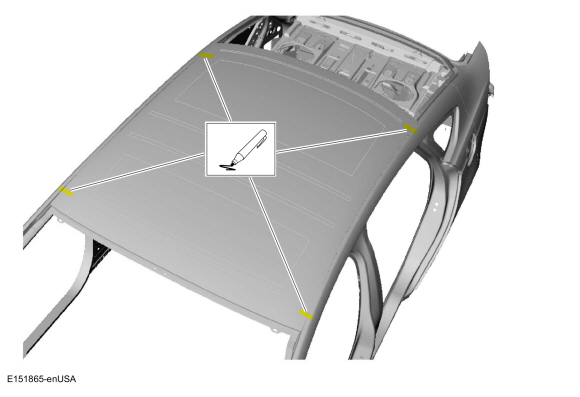
-
Properly align and index mark the roof panel to the vehicle.
-
With the help of an assistant, remove the roof panel.
-
Abrade flange mating area of replacement roof panel.
-
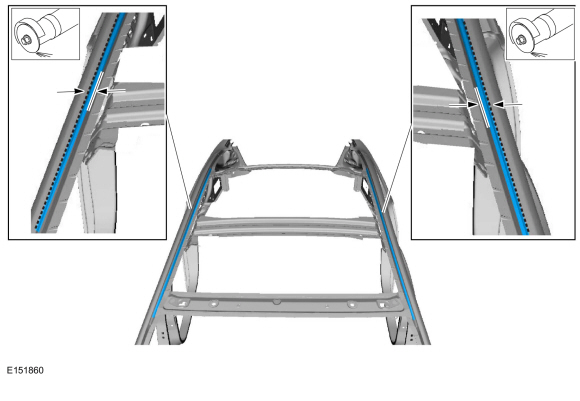
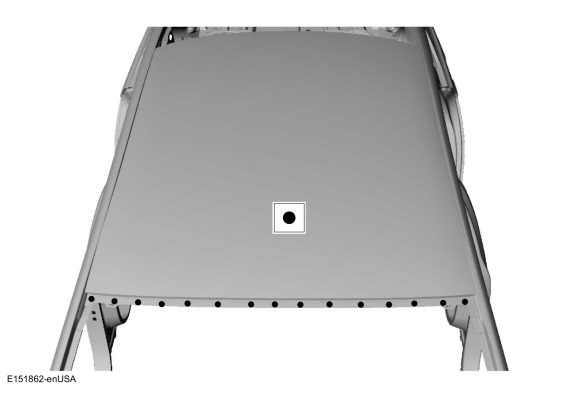
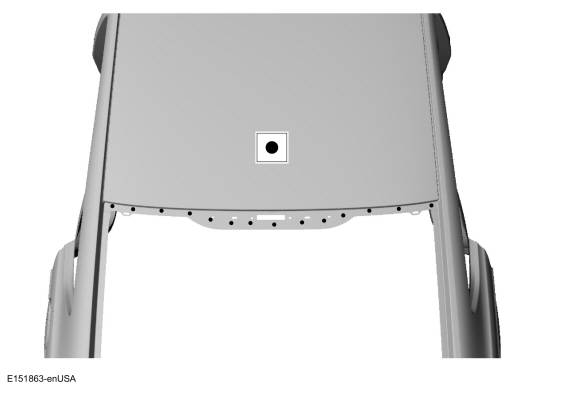
Apply adhesive and sealant as indicated.
-
Flexible foam sealant.
Material: Flexible Foam Repair
/ 3M™ 08463, LORD Fusor® 121
-
Metal bonding adhesive
Material: Metal Bonding Adhesive
/ TA-1, TA-1-B, 3M™ 08115, LORD Fusor® 108B
-
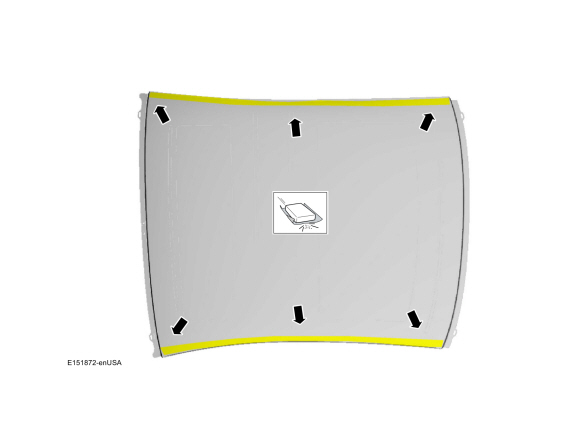
NOTE:
Do not lift the panel from the body once installed.
If the panel requires repositioning, slide the panel to correct
alignment location.
NOTE:
To assure complete bonding, check all locations for
full adhesive contact. Add additional adhesive as necessary.
With the help of an assistant, install and align the roof outer panel.
-
Tightly clamp (without damaging) the roof outer panel.
Use the General Equipment: Locking Pliers
-
Resistance spot weld the windshield opening flange.
Use the General Equipment: Resistance Spotwelding Equipment
-
Resistance spot weld at the rear window glass opening area.
Use the General Equipment: Resistance Spotwelding Equipment
-
Install NVH pads.
-
Apply seam sealer.
Material: Seam Sealer
/ TA-2-B, 3M™ 08308, LORD Fusor® 803DTM
-
Refinish the roof panel using a Ford approved paint system.
-
Install the following items:
-
Install the audio unit antenna.
Refer to: Audio Unit Antenna (415-00 Information and
Entertainment System - General Information - Vehicles With:
AM/FM/CD/SYNC/Sony Audio System)
.
Refer to: Audio Unit Antenna (415-00 Information and
Entertainment System - General Information - Vehicles With:
AM/FM/CD/SYNC)
.
Refer to: Audio Unit Antenna (415-00 Information and Entertainment System - General Information - Vehicles With: SYNC 3, Removal and Installation).
-
Install the fixed glass.
Refer to: Fixed Glass (501-11 Glass, Frames and Mechanisms, General Procedures).
-
Install the side air curtains.
Refer to: Side Curtain Airbag (501-20B Supplemental Restraint System, Removal and Installation).
-
Install the headliner.
Refer to: Headliner (501-05 Interior Trim and Ornamentation, Removal and Installation).
-
Repower the SRS.
Refer to: Supplemental Restraint System (SRS) Depowering and Repowering (501-20B Supplemental Restraint System, General Procedures).
Special Tool(s) /
General Equipment
Resistance Spotwelding Equipment
Spot Weld Drill Bit
Locking Pliers
Removal
NOTICE:
Battery electric vehicle (BEV), hybrid electric vehicle
(HEV) and plug-in hybrid electric vehicle (PHEV) contain a high-voltage
battery...
Special Tool(s) /
General Equipment
Resistance Spotwelding Equipment
Spherical Cutter
Grinder
Spot Weld Drill Bit
Locking Pliers
Materials
Name
Specification
Metal Bonding AdhesiveTA-1, TA-1-B, 3M™ 08115, LORD Fusor® 108B
-
Seam SealerTA-2-B, 3M™ 08308, LORD Fusor® 803DTM
-
Removal
NOTICE:
Before beginning any servic..
Other information:
Principle of Operation
WARNING: Vehicle modifications
involving braking system, aftermarket
roof racks, suspension, steering system,
tire construction and wheel and tire size
may change the handling characteristics
of your vehicle and may adversely affect
the performance of the electronic
stability control system. In addition,
installing any stereo loudspeakers may
interfere with and adve..
For TCC operation, REFER to: Transmission Description - System Operation and Component Description (307-01A Automatic Transmission - 6-Speed Automatic Transmission – 6F35, Description and Operation).
Symptom Chart
Symptom
Possible Sources
Action
TCC does not apply
TCC solenoid filter screen blocked
INSTALL a new TCC sol..


 Roof Front Frame. Removal and Installation
 Roof Panel - Vehicles With: Roof Opening Panel. Removal and Installation