Ford Fusion: Body Closures / Luggage Compartment Lid. Removal and Installation
Ford Fusion 2013–2020 Service Manual / Body and Paint / Body and Paint / Body Closures / Luggage Compartment Lid. Removal and Installation
Special Tool(s) / General Equipment
| Flat-Bladed Screwdriver |
Removal
NOTE: Removal steps in this procedure may contain installation details.
-
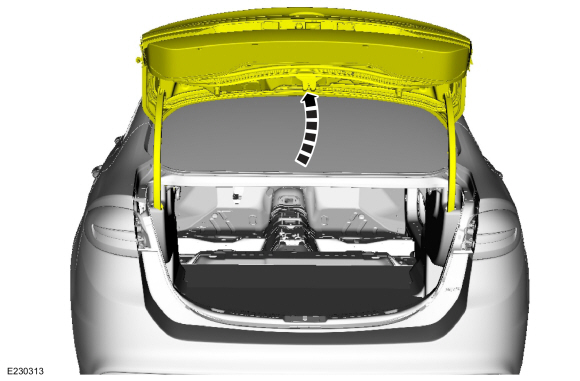
Open the luggage compartment lid.
 |
-
-
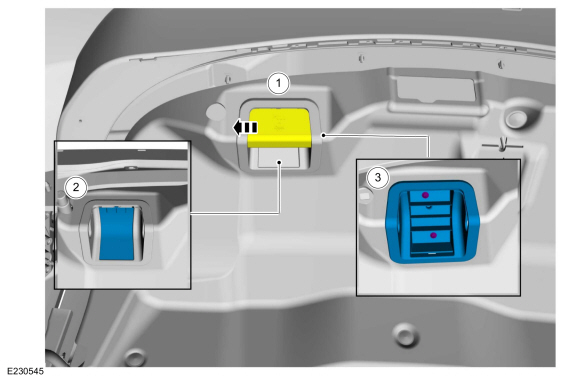
Position aside the luggage compartment lid pull handle cover.
-
Remove the trim cover.
-
Remove the screws and the luggage compartment pull handle.
-
Position aside the luggage compartment lid pull handle cover.
 |
-
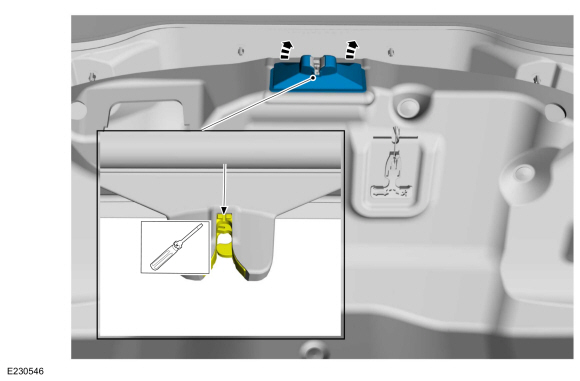
Insert a flat blade screwdriver in the latch housing
slot and slowly pry down to disengage the tabs on the latch and remove
the trim cover.
Use the General Equipment: Flat-Bladed Screwdriver
 |
-
-
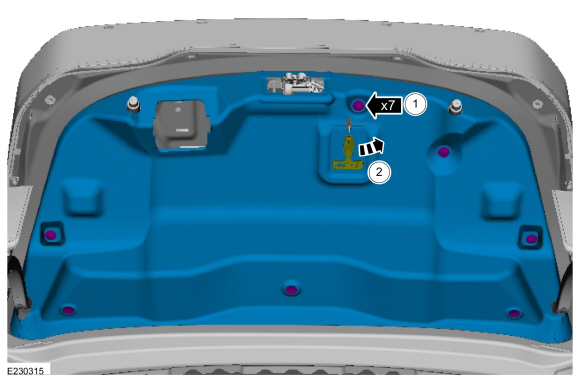
Remove the pin-type retainers.
-
Remove the trim panel, passing the emergency release handle through the trim panel opening.
-
Remove the pin-type retainers.
 |
-
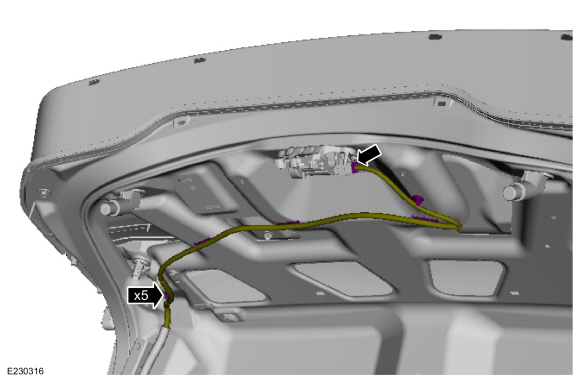
Disconnect the electrical connector, detach the wiring harness retainers and position the wiring harness aside.
 |
-
Index-mark the hinge location to aid in luggage compartment lid installation.
 |
-
Remove the bolts and the luggage compartment lid.
Torque: 89 lb.in (10 Nm)
 |
Installation
-
To install, reverse the removal procedure.
-
Check the alignment and correct if necessary.
Refer to: Luggage Compartment Lid Alignment (501-03 Body Closures, General Procedures).
 Rear Door. Removal and Installation
Special Tool(s) /
General Equipment
Door Lift
Removal
NOTE:
Removal steps in this procedure may contain installation details.
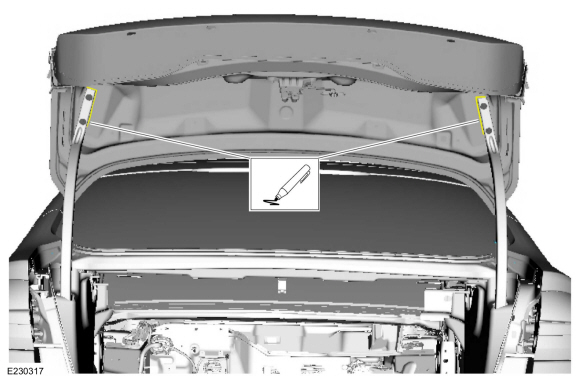
Remove the check arm bolt...
 Luggage Compartment Lid Hinge. Removal and Installation
Removal
NOTE:
Left hand (LH) side shown, right hand (RH) side similar.
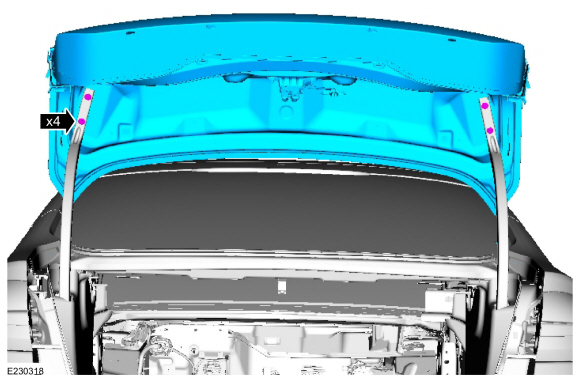
Remove the luggage compartment lid.
Refer to: Luggage Compartment Lid (501-03)
...
Other information:
Ford Fusion 2013–2020 Service Manual: Passenger Knee Airbag. Removal and Installation
Removal NOTE: Removal steps in this procedure may contain installation details. WARNING: Turn the ignition OFF and wait one minute to deplete the backup power supply. Ignition must remain OFF until repair is complete. Failure to follow this instruction may result in serious personal injury or death in the event of an accidental deployment...
Ford Fusion 2013–2020 Service Manual: Climate Control System - Vehicles With: Electronic Manual Temperature Control (EMTC). Diagnosis and Testing
Diagnostic Trouble Code (DTC) Charts DTC Chart: Powertrain Control Module (PCM) Diagnostics in this manual assume a certain skill level and knowledge of Ford-specific diagnostic practices. For information about these practices, REFER to: Diagnostic Methods (100-00 General Information, Description and Operation)...
Categories
- Manuals Home
- 2nd Generation Ford Fusion Owners Manual
- 2nd Generation Ford Fusion Service Manual
- Powertrain
- Main Control Valve Body. Removal and Installation
- Automatic Transmission Fluid Check - 1.5L EcoBoost™/2.0L EcoBoost™/2.5L. Automatic Transmission Fluid Check - 2.7L EcoBoost™
- New on site
- Most important about car
Understanding Your Tire Pressure Monitoring System

The tire pressure monitoring system measures pressure in your road tires and sends the tire pressure readings to your vehicle. You can view the tire pressure readings through the information display. The low tire pressure warning light will turn on if the tire pressure is significantly low. Once the light is illuminated, your tires are under-inflated and need to be inflated to the manufacturer’s recommended tire pressure. Even if the light turns on and a short time later turns off, your tire pressure still needs to be checked.
Copyright © 2026 www.fofusion2.com