Ford Fusion: Handles, Locks, Latches and Entry Systems / Door Lock Cylinder. Removal and Installation
Ford Fusion 2013–2020 Service Manual / Body and Paint / Body and Paint / Handles, Locks, Latches and Entry Systems / Door Lock Cylinder. Removal and Installation
Removal
NOTE: LH side shown, RH side similar.
NOTE: Removal steps in this procedure may contain installation details.
-
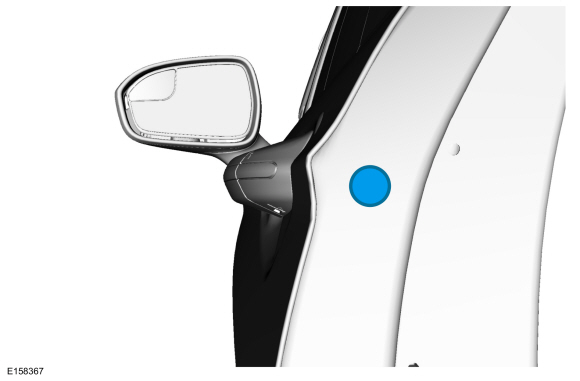
Remove the grommet.
 |
-
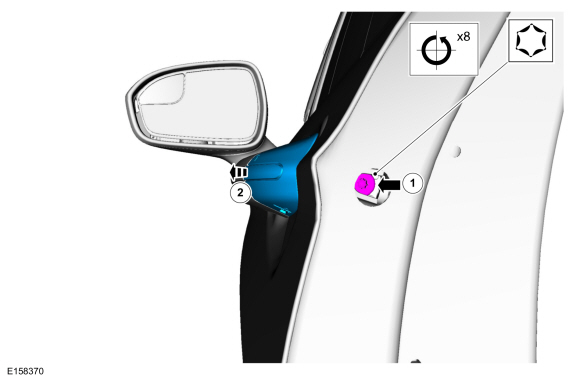
Remove the lock cylinder door handle cover.
-
Turn the release screw 8 turns. The handle will
release around 6 to 6.5 turns. You must continue to the full 8
revolutions for installation.
Torque: 9 lb.in (1 Nm)
-
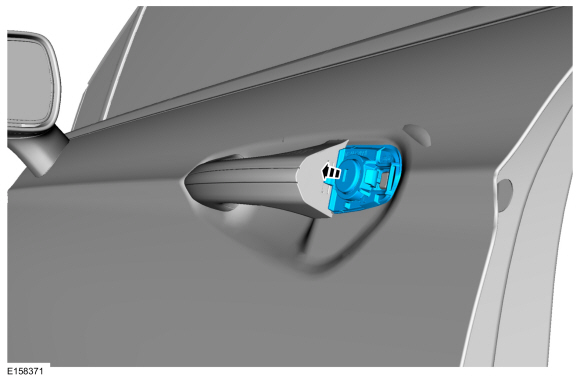
Remove the front door handle cover assembly from the front door.
-
Turn the release screw 8 turns. The handle will
release around 6 to 6.5 turns. You must continue to the full 8
revolutions for installation.
 |
-
Remove the front door lock cylinder.
 |
Installation
-
To install, reverse the removal procedure.
 Hood Latch Release Handle. Removal and Installation
Removal
Remove the hood latch release handle access cover.
NOTE:
Insert a 10mm 1/4 inch drive socket to release the clips...
 Interior Front Door Handle. Removal and Installation
Removal
NOTE:
LH side shown, RH side similar.
NOTE:
Removal steps in this procedure may contain installation details.
Remove the front door trim panel...
Other information:
Ford Fusion 2013–2020 Service Manual: Exhaust System. Diagnosis and Testing
Symptom Chart(s) Symptom Chart: Symptom Chart - Exhaust System Verify the customer concern. Inspect the components of the exhaust system for obvious signs of damage or other mechanical concerns using the following chart. Visual Inspection Chart - Mechanical Mechanical Exhaust pipe pinched or crushed Damaged muffler Broken or damaged..
Ford Fusion 2013–2020 Service Manual: Rear Door. Removal and Installation
Special Tool(s) / General Equipment Door Lift Removal NOTE: Removal steps in this procedure may contain installation details. Remove the check arm bolt. Torque: 18 lb.ft (25 Nm) Disconnect the rear door electrical connector. Remove the door hinge pivot bolts and the door. Use the General Equipment: D..
Categories
- Manuals Home
- 2nd Generation Ford Fusion Owners Manual
- 2nd Generation Ford Fusion Service Manual
- Under Hood Overview - 1.5L EcoBoost™, 2.0L EcoBoost™, 2.5L, 2.7L EcoBoost™
- Intake Manifold. Removal and Installation
- Starter Motor. Removal and Installation
- New on site
- Most important about car
Child Safety Locks
When these locks are set, the rear doors cannot be opened from the inside.
Copyright © 2026 www.fofusion2.com