Ford Fusion: Transmission Cooling - 6-Speed Automatic Transmission – 6F35 / Transmission Fluid Warmer. Removal and Installation
Special Tool(s) /
General Equipment
Materials
| Name |
Specification |
Motorcraft® MERCON® LV Automatic Transmission Fluid
XT-10-QLVC |
WSS-M2C938-A
MERCON® LV,
|
Removal
-
Remove the battery tray.
Refer to: Battery Tray (414-01 Battery, Mounting and Cables, Removal and Installation).
-
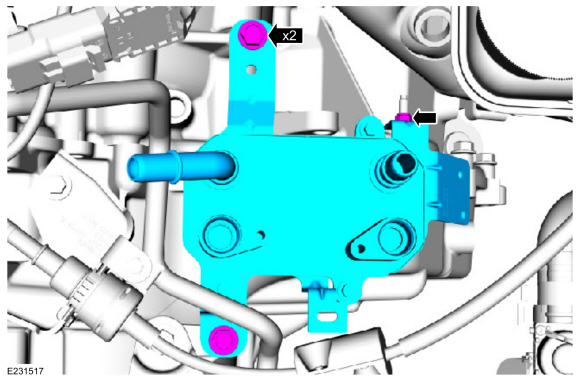
Remove the nut and disconnect the ground cable terminal
from the transmission-to-transmission fluid warmer tube stud bolt.
-
NOTE:
Be prepared to collect escaping fluid.
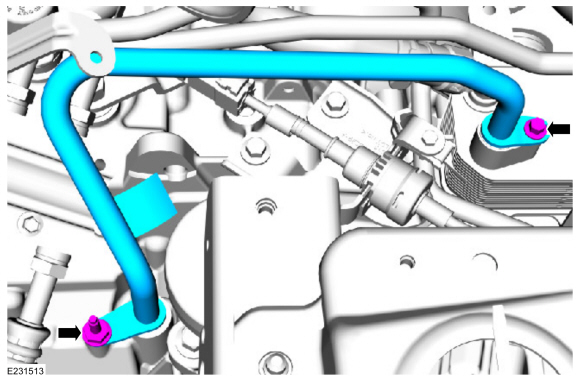
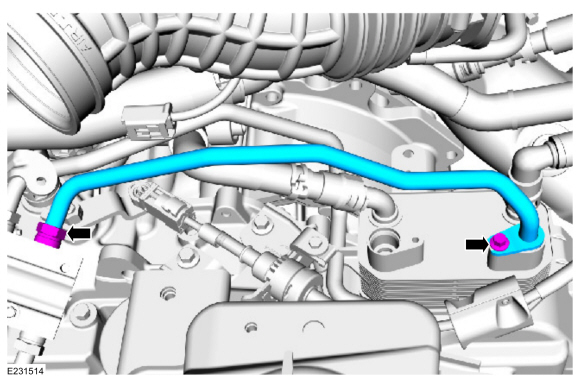
Remove the bolt, the studbolt and the transmission-to-transmission fluid warmer tube.
-
Inspect the transmission to be sure the transmission
fluid tube seal and backing ring were removed with the transmission
fluid tube and are not stuck in the transmission. If the transmission
fluid tube seal or backing ring are stuck in the transmission, remove
the seal and backing ring.
-
NOTE:
Be prepared to collect escaping fluid.
Completely loosen the fitting, remove the bolt and
remove the transmission fluid warmer-to-cooler bypass valve tube.
-
Inspect the transmission fluid warmer to be sure the
transmission fluid tube seals and backing rings were removed with the
transmission fluid tubes and are not stuck in the transmission fluid
warmer. If the transmission fluid tube seals or backing rings are stuck
in the transmission fluid warmer, remove the seals and backing rings.
-
NOTE:
Be prepared to collect escaping fluid.
Clamp the coolant hoses and disconnect the coolant hose
quick connect couplings from the transmission fluid warmer.
Use the General Equipment: Hose Clamp(s)
-
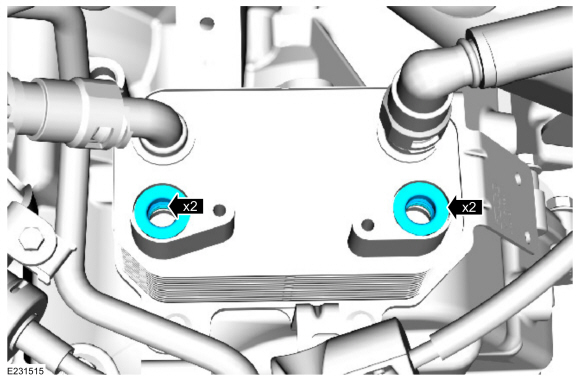
Remove the bolts, the nut and the transmission fluid warmer.
Installation
-
Install the transmission fluid warmer the nut and the bolts.
Torque:
18 lb.ft (25 Nm)
-
Connect the coolant hose quick connect couplings to the transmission fluid warmer and remove the clamps.
Use the General Equipment: Hose Clamp(s)
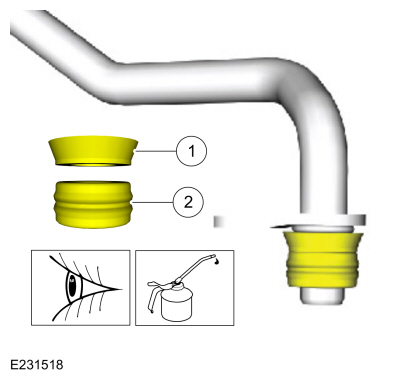
-
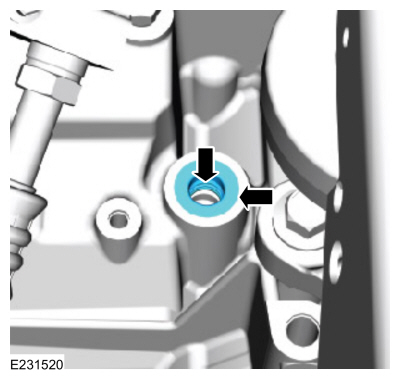
Inspect the transmission fluid warmer-to-cooler bypass
valve tube backing ring and seal for damage and install new a backing
ring or seal if necessary.
-
Backing ring (7J324)
-
Seal (7D285)
Material: Motorcraft® MERCON® LV Automatic Transmission Fluid
/ XT-10-QLVC
(WSS-M2C938-A)
(MERCON® LV, )
-
Install the transmission fluid warmer-to-cooler bypass valve tube, tighten the fitting and install the bolt.
-
Torque:
16 lb.ft (22 Nm)
-
Torque:
80 lb.in (9 Nm)
-
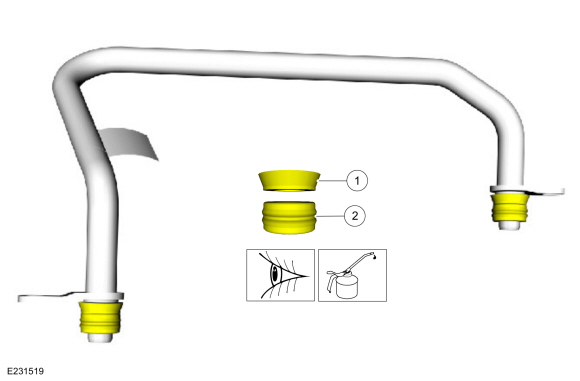
Inspect the transmission-to-transmission fluid warmer
tube backing rings and seals for damage and install new backing rings or
seals if necessary.
-
Backing ring (7J324)
-
Seal (7D285)
Material: Motorcraft® MERCON® LV Automatic Transmission Fluid
/ XT-10-QLVC
(WSS-M2C938-A)
(MERCON® LV, )
-
Install the transmission-to-transmission fluid warmer tube, the studbolt and the bolt.
Torque:
80 lb.in (9 Nm)
-
Connect the ground cable terminal from the
transmission-to-transmission fluid warmer tube stud bolt and install the
nut.
Torque:
80 lb.in (9 Nm)
-
Install the battery tray.
Refer to: Battery Tray (414-01 Battery, Mounting and Cables, Removal and Installation).
-
Check the transmission fluid level and adjust as necessary.
Refer to: Transmission Fluid Level Check (307-01A Automatic Transmission - 6-Speed Automatic Transmission – 6F35, General Procedures).
-
Check the engine coolant level and adjust as necessary.
Refer to: Engine Cooling System Draining, Vacuum Filling and Bleeding (303-03A Engine Cooling - 1.5L EcoBoost (118kW/160PS) – I4, General Procedures).
Refer to: Engine Cooling System Draining, Vacuum Filling and Bleeding (303-03B Engine Cooling - 2.0L EcoBoost (184kW/250PS) – MI4, General Procedures).
Refer to: Engine Cooling System Draining, Vacuum Filling and Bleeding (303-03C Engine Cooling - 2.5L Duratec (125kW/170PS), General Procedures).
Special Tool(s) /
General Equipment
307-569Disconnect Tool TOC Line (1/2)TKIT-2006U-F/FMTKIT-2006U-FLM/LMTKIT-2006U-ROW1TKIT-2006U-ROW2
Materials
Name
Specification
Motorcraft® MERCON® LV Automatic Transmission FluidXT-10-QLVC
WSS-M2C938-AMERCON® LV,
Removal
With the vehicle in N, position it on a hoist...
Other information:
Overview
The
Lane Keeping System (LKS) has 2 functions, lane keeping aid and lane
keeping alert. The Lane Keeping System (LKS) utilizes the camera located
in the IPMA to detect
and track the road lane markings. The lane keeping alert detects
unintentional drifting toward the outside of the lane and alerts the
driver through steering wheel vibrations and a visual alert in the IPC
message c..
WARNING: Do not adjust the driver
seat or seatback when your vehicle is
moving.
WARNING: Do not place cargo or
any objects behind the seatback before
returning it to the original position.
Note: Driver seat shown, passenger seat
similar.
6-way power seat
10-way power seat
Power Lumbar (If Equipped)
..


 Transmission Fluid Cooler Tubes - 1.5L EcoBoost (110kW/150PS) – I4. Removal and Installation