Ford Fusion: Transmission Cooling - 6-Speed Automatic Transmission – 6F35 / Transmission Fluid Cooler Tubes - 1.5L EcoBoost (110kW/150PS) – I4. Removal and Installation
Special Tool(s) /
General Equipment
 |
307-569
Disconnect Tool TOC Line (1/2)
TKIT-2006U-F/FM
TKIT-2006U-FLM/LM
TKIT-2006U-ROW1
TKIT-2006U-ROW2 |
Materials
| Name |
Specification |
Motorcraft® MERCON® LV Automatic Transmission Fluid
XT-10-QLVC |
WSS-M2C938-A
MERCON® LV,
|
Removal
-
With the vehicle in N, position it on a hoist.
Refer to: Jacking and Lifting - Overview (100-02 Jacking and Lifting, Description and Operation).
-
Remove the battery tray.
Refer to: Battery Tray (414-01 Battery, Mounting and Cables, Removal and Installation).
-
Remove the nut and disconnect the ground cable terminal
from the transmission-to-transmission fluid warmer tube stud bolt.
-
NOTE:
Be prepared to collect escaping fluid.
Remove the bolt, the studbolt and the transmission-to-transmission fluid warmer tube.
-
Inspect the transmission to be sure the transmission
fluid tube seal and backing ring were removed with the transmission
fluid tube and are not stuck in the transmission. If the transmission
fluid tube seal or backing ring are stuck in the transmission, remove
the seal and backing ring.
-
Inspect the transmission fluid warmer to be sure the
transmission fluid tube seal and backing ring were removed with the
transmission fluid tube and are not stuck in the transmission fluid
warmer. If the transmission fluid tube seal or backing ring are stuck in
the transmission fluid warmer, remove the seal and backing ring.
-
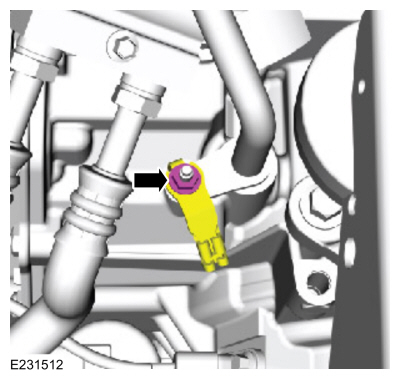
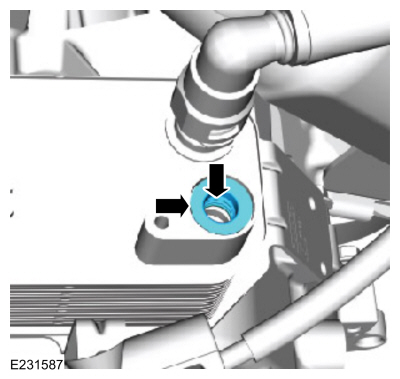
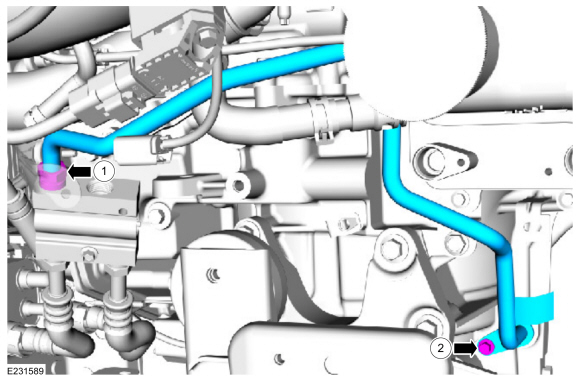
NOTE:
Be prepared to collect escaping fluid.
Completely loosen the fitting, remove the bolt and
remove the transmission fluid warmer-to-cooler bypass valve tube.
-
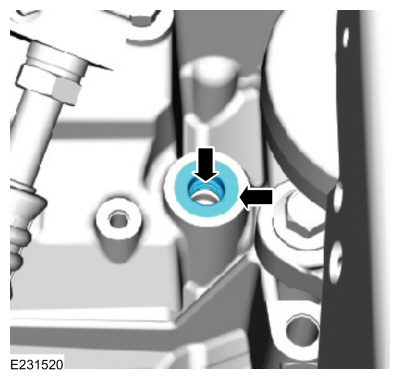
Inspect the transmission fluid warmer to be sure the
transmission fluid tube seal and backing ring were removed with the
transmission fluid tube and are not stuck in the transmission fluid
warmer. If the transmission fluid tube seal or backing ring are stuck in
the transmission fluid warmer, remove the seal and backing ring.
-
Remove the nut, the bolt and the battery tray support bracket.
-
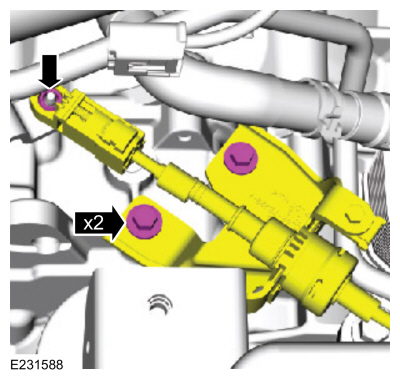
Disconnect the selector lever cable from the
transmission manual lever, remove the bolts and position the selector
lever cable aside.
-
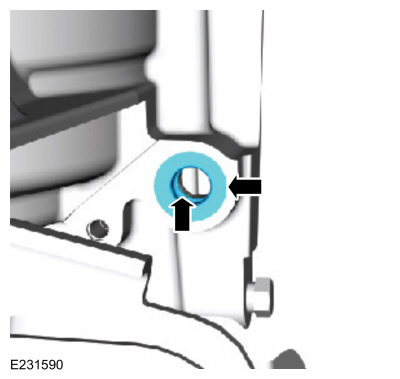
Remove the cooler bypass valve-to-transmission tube.
-
Completely loosen the fitting.
-
Remove the bolt and the tube.
-
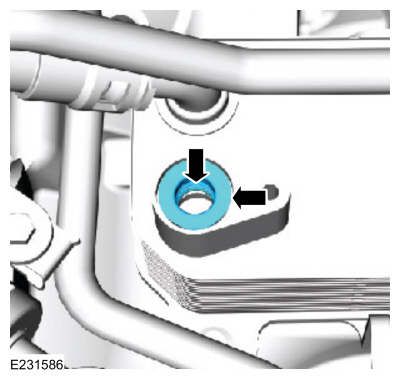
Inspect the transmission to be sure the transmission
fluid tube seal and backing ring were removed with the transmission
fluid tube and are not stuck in the transmission. If the transmission
fluid tube seal or backing ring are stuck in the transmission, remove
the seal and backing ring.
-
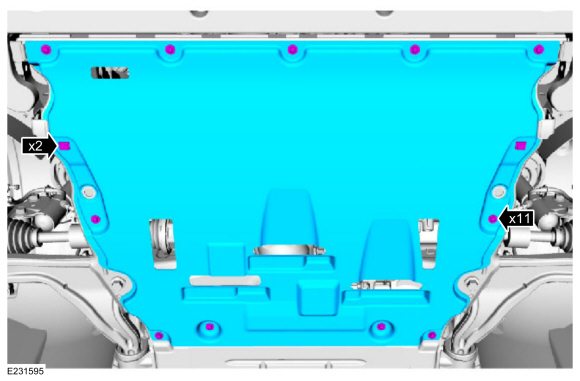
Remove the retainers and the engine undershield.
-
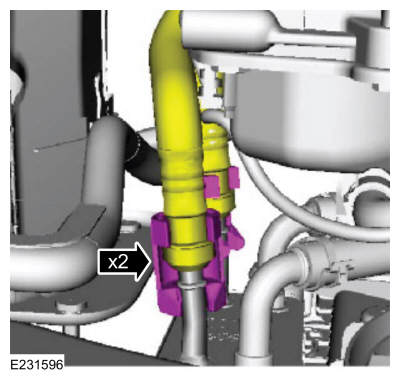
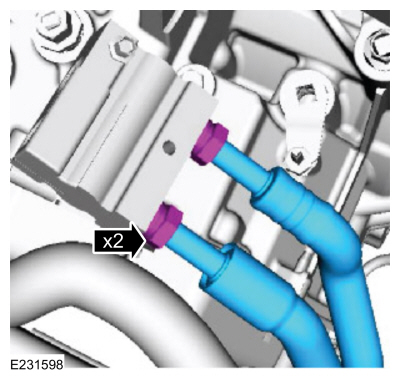
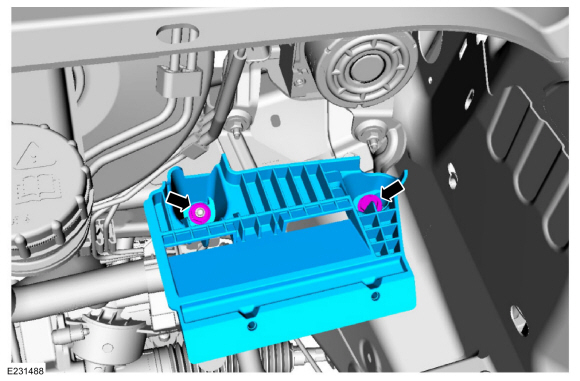
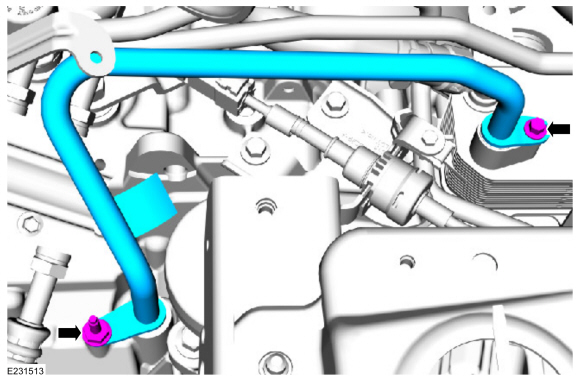
Remove the transmission fluid cooler tube secondary latches.
-
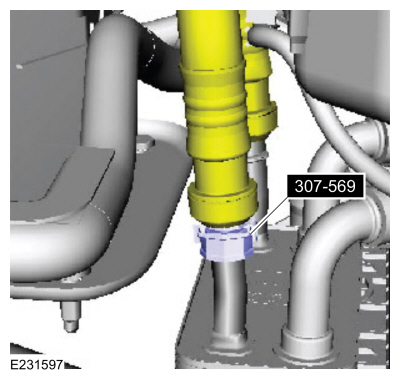
Using the special tool, disconnect the transmission fluid cooler tubes from the transmission fluid cooler.
Use Special Service Tool: 307-569
Disconnect Tool TOC Line (1/2).
-
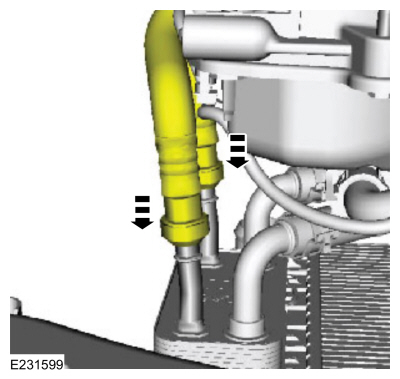
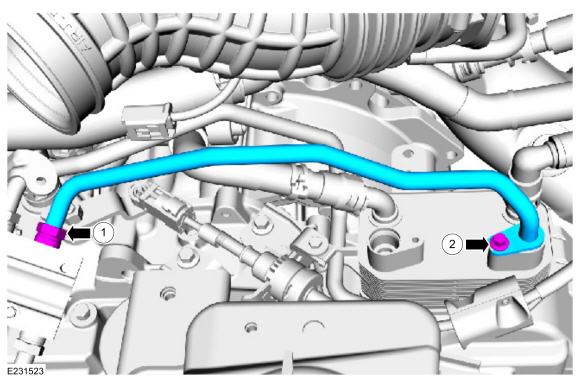
Completely loosen the fittings and remove the bypass valve-to-transmission fluid cooler tubes.
Installation
-
Install the bypass valve-to-transmission fluid cooler tubes and tighten the fittings.
Torque:
22 lb.ft (30 Nm)
-
Connect the transmission fluid cooler tubes to the transmission fluid cooler.
-
Install the transmission fluid cooler tube secondary latches.
-
Install the engine undershield and the retainers.
-
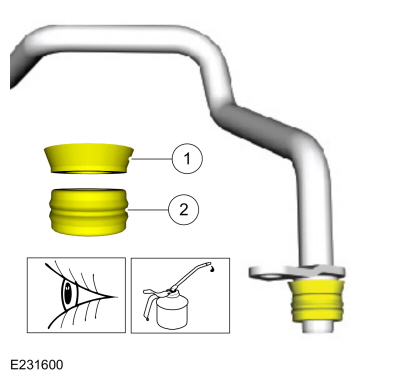
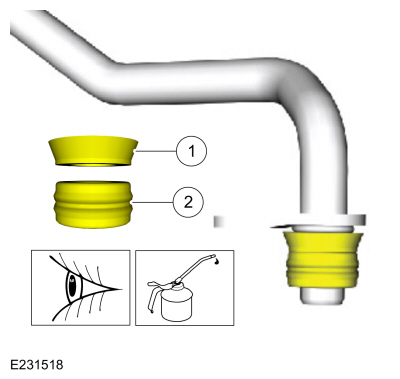
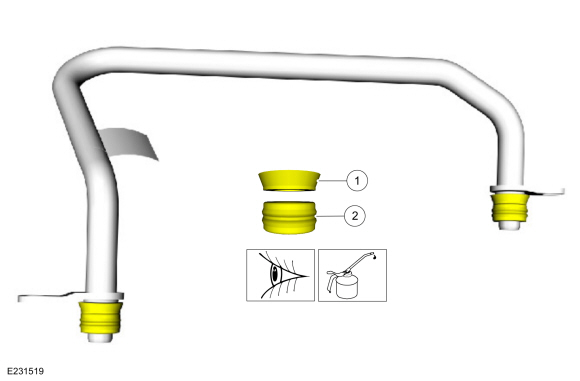
Inspect the transmission fluid cooler bypass
valve-to-transmission tube backing ring and seal for damage and install
new a backing ring or seal if necessary.
-
Backing ring (7J324)
-
Seal (7D285)
Material: Motorcraft® MERCON® LV Automatic Transmission Fluid
/ XT-10-QLVC
(WSS-M2C938-A)
(MERCON® LV, )
-
Install the cooler bypass valve-to-transmission tube.
-
Tighten the fitting.
Torque:
16 lb.ft (22 Nm)
-
Install the bolt.
Torque:
80 lb.in (9 Nm)
-
Position the selector lever cable, install the bolts and connect the cable to the transmission manual lever.
Torque:
18 lb.ft (25 Nm)
-
Install the battery tray support bracket, the nut and the bolt.
Torque:
89 lb.in (10 Nm)
-
Inspect the transmission fluid warmer-to-cooler bypass
valve tube backing ring and seal for damage and install new a backing
ring or seal if necessary.
-
Backing ring (7J324)
-
Seal (7D285)
Material: Motorcraft® MERCON® LV Automatic Transmission Fluid
/ XT-10-QLVC
(WSS-M2C938-A)
(MERCON® LV, )
-
Install the transmission fluid warmer-to-cooler bypass valve tube, tighten the fitting and install the bolt.
-
Torque:
16 lb.ft (22 Nm)
-
Torque:
80 lb.in (9 Nm)
-
Inspect the transmission-to-transmission fluid warmer
tube backing rings and seals for damage and install new backing rings or
seals if necessary.
-
Backing ring (7J324)
-
Seal (7D285)
Material: Motorcraft® MERCON® LV Automatic Transmission Fluid
/ XT-10-QLVC
(WSS-M2C938-A)
(MERCON® LV, )
-
Install the transmission-to-transmission fluid warmer tube, the studbolt and the bolt.
Torque:
80 lb.in (9 Nm)
-
Connect the ground cable terminal from the
transmission-to-transmission fluid warmer tube stud bolt and install the
nut.
Torque:
80 lb.in (9 Nm)
-
NOTE:
Do not install the air cleaner at this time.
Install the battery tray.
Refer to: Battery Tray (414-01 Battery, Mounting and Cables, Removal and Installation).
-
Adjust the selector lever cable.
Refer to: Selector Lever Cable Adjustment - 1.5L EcoBoost (118kW/160PS) – I4 (307-05A Automatic Transmission External Controls - 6-Speed Automatic Transmission – 6F35, General Procedures).
-
Check the transmission fluid level and adjust as necessary.
Refer to: Transmission Fluid Level Check (307-01A Automatic Transmission - 6-Speed Automatic Transmission – 6F35, General Procedures).
Removal
With the vehicle in N, position it on a hoist.
Refer to: Jacking and Lifting - Overview (100-02 Jacking and Lifting, Description and Operation)...
Special Tool(s) /
General Equipment
Hose Clamp(s)
Materials
Name
Specification
Motorcraft® MERCON® LV Automatic Transmission FluidXT-10-QLVC
WSS-M2C938-AMERCON® LV,
Removal
Remove the battery tray...
Other information:
Special Tool(s) /
General Equipment
205-D070
(D93P-1175-B)
Remover, Front Wheel Hub
Removal
NOTICE:
Suspension fasteners are critical parts that affect the
performance of vital components and systems. Failure of these fasteners
may result in major service expense...
WARNING: Failure to follow engine
block heater instructions could result in
property damage or serious personal
injury.
WARNING: Do not use your heater
with ungrounded electrical systems or
two-pronged adapters. There is a risk of
electrical shock...


 Transmission Fluid Cooler - 1.5L EcoBoost (118kW/160PS) – I4/2.5L Duratec (110kW/150PS). Removal and Installation
 Transmission Fluid Warmer. Removal and Installation