Ford Fusion: Bumpers / Rear Bumper Cover. Removal and Installation
Special Tool(s) /
General Equipment
Removal
NOTE:
Removal steps in this procedure may contain installation details.
-
Remove the rear wheels and tires.
Refer to: Wheel and Tire (204-04A Wheels and Tires, Removal and Installation).
-
On both sides.
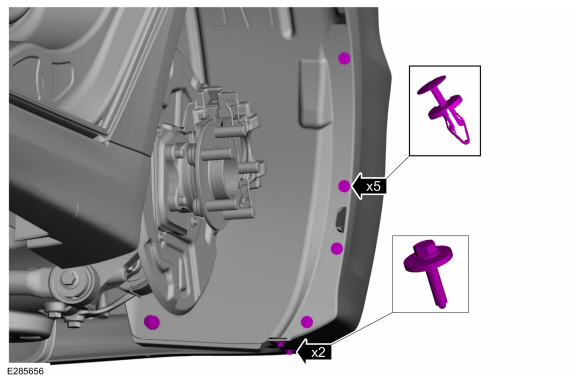
Remove the inner wheel liner to rear bumper cover pin-type retainers and the bolts.
Torque:
13 lb.in (1.5 Nm)
-
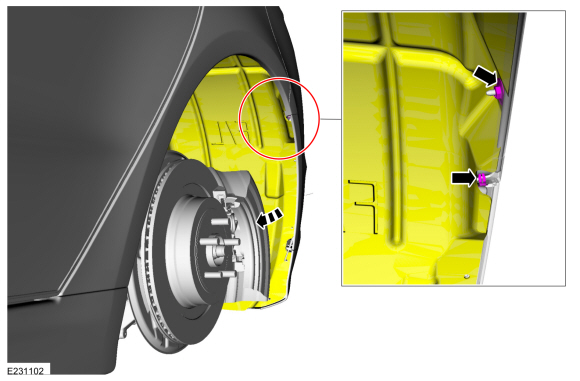
On both sides.
Remove the nut and the spring clip and then position the wheel well liner aside.
Torque:
13 lb.in (1.5 Nm)
-
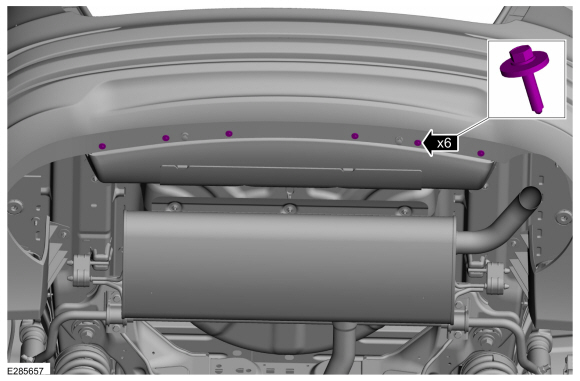
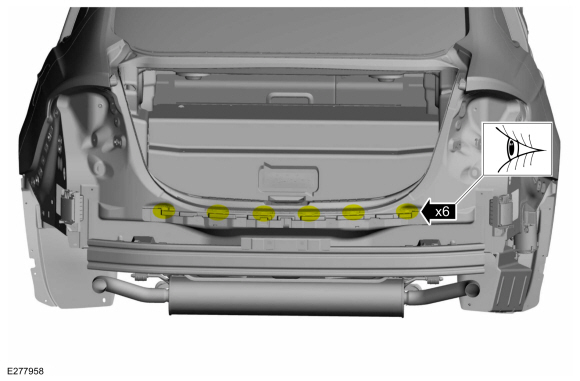
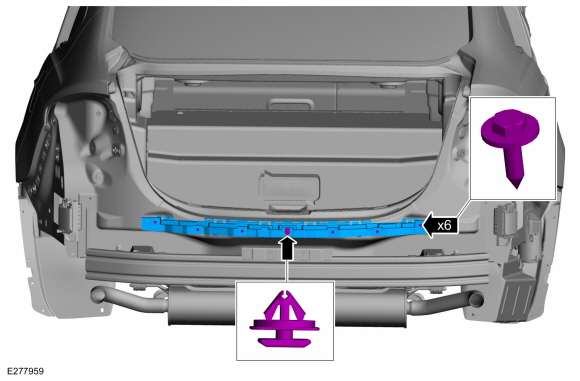
Remove the lower rear bumper cover to the body screws.
Torque:
13 lb.in (1.5 Nm)
-
Remove the rear lamp assemblies.
Refer to: Rear Lamp Assembly - 4-Door (417-01 Exterior Lighting, Removal and Installation).
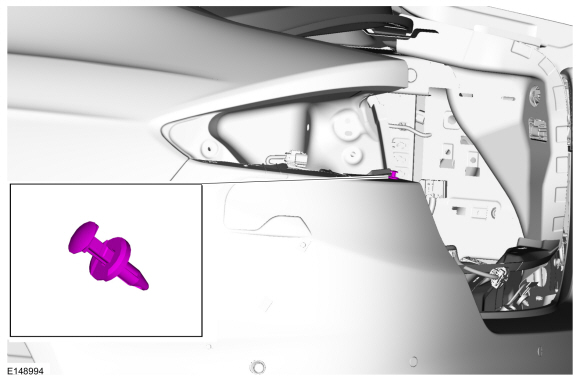
-
On both sides.
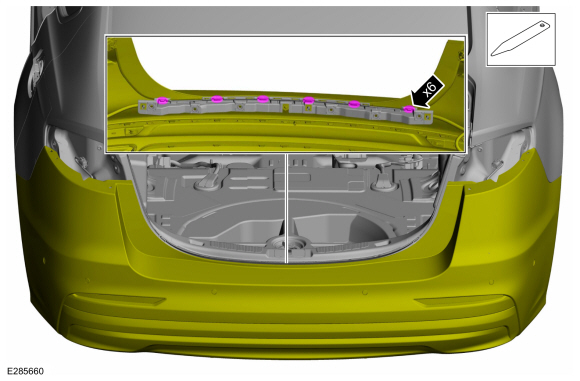
Remove the pin-type retainer.
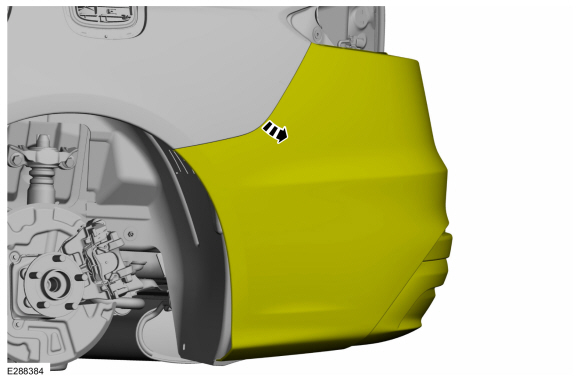
-
On both sides.
Release the rear bumper cover from the rear bumper cover brackets and position the rear bumper cover aside.
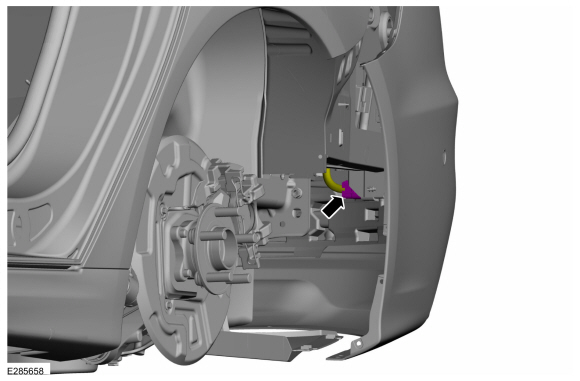
-
Disconnect the rear bumper harness electrical connector.
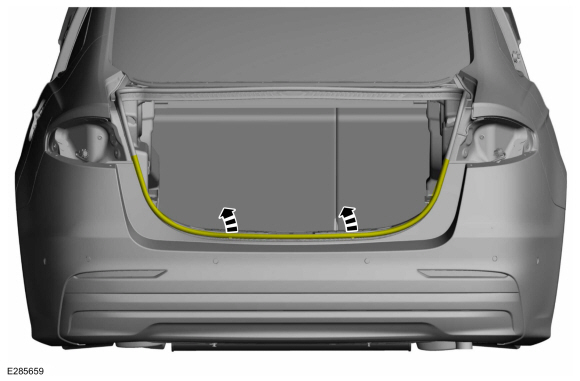
-
Position the weatherstrip aside.
-
Using a non-marring tool, release the retaining tabs and pull outward to disengage.
Use the General Equipment: Interior Trim Remover
-
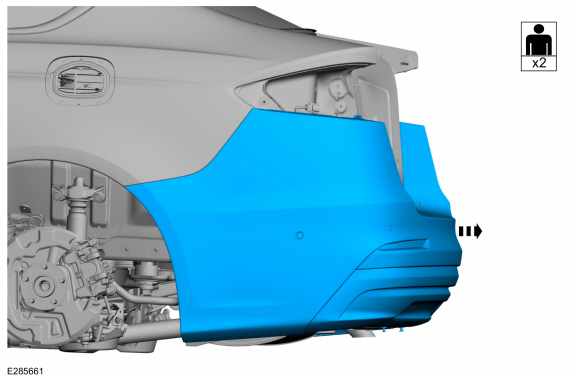
With the help of an assistant.
Remove the rear bumper cover.
-
On both sides.
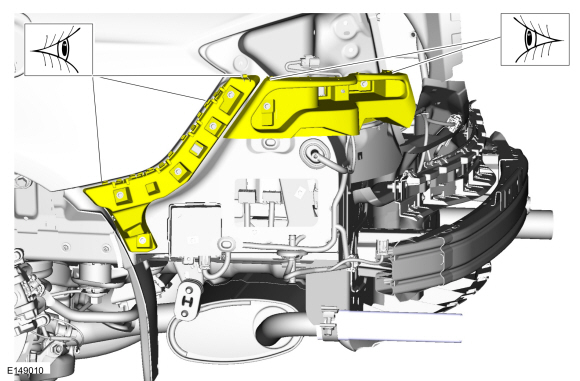
Inspect the bumper reinforcements for damage to the bumper cover tabs.
-
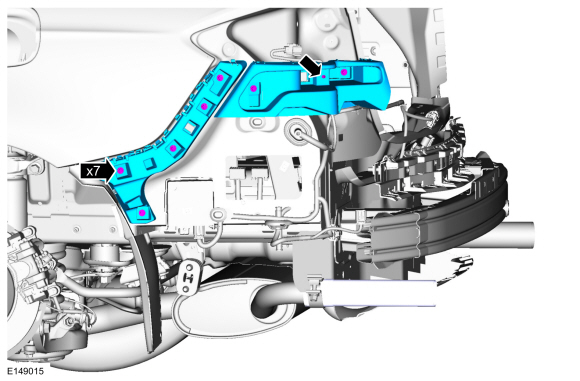
On both sides, if required.
Remove the screws, release the tab and the remove the rear bumper cover side brackets.
Torque:
13 lb.in (1.5 Nm)
-
Inspect the bumper reinforcements for damage to the bumper cover gripping surfaces.
-
If required.
Remove the screws, the trim pin and the damaged rear bracket.
Torque:
13 lb.in (1.5 Nm)
Installation
-
To install, reverse the removal procedure.
Removal
NOTE:
Removal steps in this procedure may contain installation details.
Remove the rear bumper cover.
Refer to: Rear Bumper Cover (501-19 Bumpers, Removal and Installation)...
Special Tool(s) /
General Equipment
Hot Air Gun
DISASSEMBLY
NOTE:
Removal steps in this procedure may contain installation details.
Remove the front bumper cover...
Other information:
Date: October 20, 2025
Even several years after production officially ended, the Ford Fusion continues to demonstrate remarkable staying power in the used-car market. Once one of Ford’s best-selling sedans in North America, the Fusion has maintained a loyal customer base and steady resale value thanks to its reputation for comfort, safety, and durability...
System Operation
System Diagram
Item
Description
1
ACM
2
HUD module
3
CCM
4
IPC
5
BCM
6
GWM
7
ABS module
8
IPMA
Network Message Chart
Network Input Messages - ACM
Broadcast Message
Originating Module
Message Purpose
Instrument ..
 Rear Bumper. Removal and Installation
 Front Bumper Cover. Disassembly and Assembly