Ford Fusion Manuals

Ford Fusion: Interior Lighting / Interior Lighting. Diagnosis and Testing

Ford Fusion 2013–2020 Service Manual / Electrical / Lighting / Interior Lighting / Interior Lighting. Diagnosis and Testing

DTC Chart: BCM

Diagnostics in this manual assume a certain skill level and knowledge of Ford-specific diagnostic practices.
REFER to: Diagnostic Methods (100-00 General Information, Description and Operation).


  BCM DTC Chart


DTC Description Action
B1175:01 Driver Door Ajar Switch: General Electrical Failure   GO to Pinpoint Test C
B1176:01 Passenger Door Ajar Switch: General Electrical Failure   GO to Pinpoint Test C
B11C0:01 Driver Side Rear Door Ajar Switch: General Electrical Failure   GO to Pinpoint Test C
B11C1:01 Passenger Side Rear Door Ajar Switch: General Electrical Failure   GO to Pinpoint Test C
B1313:11 Interior Lighting Output: Circuit Short To Ground
  • If the interior courtesy lamps are always on, GO to Pinpoint Test D
  • If the interior courtesy lamps are inoperative, GO to Pinpoint Test B
B1313:15 Interior Lighting Output: Circuit Short To Battery or Open
  • If the interior courtesy lamps are always on, GO to Pinpoint Test D
  • If the interior courtesy lamps are inoperative, GO to Pinpoint Test B
B145C:11 Ambient Lighting Power Supply Output: Circuit Short To Ground   GO to Pinpoint Test H
B145C:15 Ambient Lighting Power Supply Output: Circuit Short To Battery or Open   GO to Pinpoint Test H
B1465:00 Ambient Lighting Bus 1: No Sub Type Information   GO to Pinpoint Test J
B1467:00 Ambient Lighting Bus 3: No Sub Type Information   GO to Pinpoint Test J
U1000:00 Solid State Driver Protection Activated -Driver Disabled: No Sub Type Information The module has temporarily disabled an output because an excessive current draw exists (such as a short to ground). The BCM cannot enable the output until the cause of the short is corrected. ADDRESS all other Diagnostic Trouble Codes (DTCs) first. After the cause of the concern is corrected, CLEAR the Diagnostic Trouble Codes (DTCs). REPEAT the self-test.
U3000:49 Control Module: Internal Electronic Failure The module has permanently disabled an output because an excessive current draw fault (such as a short to ground) has exceeded the limits that the BCM can withstand. The cause of the excessive current draw MUST be corrected before a new BCM is installed. ADDRESS all other Diagnostic Trouble Codes (DTCs) first. After the cause of the concern is corrected,
Ford Fusion. Interior Lighting. Diagnosis and Testing   Click here to access Guided Routine (BCM).Ford Fusion. Interior Lighting. Diagnosis and Testing Internet Explorer version 11 or greater is required to perform this Pinpoint Test.
For additional information on BCM Field Effect Transistor (FET) protection,
REFER to: Module Controlled Functions - System Operation and Component Description (419-10 Multifunction Electronic Modules, Description and Operation).

DTC Chart: DDM

Diagnostics in this manual assume a certain skill level and knowledge of Ford-specific diagnostic practices.
REFER to: Diagnostic Methods (100-00 General Information, Description and Operation).


  DDM DTC Chart


DTC Description Action
B1165:11 Left Front Puddle Lamp Output: Circuit Short To Ground   GO to Pinpoint Test I
B1165:15 Left Front Puddle Lamp Output: Circuit Short To Battery Or Open   GO to Pinpoint Test I

DTC Chart: PDM

Diagnostics in this manual assume a certain skill level and knowledge of Ford-specific diagnostic practices.
REFER to: Diagnostic Methods (100-00 General Information, Description and Operation).


  PDM DTC Chart


DTC Description Action
B1166:11 Right Front Puddle Lamp Output: Circuit Short To Ground   GO to Pinpoint Test I
B1166:15 Right Front Puddle Lamp Output: Circuit Short To Battery Or Open   GO to Pinpoint Test I

Symptom Chart(s)

Symptom Chart: Interior Lighting

Diagnostics in this manual assume a certain skill level and knowledge of Ford-specific diagnostic practices.
REFER to: Diagnostic Methods (100-00 General Information, Description and Operation).


  Symptom Chart


Condition Possible Sources Actions
A module does not respond to the scan tool
  • Fuse
  • Wiring, terminals or connectors
  • Module
 
REFER to: Communications Network (418-00 Module Communications Network, Diagnosis and Testing).
The courtesy lamps do not illuminate with a door open Refer to the Pinpoint Test   GO to Pinpoint Test A
The overhead interior courtesy lamps do not illuminate from the courtesy lamp switch Refer to the Pinpoint Test   GO to Pinpoint Test B
One or more interior courtesy lamps are inoperative Refer to the Pinpoint Test   GO to Pinpoint Test B
A puddle lamp is inoperative or always on Refer to the Pinpoint Test   GO to Pinpoint Test I
All the courtesy lamps stay on continuously Refer to the Pinpoint Test   GO to Pinpoint Test C
The interior courtesy lamps stay on continuously Refer to the Pinpoint Test   GO to Pinpoint Test D
The luggage compartment lamp is inoperative or on continuously Refer to the Pinpoint Test   GO to Pinpoint Test E
One or more demand lamps are inoperative Refer to the Pinpoint Test   GO to Pinpoint Test F
The battery saver does not deactivate after time-out Refer to the Pinpoint Test   GO to Pinpoint Test G
The ambient lighting is inoperative Refer to the Pinpoint Test   GO to Pinpoint Test H
One or more of the ambient lighting LEDs are inoperative or does not change color Refer to the Pinpoint Test   GO to Pinpoint Test J

Pinpoint Tests

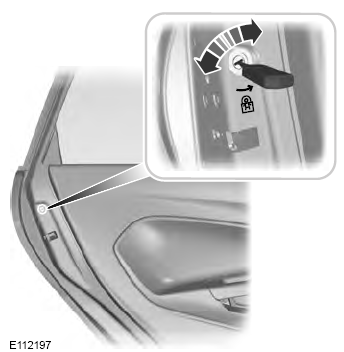
The Courtesy Lamps Do Not Illuminate With a Door Open


Refer to Wiring Diagrams Cell 89 for schematic and connector information.


Refer to Wiring Diagrams Cell 117 for schematic and connector information.

Normal Operation and Fault Conditions


REFER to: Interior Lighting - Overview (417-02 Interior Lighting, Description and Operation).


REFER to: Interior Lighting - System Operation and Component Description (417-02 Interior Lighting, Description and Operation).

Possible Sources

  • Wiring, terminals or connectors
  • Door latch
  • BCM

PINPOINT TEST A : THE COURTESY LAMPS DO NOT ILLUMINATE WITH A DOOR OPEN
A1 CHECK THE OPERATION OF THE COURTESY LAMP FUNCTION FROM THE FRONT/DRIVER INTERIOR LAMP
  • Ignition OFF.
  • Use the courtesy lamp switch on the front interior lamp to activate the overhead courtesy lamps.

Do the overhead courtesy lamps illuminate?
Yes GO to A2
No GO to Pinpoint Test B

A2 CHECK THE DOOR AJAR SWITCH OPERATION
  • Deactivate the overhead courtesy lamps from the front interior lamp.
  • Disconnect Suspect door latch.

Do the courtesy lamps illuminate?
Yes For a front door, INSTALL a new front door latch.
REFER to: Front Door Latch (501-14 Handles, Locks, Latches and Entry Systems, Removal and Installation). For a rear door, INSTALL a new rear door latch.
REFER to: Rear Door Latch (501-14 Handles, Locks, Latches and Entry Systems, Removal and Installation).
No GO to A3

A3 CHECK THE DOOR AJAR SWITCH INPUT CIRCUIT FOR A SHORT TO GROUND
  • Disconnect BCM C2280D .
  • Measure:
    Click to display connectors

      LH Front Door Ajar Switch


    Positive Lead Measurement / Action Negative Lead
      C525-3 Ford Fusion. Interior Lighting. Diagnosis and Testing   Ground

    Click to display connectors

      RH Front Door Ajar Switch


    Positive Lead Measurement / Action Negative Lead
      C609-6 Ford Fusion. Interior Lighting. Diagnosis and Testing   Ground

    Click to display connectors

      LH Rear Door Ajar Switch


    Positive Lead Measurement / Action Negative Lead
      C705-3 Ford Fusion. Interior Lighting. Diagnosis and Testing   Ground

    Click to display connectors

      RH Rear Door Ajar Switch


    Positive Lead Measurement / Action Negative Lead
      C805-6 Ford Fusion. Interior Lighting. Diagnosis and Testing   Ground

Is the resistance greater than 10,000 ohms?
Yes GO to A4
No REPAIR the circuit.

A4 CHECK FOR CORRECT BCM (BODY CONTROL MODULE) OPERATION
  • Disconnect and inspect all BCM connectors.
  • Repair:
    • corrosion (install new connector or terminals – clean module pins)
    • damaged or bent pins – install new terminals/pins
    • pushed-out pins – install new pins as necessary
  • Reconnect the BCM connectors. Make sure they seat and latch correctly.
  • Operate the system and determine if the concern is still present.

Is the concern still present?
Yes CHECK OASIS for any applicable service articles: TSB, GSB, SSM or FSA. If a service article exists for this concern, DISCONTINUE this test and FOLLOW the service article instructions. If no service articles address this concern,
Ford Fusion. Interior Lighting. Diagnosis and Testing   Click here to access Guided Routine (BCM).Ford Fusion. Interior Lighting. Diagnosis and Testing Internet Explorer version 11 or greater is required to perform this Pinpoint Test.
No The system is operating correctly at this time. The concern may have been caused by module connections. ADDRESS the root cause of any connector or pin issues. CLEAR the Diagnostic Trouble Codes (DTCs).


One Or More Interior Courtesy Lamps Are Inoperative


Refer to Wiring Diagrams Cell 89 for schematic and connector information.

Normal Operation and Fault Conditions


REFER to: Interior Lighting - Overview (417-02 Interior Lighting, Description and Operation).


REFER to: Interior Lighting - System Operation and Component Description (417-02 Interior Lighting, Description and Operation).


  DTC Fault Trigger Conditions


DTC Description Fault Trigger Conditions
B1313:11 Interior Lighting Output: Circuit Short To Ground A continuous memory and on-demand DTC that sets when the BCM detects an open from the courtesy lighting voltage output circuit.
B1313:15 Interior Lighting Output: Circuit Short To Battery or Open A continuous memory and on-demand DTC that sets when the BCM detects an open or short to battery voltage from the courtesy lighting voltage output circuit.
U1000:00 Solid State Driver Protection Activated -Driver Disabled: No Sub Type Information This DTC sets when the BCM has temporarily shut down the output driver. The module has temporarily disabled an output because an excessive current draw exists (such as a short to ground). The BCM cannot enable the output until the cause of the short is corrected, the Diagnostic Trouble Codes (DTCs) have been cleared and a successful self-test is run.
U3000:49 Control Module: Internal Electronic Failure This DTC sets when the BCM has permanently shut down the output driver. The module has permanently disabled an output because an excessive current draw fault (such as a short to ground) has exceeded the limits that the BCM can withstand. CORRECT the cause of the excessive current draw before installing a new BCM.

Possible Sources

  • Wiring, terminals or connectors
  • Interior lamp
  • BCM

PINPOINT TEST B : ONE OR MORE INTERIOR COURTESY LAMPS ARE INOPERATIVE
B1 CHECK THE FRONT AND REAR INTERIOR LAMPS FROM THE ON-DEMAND MAP LAMP LENSES/SWITCHES
  • Ignition ON.
  • Press the front interior lamp LH and RH lenses/switches.
  • Press the rear interior lamp switch.

Do the front and rear interior lamps illuminate from the lamp switches?
Yes GO to B2
No GO to Pinpoint Test F

B2 CHECK THE OPERATION OF ALL THE INTERIOR COURTESY LAMPS
  • Open a door and observe the interior courtesy lamps.

Are both the interior courtesy lamps inoperative?
Yes GO to B3
No If only the front interior lamp is inoperative, INSTALL a new overhead console.
REFER to: Overhead Console (501-12 Instrument Panel and Console, Removal and Installation). If only the rear interior lamp is inoperative, GO to B6

B3 CHECK FOR VOLTAGE TO THE FRONT COURTESY LAMP
  • Close the door.
  • Ignition OFF.
  • Disconnect Front Interior Lamp C930 .
  • Ignition ON.
  • Open a door.
  • Measure:
    Click to display connectors
    Positive Lead Measurement / Action Negative Lead
      C930-11 Ford Fusion. Interior Lighting. Diagnosis and Testing   Ground

Is the voltage greater than 11 volts?
Yes INSTALL a new overhead console.
REFER to: Overhead Console (501-12 Instrument Panel and Console, Removal and Installation).
No GO to B4

B4 BYPASS THE BCM (BODY CONTROL MODULE) COURTESY LAMP OUTPUT

NOTE: If the jumper wire fails, refer to the Wiring Diagrams manual to identify the possible causes of the circuit short. After the repair: If BCM DTC U1000:00 is present, clear the Diagnostic Trouble Codes (DTCs) and repeat the self-test (required to enable the courtesy lamp output driver if BCM DTC U1000:00 is present). Test the system for normal operation. If DTC U3000:49 is present, install a new BCM.

  • Ignition OFF.
  • Connect Front Interior Lamp C931 .
  • Disconnect BCM C2280F .
  • Connect:
    Click to display connectors
    Positive Lead Measurement / Action Negative Lead
      C2280F-13 Ford Fusion. Interior Lighting. Diagnosis and Testing Battery Positive
  • Ignition ON.
  • Open any door.

Do the courtesy lamps illuminate?
Yes REMOVE the fused jumper wire. GO to B9
No REMOVE the fused jumper wire. GO to B5

B5 CHECK THE BCM (BODY CONTROL MODULE) COURTESY LAMP OUTPUT CIRCUIT FOR AN OPEN
  • Disconnect Front Interior Lamp C930 .
  • Measure:
    Click to display connectors
    Positive Lead Measurement / Action Negative Lead
      C930-11 Ford Fusion. Interior Lighting. Diagnosis and Testing   C2280F-13

Is the resistance less than 3 ohms?
Yes REPAIR the circuit for a short to ground.
No REPAIR the circuit for an open.

B6 CHECK THE REAR LAMP CONTROL CIRCUIT FOR A SHORT TO VOLTAGE
  • Ignition OFF.
  • Disconnect Front Interior Lamp C930 .
  • Disconnect Rear Interior Lamp C901 .
  • Ignition ON.
  • Measure:
    Click to display connectors
    Positive Lead Measurement / Action Negative Lead
      C930-5 Ford Fusion. Interior Lighting. Diagnosis and Testing   Ground

Is any voltage present?
Yes REPAIR the circuit.
No GO to B7

B7 CHECK THE REAR LAMP CONTROL CIRCUIT FOR A SHORT TO GROUND
  • Ignition OFF.
  • Measure:
    Click to display connectors
    Positive Lead Measurement / Action Negative Lead
      C930-5 Ford Fusion. Interior Lighting. Diagnosis and Testing   Ground

Is the resistance greater than 10,000 ohms?
Yes GO to B8
No REPAIR the circuit.

B8 CHECK THE REAR LAMP CONTROL CIRCUIT FOR AN OPEN
  • Measure:
    Click to display connectors
    Positive Lead Measurement / Action Negative Lead
      C930-5 Ford Fusion. Interior Lighting. Diagnosis and Testing   C901-6

Is the resistance less than 3 ohms?
Yes INSTALL a new rear interior lamp. TEST the system for normal operation. If the condition still exists, INSTALL a new overhead console.
REFER to: Overhead Console (501-12 Instrument Panel and Console, Removal and Installation).
No REPAIR the circuit.

B9 CHECK FOR CORRECT BCM (BODY CONTROL MODULE) OPERATION
  • Disconnect and inspect all BCM connectors.
  • Repair:
    • corrosion (install new connector or terminals – clean module pins)
    • damaged or bent pins – install new terminals/pins
    • pushed-out pins – install new pins as necessary
  • Reconnect the BCM connectors. Make sure they seat and latch correctly.
  • Operate the system and determine if the concern is still present.

Is the concern still present?
Yes CHECK OASIS for any applicable service articles: TSB, GSB, SSM or FSA. If a service article exists for this concern, DISCONTINUE this test and FOLLOW the service article instructions. If no service articles address this concern,
Ford Fusion. Interior Lighting. Diagnosis and Testing   Click here to access Guided Routine (BCM).Ford Fusion. Interior Lighting. Diagnosis and Testing Internet Explorer version 11 or greater is required to perform this Pinpoint Test.
No The system is operating correctly at this time. The concern may have been caused by module connections. ADDRESS the root cause of any connector or pin issues. CLEAR the Diagnostic Trouble Codes (DTCs).


All The Courtesy Lamps Stay On Continuously


Refer to Wiring Diagrams Cell 89 for schematic and connector information.


Refer to Wiring Diagrams Cell 117 for schematic and connector information.

Normal Operation and Fault Conditions


REFER to: Interior Lighting - Overview (417-02 Interior Lighting, Description and Operation).


REFER to: Interior Lighting - System Operation and Component Description (417-02 Interior Lighting, Description and Operation).


  DTC Fault Trigger Conditions


DTC Description Fault Trigger Conditions
B1175:01 Driver Door Ajar Switch: General Electrical Failure An on-demand DTC that sets when the BCM detects a fault on the left front door ajar circuit.
B1176:01 Passenger Door Ajar Switch: General Electrical Failure An on-demand DTC that sets when the BCM detects a fault on the right front door ajar circuit.
B11C0:01 Driver Side Rear Door Ajar Switch: General Electrical Failure An on-demand DTC that sets when the BCM detects a fault on the left rear door ajar circuit.
B11C1:01 Passenger Side Rear Door Ajar Switch: General Electrical Failure An on-demand DTC that sets when the BCM detects a fault on the right rear door ajar circuit.

Possible Sources

  • Wiring, terminals or connectors
  • Ajar switch
  • BCM

PINPOINT TEST C : ALL THE COURTESY LAMPS STAY ON CONTINUOUSLY
C1 CHECK THE DOOR AJAR SWITCH PARAMETER IDENTIFICATIONS (PIDS)
  • Ignition ON.
  • Using a diagnostic scan tool, view BCM Parameter Identifications (PIDs).
  • Monitor the BCM DOOR_SW_DRVR, DOOR_SW_PSGR, DOOR_SW_LR and DOOR_SW_RR Parameter Identifications (PIDs) while opening and closing all the doors.

Do all the door ajar switch PID values agree with the door positions?
Yes GO to Pinpoint Test D
No GO to C2

C2 BYPASS THE SUSPECT DOOR LATCH
  • Disconnect Suspect door latch.
  • Connect:
    Click to display connectors

      LH Front Door Ajar Switch


    Positive Lead Measurement / Action Negative Lead
      C525-3 Ford Fusion. Interior Lighting. Diagnosis and Testing   C525-5

    Click to display connectors

      RH Front Door Ajar Switch


    Positive Lead Measurement / Action Negative Lead
      C609-6 Ford Fusion. Interior Lighting. Diagnosis and Testing   C609-4

    Click to display connectors

      LH Rear Door Ajar Switch


    Positive Lead Measurement / Action Negative Lead
      C705-3 Ford Fusion. Interior Lighting. Diagnosis and Testing   C705-5

    Click to display connectors

      RH Rear Door Ajar Switch


    Positive Lead Measurement / Action Negative Lead
      C805-6 Ford Fusion. Interior Lighting. Diagnosis and Testing   C805-4
  • Using a diagnostic scan tool, view BCM Parameter Identifications (PIDs).
  • Monitor the BCM DOOR_SW_DRVR, DOOR_SW_PSGR, DOOR_SW_LR and DOOR_SW_RR Parameter Identifications (PIDs).

Does the PID indicate the door in question is closed?
Yes REMOVE the fused jumper wire. For a front door, INSTALL a new front door latch.
REFER to: Front Door Latch (501-14 Handles, Locks, Latches and Entry Systems, Removal and Installation). REMOVE the fused jumper wire. For a rear door, INSTALL a new rear door latch.
REFER to: Rear Door Latch (501-14 Handles, Locks, Latches and Entry Systems, Removal and Installation).
No REMOVE the fused jumper wire. GO to C3

C3 BYPASS THE DOOR LATCH GROUND CIRCUIT
  • Connect:
    Click to display connectors

      LH Front Door Ajar Switch


    Positive Lead Measurement / Action Negative Lead
      C525-3 Ford Fusion. Interior Lighting. Diagnosis and Testing   Ground

    Click to display connectors

      RH Front Door Ajar Switch


    Positive Lead Measurement / Action Negative Lead
      C609-6 Ford Fusion. Interior Lighting. Diagnosis and Testing   Ground

    Click to display connectors

      LH Rear Door Ajar Switch


    Positive Lead Measurement / Action Negative Lead
      C705-3 Ford Fusion. Interior Lighting. Diagnosis and Testing   Ground

    Click to display connectors

      RH Rear Door Ajar Switch


    Positive Lead Measurement / Action Negative Lead
      C805-6 Ford Fusion. Interior Lighting. Diagnosis and Testing   Ground
  • Monitor the BCM DOOR_SW_DRVR, DOOR_SW_PSGR, DOOR_SW_LR and DOOR_SW_RR Parameter Identifications (PIDs).

Does the PID indicate the door in question is closed?
Yes REMOVE the fused jumper wire. GO to C5
No REMOVE the fused jumper wire. GO to C4

C4 CHECK THE SUSPECT DOOR AJAR SWITCH INPUT CIRCUIT FOR AN OPEN
  • Disconnect BCM C2280D .
  • Measure:
    Click to display connectors

      LH Front Door Ajar Switch


    Positive Lead Measurement / Action Negative Lead
      C525-3 Ford Fusion. Interior Lighting. Diagnosis and Testing   C2280D-33

    Click to display connectors

      RH Front Door Ajar Switch


    Positive Lead Measurement / Action Negative Lead
      C609-6 Ford Fusion. Interior Lighting. Diagnosis and Testing   C2280D-21

    Click to display connectors

      LH Rear Door Ajar Switch


    Positive Lead Measurement / Action Negative Lead
      C705-3 Ford Fusion. Interior Lighting. Diagnosis and Testing   C2280D-46

    Click to display connectors

      RH Rear Door Ajar Switch


    Positive Lead Measurement / Action Negative Lead
      C805-6 Ford Fusion. Interior Lighting. Diagnosis and Testing   C2280D-19

Is the resistance less than 3 ohms?
Yes GO to C7
No REPAIR the door ajar input circuit in question.

C5 CHECK THE DOOR LATCH RETURN CIRCUIT TO THE DOOR MODULE FOR AN OPEN
  • Connect Suspect door latch.
  • Disconnect Suspect door module.
  • Connect:
    Click to display connectors

      LH Front Door Ajar Switch


    Positive Lead Measurement / Action Negative Lead
      C501B-12 Ford Fusion. Interior Lighting. Diagnosis and Testing   Ground

    Click to display connectors

      RH Front Door Ajar Switch


    Positive Lead Measurement / Action Negative Lead
      C652B-12 Ford Fusion. Interior Lighting. Diagnosis and Testing   Ground

    Click to display connectors

      LH Rear Door Ajar Switch


    Positive Lead Measurement / Action Negative Lead
      C728-15 Ford Fusion. Interior Lighting. Diagnosis and Testing   Ground

    Click to display connectors

      RH Rear Door Ajar Switch


    Positive Lead Measurement / Action Negative Lead
      C832-15 Ford Fusion. Interior Lighting. Diagnosis and Testing   Ground
  • Close the door.
  • Monitor the BCM DOOR_SW_DRVR, DOOR_SW_PSGR, DOOR_SW_LR and DOOR_SW_RR Parameter Identifications (PIDs).

Does the PID indicate the door is closed?
Yes REMOVE the fused jumper wire. GO to C6
No REMOVE the fused jumper wire. REPAIR the door latch return circuit in question.

C6 CHECK THE DOOR MODULE GROUND CIRCUIT FOR AN OPEN
  • Connect:
    Click to display connectors

      LH Front Door Ajar Switch


    Positive Lead Measurement / Action Negative Lead
      C501B-12 Ford Fusion. Interior Lighting. Diagnosis and Testing   C501A-2

    Click to display connectors

      RH Front Door Ajar Switch


    Positive Lead Measurement / Action Negative Lead
      C652B-12 Ford Fusion. Interior Lighting. Diagnosis and Testing   C652A-2

    Click to display connectors

      LH Rear Door Ajar Switch


    Positive Lead Measurement / Action Negative Lead
      C728-15 Ford Fusion. Interior Lighting. Diagnosis and Testing   C728-2

    Click to display connectors

      RH Rear Door Ajar Switch


    Positive Lead Measurement / Action Negative Lead
      C832-15 Ford Fusion. Interior Lighting. Diagnosis and Testing   C832-2
  • Monitor the BCM DOOR_SW_DRVR, DOOR_SW_PSGR, DOOR_SW_LR and DOOR_SW_RR Parameter Identifications (PIDs).

Does the PID indicate the door is closed?
Yes REMOVE the fused jumper wire. INSTALL a new door module in question.
REFER to: Driver Door Module (DDM) (419-10 Multifunction Electronic Modules, Removal and Installation).
REFER to: Passenger Door Module (PDM) (419-10 Multifunction Electronic Modules, Removal and Installation).
REFER to: Rear Door Module (RDM) (419-10 Multifunction Electronic Modules, Removal and Installation).
No REMOVE the fused jumper wire. REPAIR the circuit.

C7 CHECK FOR CORRECT BCM (BODY CONTROL MODULE) OPERATION
  • Disconnect and inspect all BCM connectors.
  • Repair:
    • corrosion (install new connector or terminals – clean module pins)
    • damaged or bent pins – install new terminals/pins
    • pushed-out pins – install new pins as necessary
  • Reconnect the BCM connectors. Make sure they seat and latch correctly.
  • Operate the system and determine if the concern is still present.

Is the concern still present?
Yes CHECK OASIS for any applicable service articles: TSB, GSB, SSM or FSA. If a service article exists for this concern, DISCONTINUE this test and FOLLOW the service article instructions. If no service articles address this concern,
Ford Fusion. Interior Lighting. Diagnosis and Testing   Click here to access Guided Routine (BCM).Ford Fusion. Interior Lighting. Diagnosis and Testing Internet Explorer version 11 or greater is required to perform this Pinpoint Test.
No The system is operating correctly at this time. The concern may have been caused by module connections. ADDRESS the root cause of any connector or pin issues. CLEAR the Diagnostic Trouble Codes (DTCs).


The Interior Courtesy Lamps Stay On Continuously


Refer to Wiring Diagrams Cell 89 for schematic and connector information.

Normal Operation and Fault Conditions


REFER to: Interior Lighting - Overview (417-02 Interior Lighting, Description and Operation).


REFER to: Interior Lighting - System Operation and Component Description (417-02 Interior Lighting, Description and Operation).


  DTC Fault Trigger Conditions


DTC Description Fault Trigger Conditions
B1313:11 Interior Lighting Output: Circuit Short To Ground A continuous memory and on-demand DTC that sets when the BCM detects a short to ground from the courtesy lighting ground control circuit.
U1000:00 Solid State Driver Protection Activated -Driver Disabled: No Sub Type Information This DTC sets when the BCM has temporarily shut down the output driver. The module has temporarily disabled an output because an excessive current draw exists (such as a short to ground). The BCM cannot enable the output until the cause of the short is corrected, the Diagnostic Trouble Codes (DTCs) have been cleared and a successful self-test is run.
U3000:49 Control Module: Internal Electronic Failure This DTC sets when the BCM has permanently shut down the output driver. The module has permanently disabled an output because an excessive current draw fault (such as a short to ground) has exceeded the limits that the BCM can withstand. CORRECT the cause of the excessive current draw before installing a new BCM.

Possible Sources

  • Wiring, terminals or connectors
  • Interior lamp
  • BCM

PINPOINT TEST D : THE INTERIOR COURTESY LAMPS STAY ON CONTINUOUSLY
D1 CHECK THE OPERATION OF ALL THE INTERIOR COURTESY LAMPS
  • Close all doors and observe the courtesy lamps.

Is only the rear interior courtesy lamp always on?
Yes GO to D2
No GO to D5

D2 CHECK THE REAR LAMP CONTROL CIRCUIT FOR A SHORT TO VOLTAGE
  • Ignition OFF.
  • Disconnect Front Interior Lamp C930 .
  • Disconnect Rear Interior Lamp C901 .
  • Ignition ON.
  • Measure:
    Click to display connectors
    Positive Lead Measurement / Action Negative Lead
      C930-5 Ford Fusion. Interior Lighting. Diagnosis and Testing   Ground

Is any voltage present?
Yes REPAIR the circuit.
No GO to D3

D3 CHECK THE REAR LAMP CONTROL CIRCUIT FOR A SHORT TO GROUND
  • Ignition OFF.
  • Measure:
    Click to display connectors
    Positive Lead Measurement / Action Negative Lead
      C930-5 Ford Fusion. Interior Lighting. Diagnosis and Testing   Ground

Is the resistance greater than 10,000 ohms?
Yes GO to D4
No REPAIR the circuit.

D4 CHECK THE REAR LAMP CONTROL CIRCUIT FOR AN OPEN
  • Measure:
    Click to display connectors
    Positive Lead Measurement / Action Negative Lead
      C930-5 Ford Fusion. Interior Lighting. Diagnosis and Testing   C901-6

Is the resistance less than 3 ohms?
Yes INSTALL a new rear interior lamp. TEST the system for normal operation. If the condition still exists, INSTALL a new overhead console.
REFER to: Overhead Console (501-12 Instrument Panel and Console, Removal and Installation).
No REPAIR the circuit.

D5 ISOLATE THE BCM (BODY CONTROL MODULE)
  • Ignition OFF.
  • Disconnect BCM C2280F .
  • Ignition ON.

Do the interior courtesy lamps continue to illuminate?
Yes INSTALL a new overhead console.
REFER to: Overhead Console (501-12 Instrument Panel and Console, Removal and Installation).
No GO to D6

D6 CHECK FOR CORRECT BCM (BODY CONTROL MODULE) OPERATION
  • Disconnect and inspect all BCM connectors.
  • Repair:
    • corrosion (install new connector or terminals – clean module pins)
    • damaged or bent pins – install new terminals/pins
    • pushed-out pins – install new pins as necessary
  • Reconnect the BCM connectors. Make sure they seat and latch correctly.
  • Operate the system and determine if the concern is still present.

Is the concern still present?
Yes CHECK OASIS for any applicable service articles: TSB, GSB, SSM or FSA. If a service article exists for this concern, DISCONTINUE this test and FOLLOW the service article instructions. If no service articles address this concern,
Ford Fusion. Interior Lighting. Diagnosis and Testing   Click here to access Guided Routine (BCM).Ford Fusion. Interior Lighting. Diagnosis and Testing Internet Explorer version 11 or greater is required to perform this Pinpoint Test.
No The system is operating correctly at this time. The concern may have been caused by module connections. ADDRESS the root cause of any connector or pin issues. CLEAR the Diagnostic Trouble Codes (DTCs).


The Luggage Compartment Lamp Is Inoperative Or On Continuously


Refer to Wiring Diagrams Cell 89 for schematic and connector information.

Normal Operation and Fault Conditions


REFER to: Interior Lighting - Overview (417-02 Interior Lighting, Description and Operation).


REFER to: Interior Lighting - System Operation and Component Description (417-02 Interior Lighting, Description and Operation).

Possible Sources

  • Luggage compartment lid latch
  • Luggage compartment lamp bulb socket
  • Wiring, terminals or connectors

PINPOINT TEST E : THE LUGGAGE COMPARTMENT LAMP IS INOPERATIVE OR ON CONTINUOUSLY
E1 DETERMINE IF THE LAMP IS ON WITH THE LUGGAGE COMPARTMENT LID OPEN
  • Ignition ON.
  • Make sure the luggage compartment lid is fully open and observe the luggage compartment lamp(s).

Is the luggage compartment lamp illuminated?
Yes GO to E2
No GO to E3

E2 CHECK THE LUGGAGE COMPARTMENT LAMP GROUND CIRCUIT FOR A SHORT TO GROUND
  • Disconnect Luggage Compartment Lid Latch C4424 .

Does the luggage compartment lamp continue to illuminate?
Yes REPAIR the circuit.
No INSTALL a new luggage compartment lid latch.
REFER to: Luggage Compartment Lid Latch (501-14 Handles, Locks, Latches and Entry Systems, Removal and Installation).

E3 CHECK THE OPERATION OF THE DEMAND LAMPS
  • Ignition OFF.
  • Press the interior lamp switch.

Does the interior courtesy lamps illuminate?
Yes GO to E4
No GO to Pinpoint Test F

E4 CHECK FOR VOLTAGE TO THE LUGGAGE COMPARTMENT LAMP
  • Disconnect Luggage Compartment Lamp C428 .
  • Ignition ON.
  • Measure:
    Click to display connectors
    Positive Lead Measurement / Action Negative Lead
      C428-1 Ford Fusion. Interior Lighting. Diagnosis and Testing   Ground

Is the voltage greater than 11 volts?
Yes GO to E5
No REPAIR the luggage compartment lamp voltage supply circuit for an open.

E5 ISOLATE THE LUGGAGE COMPARTMENT LAMP BULB SOCKET
  • Measure:
    Click to display connectors
    Positive Lead Measurement / Action Negative Lead
      C428-1 Ford Fusion. Interior Lighting. Diagnosis and Testing   C428-3

Is the voltage greater than 11 volts?
Yes INSTALL a new luggage compartment lamp bulb socket.
No GO to E6

E6 CHECK THE LUGGAGE COMPARTMENT LAMP GROUND CIRCUIT FOR AN OPEN
  • Ignition OFF.
  • Connect Luggage Compartment Lamp C428 .
  • Disconnect Luggage Compartment Lid Latch C4424 .
  • Connect:
    Click to display connectors
    Positive Lead Measurement / Action Negative Lead
      C4424-2 Ford Fusion. Interior Lighting. Diagnosis and Testing   Ground

Does the luggage compartment lamp illuminate?
Yes REMOVE the fused jumper wire. GO to E7
No REMOVE the fused jumper wire. REPAIR the circuit.

E7 CHECK THE LUGGAGE COMPARTMENT LID LATCH GROUND CIRCUIT FOR AN OPEN
  • Connect:
    Click to display connectors
    Positive Lead Measurement / Action Negative Lead
      C4424-2 Ford Fusion. Interior Lighting. Diagnosis and Testing   C4424-4

Does the luggage compartment lamp illuminate?
Yes REMOVE the fused jumper wire. INSTALL a new luggage compartment lid latch.
REFER to: Luggage Compartment Lid Latch (501-14 Handles, Locks, Latches and Entry Systems, Removal and Installation).
No REMOVE the fused jumper wire. REPAIR the circuit.


One Or More Demand Lamps Are Inoperative


Refer to Wiring Diagrams Cell 89 for schematic and connector information.

Normal Operation and Fault Conditions


REFER to: Interior Lighting - Overview (417-02 Interior Lighting, Description and Operation).


REFER to: Interior Lighting - System Operation and Component Description (417-02 Interior Lighting, Description and Operation).


  DTC Fault Trigger Conditions


DTC Description Fault Trigger Conditions
U1000:00 Solid State Driver Protection Activated -Driver Disabled: No Sub Type Information This DTC sets when the BCM has temporarily shut down the output driver. The module has temporarily disabled an output because an excessive current draw exists (such as a short to ground). The BCM cannot enable the output until the cause of the short is corrected, the Diagnostic Trouble Codes (DTCs) have been cleared and a successful self-test is run.
U3000:49 Control Module: Internal Electronic Failure This DTC sets when the BCM has permanently shut down the output driver. The module has permanently disabled an output because an excessive current draw fault (such as a short to ground) has exceeded the limits that the BCM can withstand. CORRECT the cause of the excessive current draw before installing a new BCM.

Possible Sources

  • Wiring, terminals or connectors
  • Demand lamp
  • BCM

Visual Inspection and Diagnostic Pre-checks

  • Inspect the bulbs and make sure they are OK.
  • Inspect the courtesy lamp operation.
  • Inspect the interior lamp for damage.

PINPOINT TEST F : ONE OR MORE DEMAND LAMPS ARE INOPERATIVE
F1 CHECK THE DEMAND LAMP OPERATION
  • Ignition ON.
  • Check the operation of the LH vanity mirror, RH vanity mirror, overhead map and glove box lamps.

Does the LH vanity mirror, RH vanity mirror, overhead map or glove box lamp illuminate?
Yes If the luggage compartment lamp is inoperative, GO to Pinpoint Test E
If a vanity mirror lamp is inoperative, GO to F6
If the glovebox map lamp is inoperative, GO to F8
If an overhead map lamp is inoperative, GO to F10
No GO to F2

F2 CHECK FOR VOLTAGE TO THE FRONT OVERHEAD MAP LAMP
  • Ignition OFF.
  • Disconnect Overhead Console C930 .
  • Ignition ON.
  • Measure:
    Click to display connectors
    Positive Lead Measurement / Action Negative Lead
      C930-12 Ford Fusion. Interior Lighting. Diagnosis and Testing   Ground

Is the voltage greater than 11 volts?
Yes GO to F10
No GO to F3.

F3 REPEAT THE ON-DEMAND SELF-TEST AND CHECK FOR VOLTAGE TO THE FRONT OVERHEAD MAP LAMP
  • Using a diagnostic scan tool, perform the BCM self-test.
  • Clear the Diagnostic Trouble Codes (DTCs) and repeat the self-test (required to enable the lamp output driver if DTC U1000:00 is present).
  • Measure:
    Click to display connectors
    Positive Lead Measurement / Action Negative Lead
      C930-12 Ford Fusion. Interior Lighting. Diagnosis and Testing   Ground

Is the voltage greater than 11 volts?
Yes INSTALL a new overhead console.
REFER to: Overhead Console (501-12 Instrument Panel and Console, Removal and Installation).
No GO to F4

F4 CHECK THE BCM (BODY CONTROL MODULE) DEMAND LAMP OUTPUT CIRCUIT FOR A SHORT TO GROUND
  • Ignition OFF.
  • Disconnect BCM C2280F .
  • Disconnect Glove Compartment Lamp C254 .
  • Disconnect LH Vanity Mirror Lamp C9117 and RH Vanity Mirror Lamp C9116 (China).
  • Disconnect LH Vanity Mirror Lamp C907 and RH Vanity Mirror Lamp C906 (Except China).
  • Disconnect Second Row Interior Lamp C901 .
  • Measure:
    Click to display connectors
    Positive Lead Measurement / Action Negative Lead
      C930-12 Ford Fusion. Interior Lighting. Diagnosis and Testing   Ground

Is the resistance greater than 10,000 ohms?
Yes GO to F5
No REPAIR the circuit. After the repair:
If no Diagnostic Trouble Codes (DTCs) are present, TEST the system for normal operation.
If DTC U1000:00 is present, CLEAR the Diagnostic Trouble Codes (DTCs) and REPEAT the self-test (required to enable the lamp output driver if DTC U1000:00 is present).
If DTC U3000:49 is present,
Ford Fusion. Interior Lighting. Diagnosis and Testing   Click here to access Guided Routine (BCM).Ford Fusion. Interior Lighting. Diagnosis and Testing Internet Explorer version 11 or greater is required to perform this Pinpoint Test.

F5 CHECK THE BCM (BODY CONTROL MODULE) DEMAND LAMP OUTPUT CIRCUIT FOR AN OPEN
  • Measure:
    Click to display connectors
    Positive Lead Measurement / Action Negative Lead
      C930-12 Ford Fusion. Interior Lighting. Diagnosis and Testing   C2280F-14

Is the resistance less than 3 ohms?
Yes GO to F12
No REPAIR the circuit.

F6 CHECK THE VANITY MIRROR VOLTAGE SUPPLY CIRCUIT FOR AN OPEN
  • Ignition OFF.
  • Disconnect Inoperative LH Vanity Mirror Lamp C9117 or RH Vanity Mirror Lamp C9116 (China).
  • Disconnect Inoperative LH Vanity Mirror Lamp C907 or RH Vanity Mirror Lamp C906 (Except China).
  • Ignition ON.
  • Measure:
    Click to display connectors

      LH Vanity Mirror Lamp (China)


    Positive Lead Measurement / Action Negative Lead
      C9117-1 Ford Fusion. Interior Lighting. Diagnosis and Testing   Ground

    Click to display connectors

      LH Vanity Mirror Lamp (Except China)


    Positive Lead Measurement / Action Negative Lead
      C907-1 Ford Fusion. Interior Lighting. Diagnosis and Testing   Ground

    Click to display connectors

      RH Vanity Mirror Lamp (China)


    Positive Lead Measurement / Action Negative Lead
      C9116-1 Ford Fusion. Interior Lighting. Diagnosis and Testing   Ground

    Click to display connectors

      RH Vanity Mirror Lamp (Except China)


    Positive Lead Measurement / Action Negative Lead
      C906-1 Ford Fusion. Interior Lighting. Diagnosis and Testing   Ground

Is the voltage greater than 11 volts?
Yes GO to F7
No REPAIR the circuit.

F7 CHECK THE VANITY MIRROR GROUND CIRCUIT FOR AN OPEN
  • Measure:
    Click to display connectors

      LH Vanity Mirror Lamp (China)


    Positive Lead Measurement / Action Negative Lead
      C9117-1 Ford Fusion. Interior Lighting. Diagnosis and Testing   C9117-2

    Click to display connectors

      LH Vanity Mirror Lamp (Except China)


    Positive Lead Measurement / Action Negative Lead
      C907-1 Ford Fusion. Interior Lighting. Diagnosis and Testing   C907-2

    Click to display connectors

      RH Vanity Mirror Lamp (China)


    Positive Lead Measurement / Action Negative Lead
      C9116-1 Ford Fusion. Interior Lighting. Diagnosis and Testing   C9116-2

    Click to display connectors

      RH Vanity Mirror Lamp (Except China)


    Positive Lead Measurement / Action Negative Lead
      C906-1 Ford Fusion. Interior Lighting. Diagnosis and Testing   C906-2

Is the voltage greater than 11 volts?
Yes INSTALL a new sun visor for the lamp in question.
No REPAIR the circuit.

F8 CHECK THE GLOVE COMPARTMENT LAMP VOLTAGE SUPPLY CIRCUIT FOR AN OPEN
  • Ignition OFF.
  • Disconnect Glove Compartment Lamp C254 .
  • Ignition ON.
  • Measure:
    Click to display connectors
    Positive Lead Measurement / Action Negative Lead
      C254-1 Ford Fusion. Interior Lighting. Diagnosis and Testing   Ground

Is the voltage greater than 11 volts?
Yes GO to F9
No REPAIR the circuit.

F9 CHECK THE GLOVE COMPARTMENT LAMP GROUND CIRCUIT FOR AN OPEN
  • Measure:
    Click to display connectors
    Positive Lead Measurement / Action Negative Lead
      C254-1 Ford Fusion. Interior Lighting. Diagnosis and Testing   C254-2

Is the voltage greater than 11 volts?
Yes INSTALL a new glove compartment lamp.
No REPAIR the circuit.

F10 CHECK THE OVERHEAD INTERIOR LAMP VOLTAGE SUPPLY CIRCUIT FOR AN OPEN
  • Ignition OFF.
  • Disconnect Overhead Console C930 or Rear Interior Lamp C901 .
  • Ignition ON.
  • Measure:
    Click to display connectors

      Overhead Console


    Positive Lead Measurement / Action Negative Lead
      C930-12 Ford Fusion. Interior Lighting. Diagnosis and Testing   Ground

    Click to display connectors

      Rear Interior Lamp


    Positive Lead Measurement / Action Negative Lead
      C901-1 Ford Fusion. Interior Lighting. Diagnosis and Testing   Ground

Is the voltage greater than 11 volts?
Yes GO to F11
No REPAIR the circuit.

F11 CHECK THE OVERHEAD INTERIOR LAMP GROUND CIRCUIT FOR AN OPEN
  • Measure:
    Click to display connectors

      Overhead Console


    Positive Lead Measurement / Action Negative Lead
      C930-12 Ford Fusion. Interior Lighting. Diagnosis and Testing   C930-1

    Click to display connectors

      Rear Interior Lamp


    Positive Lead Measurement / Action Negative Lead
      C901-1 Ford Fusion. Interior Lighting. Diagnosis and Testing   C901-5

Is the voltage greater than 11 volts?
Yes For the front interior lamp, INSTALL a new overhead console.
REFER to: Overhead Console (501-12 Instrument Panel and Console, Removal and Installation). For the rear interior lamp, INSTALL a new rear interior lamp.
No REPAIR the circuit.

F12 CHECK FOR CORRECT BCM (BODY CONTROL MODULE) OPERATION
  • Disconnect and inspect all BCM connectors.
  • Repair:
    • corrosion (install new connector or terminals – clean module pins)
    • damaged or bent pins – install new terminals/pins
    • pushed-out pins – install new pins as necessary
  • Reconnect the BCM connectors. Make sure they seat and latch correctly.
  • Operate the system and determine if the concern is still present.

Is the concern still present?
Yes CHECK OASIS for any applicable service articles: TSB, GSB, SSM or FSA. If a service article exists for this concern, DISCONTINUE this test and FOLLOW the service article instructions. If no service articles address this concern,
Ford Fusion. Interior Lighting. Diagnosis and Testing   Click here to access Guided Routine (BCM).Ford Fusion. Interior Lighting. Diagnosis and Testing Internet Explorer version 11 or greater is required to perform this Pinpoint Test.
No The system is operating correctly at this time. The concern may have been caused by module connections. ADDRESS the root cause of any connector or pin issues. CLEAR the Diagnostic Trouble Codes (DTCs).


The Battery Saver Does Not Deactivate After Time-out


Refer to Wiring Diagrams Cell 89 for schematic and connector information.

Normal Operation and Fault Conditions


REFER to: Interior Lighting - Overview (417-02 Interior Lighting, Description and Operation).


REFER to: Interior Lighting - System Operation and Component Description (417-02 Interior Lighting, Description and Operation).

Possible Sources

  • Wiring, terminals or connectors
  • BCM

PINPOINT TEST G : THE BATTERY SAVER DOES NOT DEACTIVATE AFTER TIME-OUT
G1 CHECK THE DEMAND LAMP VOLTAGE SUPPLY CIRCUIT FOR A SHORT TO VOLTAGE
  • Ignition OFF.
  • Disconnect BCM C2280F .
  • Turn any demand (map or vanity mirror) lamp on.

Does the demand lamp turn on?
Yes REPAIR the circuit.
No GO to G2

G2 CHECK FOR CORRECT BCM (BODY CONTROL MODULE) OPERATION
  • Disconnect and inspect all BCM connectors.
  • Repair:
    • corrosion (install new connector or terminals – clean module pins)
    • damaged or bent pins – install new terminals/pins
    • pushed-out pins – install new pins as necessary
  • Reconnect the BCM connectors. Make sure they seat and latch correctly.
  • Operate the system and determine if the concern is still present.

Is the concern still present?
Yes CHECK OASIS for any applicable service articles: TSB, GSB, SSM or FSA. If a service article exists for this concern, DISCONTINUE this test and FOLLOW the service article instructions. If no service articles address this concern,
Ford Fusion. Interior Lighting. Diagnosis and Testing   Click here to access Guided Routine (BCM).Ford Fusion. Interior Lighting. Diagnosis and Testing Internet Explorer version 11 or greater is required to perform this Pinpoint Test.
No The system is operating correctly at this time. The concern may have been caused by module connections. ADDRESS the root cause of any connector or pin issues. CLEAR the Diagnostic Trouble Codes (DTCs).


The Ambient Lighting Is Inoperative


Refer to Wiring Diagrams Cell 89 for schematic and connector information.

Normal Operation and Fault Conditions


REFER to: Interior Lighting - Overview (417-02 Interior Lighting, Description and Operation).


REFER to: Interior Lighting - System Operation and Component Description (417-02 Interior Lighting, Description and Operation).


  DTC Fault Trigger Conditions


DTC Description Fault Trigger Conditions
B145C:11 Ambient Lighting Power Supply Output: Circuit Short To Ground A continuous memory and on-demand DTC that sets when the BCM detects a short to ground in the voltage supply output circuit to the ambient lighting light emitting diodes (LEDs).
B145C:15 Ambient Lighting Power Supply Output: Circuit Short To Battery or Open A continuous memory and on-demand DTC that sets when the BCM detects a short to voltage or open in the voyage supply output circuit to the ambient lighting light emitting diodes (LEDs).
U1000:00 Solid State Driver Protection Activated -Driver Disabled: No Sub Type Information This DTC sets when the BCM has temporarily shut down the output driver. The module has temporarily disabled an output because an excessive current draw exists (such as a short to ground). The BCM cannot enable the output until the cause of the short is corrected, the Diagnostic Trouble Codes (DTCs) have been cleared and a successful self-test is run.
U3000:49 Control Module: Internal Electronic Failure This DTC sets when the BCM has permanently shut down the output driver. The module has permanently disabled an output because an excessive current draw fault (such as a short to ground) has exceeded the limits that the BCM can withstand. CORRECT the cause of the excessive current draw before installing a new BCM.

Possible Sources

  • Wiring, terminals or connectors
  • BCM

PINPOINT TEST H : THE AMBIENT LIGHTING IS INOPERATIVE
H1 CHECK THE FDIM (FRONT DISPLAY INTERFACE MODULE) AUDIO CONTROLS
  • Ignition ON.
  • Check the operation of the audio system using the FDIM (touchscreen) controls.

Does the audio system operate correctly from the touchscreen controls?
Yes GO to H2
No
REFER to: Information and Entertainment System (415-00 Information and Entertainment System - General Information) .

H2 CHECK THE BCM (BODY CONTROL MODULE) AMBIENT LIGHTING OUTPUT FOR VOLTAGE
  • Ignition OFF.
  • Disconnect LH Footwell Lamp C209 .
  • Ignition ON.
  • Place the headlamp switch in the parking lamps ON position.
  • Measure:
    Click to display connectors
    Positive Lead Measurement / Action Negative Lead
      C209-1 Ford Fusion. Interior Lighting. Diagnosis and Testing   Ground

Is the voltage greater than 11 volts?
Yes GO to H3
No GO to H4

H3 CHECK THE BCM (BODY CONTROL MODULE) AMBIENT LIGHTING OUTPUT FOR A SHORT TO VOLTAGE
  • Ignition OFF.
  • Disconnect BCM C2280F .
  • Ignition ON.
  • Measure:
    Click to display connectors
    Positive Lead Measurement / Action Negative Lead
      C209-1 Ford Fusion. Interior Lighting. Diagnosis and Testing   Ground

Is any voltage present?
Yes REPAIR the circuit.
No GO to H6

H4 CHECK THE BCM (BODY CONTROL MODULE) AMBIENT LIGHTING OUTPUT FOR A SHORT TO GROUND
  • Ignition OFF.
  • Disconnect BCM C2280F .
  • Measure:
    Click to display connectors
    Positive Lead Measurement / Action Negative Lead
      C209-1 Ford Fusion. Interior Lighting. Diagnosis and Testing   Ground

Is the resistance greater than 10,000 ohms?
Yes GO to H5
No REPAIR the circuit.

H5 CHECK THE BCM (BODY CONTROL MODULE) AMBIENT LIGHTING OUTPUT FOR AN OPEN
  • Measure:
    Click to display connectors
    Positive Lead Measurement / Action Negative Lead
      C209-1 Ford Fusion. Interior Lighting. Diagnosis and Testing   C2280F-4

Is the resistance less than 3 ohms?
Yes GO to H6
No REPAIR the circuit.

H6 CHECK FOR CORRECT BCM (BODY CONTROL MODULE) OPERATION
  • Disconnect and inspect all BCM connectors.
  • Repair:
    • corrosion (install new connector or terminals – clean module pins)
    • damaged or bent pins – install new terminals/pins
    • pushed-out pins – install new pins as necessary
  • Reconnect the BCM connectors. Make sure they seat and latch correctly.
  • Operate the system and determine if the concern is still present.

Is the concern still present?
Yes CHECK OASIS for any applicable service articles: TSB, GSB, SSM or FSA. If a service article exists for this concern, DISCONTINUE this test and FOLLOW the service article instructions. If no service articles address this concern,
Ford Fusion. Interior Lighting. Diagnosis and Testing   Click here to access Guided Routine (BCM).Ford Fusion. Interior Lighting. Diagnosis and Testing Internet Explorer version 11 or greater is required to perform this Pinpoint Test.
No The system is operating correctly at this time. The concern may have been caused by module connections. ADDRESS the root cause of any connector or pin issues. CLEAR the Diagnostic Trouble Codes (DTCs).


A Puddle Lamp Is Inoperative Or Always On


Refer to Wiring Diagrams Cell 89 for schematic and connector information.


Refer to Wiring Diagrams Cell 124 for schematic and connector information.

Normal Operation and Fault Conditions


REFER to: Interior Lighting - Overview (417-02 Interior Lighting, Description and Operation).


REFER to: Interior Lighting - System Operation and Component Description (417-02 Interior Lighting, Description and Operation).


  DTC Fault Trigger Conditions


DTC Description Fault Trigger Conditions
B1165:11 Left Front Puddle Lamp Output: Circuit Short To Ground A continuous memory and on-demand DTC that sets when the DDM detects a short to ground from the puddle lamp output circuit.
B1165:15 Left Front Puddle Lamp Output: Circuit Short To Battery Or Open A continuous memory and on-demand DTC that sets when the DDM detects an open or a short to battery voltage from the puddle lamp output circuit.
B1166:11 Right Front Puddle Lamp Output: Circuit Short To Ground A continuous memory and on-demand DTC that sets when the PDM detects a short to ground from the puddle lamp output circuit.
B1166:15 Right Front Puddle Lamp Output: Circuit Short To Battery Or Open A continuous memory and on-demand DTC that sets when the PDM detects an open or a short to battery voltage from the puddle lamp output circuit.

Possible Sources

  • Wiring, terminals or connectors
  • Puddle lamp
  • Exterior mirror
  • DDM
  • PDM

Visual Inspection and Diagnostic Pre-checks

  • Inspect the bulbs and make sure they are OK.
  • Inspect the exterior mirror for damage.

PINPOINT TEST I : A PUDDLE LAMP IS INOPERATIVE OR ALWAYS ON
I1 CHECK THE OPERATION OF THE INTERIOR COURTESY LAMPS
  • Ignition ON.
  • Ignition OFF.
  • Open and close a door.
  • Observe the interior courtesy lamp operation for 30 seconds.

Do the interior courtesy lamps operate correctly?
Yes If a puddle lamp is always on, GO to I2
If a puddle lamp is inoperative, GO to I3
No REFER to the Interior Lamps Symptom Chart in this section and diagnose the interior courtesy lamps.

I2 CHECK THE PUDDLE LAMP POWER SUPPLY CIRCUIT FOR A SHORT TO VOLTAGE
  • Disconnect DDM C501B (LH puddle lamp).
  • Disconnect PDM C652B (RH puddle lamp.
  • Ignition ON.

Does the puddle lamp continue to illuminate?
Yes REPAIR the circuit.
No INSTALL a new door module in question.
REFER to: Driver Door Module (DDM) (419-10 Multifunction Electronic Modules, Removal and Installation).
REFER to: Passenger Door Module (PDM) (419-10 Multifunction Electronic Modules, Removal and Installation).

I3 CHECK THE MIRROR OPERATION
  • Ignition ON.
  • Using the exterior mirror control switch, operate the exterior power mirrors.

Do the exterior power mirrors operate?
Yes GO to I4
No
REFER to: Rear View Mirrors (501-09 Rear View Mirrors, Diagnosis and Testing).

I4 CHECK FOR VOLTAGE TO THE PUDDLE LAMP
  • Ignition OFF.
  • Disconnect Inoperative LH Exterior Mirror C516 or RH Exterior Mirror C601 (China).
  • Disconnect Inoperative LH Exterior Mirror C517 or RH Exterior Mirror C626 (Except China).
  • Ignition ON.
  • Open any door.
  • Measure:
    Click to display connectors

      LH Exterior Mirror (China)


    Positive Lead Measurement / Action Negative Lead
      C516-11 Ford Fusion. Interior Lighting. Diagnosis and Testing   Ground

    Click to display connectors

      LH Exterior Mirror (Except China)


    Positive Lead Measurement / Action Negative Lead
      C517-11 Ford Fusion. Interior Lighting. Diagnosis and Testing   Ground

    Click to display connectors

      RH Exterior Mirror (China)


    Positive Lead Measurement / Action Negative Lead
      C601-11 Ford Fusion. Interior Lighting. Diagnosis and Testing   Ground

    Click to display connectors

      RH Exterior Mirror (Except China)


    Positive Lead Measurement / Action Negative Lead
      C626-11 Ford Fusion. Interior Lighting. Diagnosis and Testing   Ground

Is the voltage greater than 11 volts?
Yes GO to I7
No GO to I5

I5 CHECK THE PUDDLE LAMP VOLTAGE SUPPLY CIRCUIT FOR A SHORT TO GROUND
  • Ignition OFF.
  • Disconnect DDM C501B (LH puddle lamp).
  • Disconnect PDM C652B (RH puddle lamp).
  • Measure:
    Click to display connectors

      LH Exterior Mirror (China)


    Positive Lead Measurement / Action Negative Lead
      C516-11 Ford Fusion. Interior Lighting. Diagnosis and Testing   Ground

    Click to display connectors

      LH Exterior Mirror (Except China)


    Positive Lead Measurement / Action Negative Lead
      C517-11 Ford Fusion. Interior Lighting. Diagnosis and Testing   Ground

    Click to display connectors

      RH Exterior Mirror (China)


    Positive Lead Measurement / Action Negative Lead
      C601-11 Ford Fusion. Interior Lighting. Diagnosis and Testing   Ground

    Click to display connectors

      RH Exterior Mirror (Except China)


    Positive Lead Measurement / Action Negative Lead
      C626-11 Ford Fusion. Interior Lighting. Diagnosis and Testing   Ground

Is the resistance greater than 10,000 ohms?
Yes GO to I6
No REPAIR the circuit.

I6 CHECK THE PUDDLE LAMP VOLTAGE SUPPLY CIRCUIT FOR AN OPEN
  • Measure:
    Click to display connectors

      LH Exterior Mirror (China)


    Positive Lead Measurement / Action Negative Lead
      C516-11 Ford Fusion. Interior Lighting. Diagnosis and Testing   C501B-10

    Click to display connectors

      LH Exterior Mirror (Except China)


    Positive Lead Measurement / Action Negative Lead
      C517-11 Ford Fusion. Interior Lighting. Diagnosis and Testing   C501B-10

    Click to display connectors

      RH Exterior Mirror (China)


    Positive Lead Measurement / Action Negative Lead
      C601-11 Ford Fusion. Interior Lighting. Diagnosis and Testing   C652B-10

    Click to display connectors

      RH Exterior Mirror (Except China)


    Positive Lead Measurement / Action Negative Lead
      C626-11 Ford Fusion. Interior Lighting. Diagnosis and Testing   C652B-10

Is the resistance less than 3 ohms?
Yes INSTALL a new door module in question.
REFER to: Driver Door Module (DDM) (419-10 Multifunction Electronic Modules, Removal and Installation).
REFER to: Passenger Door Module (PDM) (419-10 Multifunction Electronic Modules, Removal and Installation).
No REPAIR the circuit.

I7 CHECK THE EXTERIOR MIRROR GROUND CIRCUIT
  • Measure:
    Click to display connectors

      LH Exterior Mirror (China)


    Positive Lead Measurement / Action Negative Lead
      C516-11 Ford Fusion. Interior Lighting. Diagnosis and Testing   C516-8

    Click to display connectors

      LH Exterior Mirror (Except China)


    Positive Lead Measurement / Action Negative Lead
      C517-11 Ford Fusion. Interior Lighting. Diagnosis and Testing   C517-8

    Click to display connectors

      RH Exterior Mirror (China)


    Positive Lead Measurement / Action Negative Lead
      C601-11 Ford Fusion. Interior Lighting. Diagnosis and Testing   C601-8

    Click to display connectors

      RH Exterior Mirror (Except China)


    Positive Lead Measurement / Action Negative Lead
      C626-11 Ford Fusion. Interior Lighting. Diagnosis and Testing   C626-8

Is the voltage greater than 11 volts?
Yes CHECK the exterior mirror jumper harness between the vehicle harness and the puddle lamp for open circuits and damaged or pushed-out pins. If the jumper harness is OK, INSTALL a new puddle lamp.
REFER to: Exterior Mirror (501-09 Rear View Mirrors, Removal and Installation).
If the jumper harness is not OK, REPAIR the jumper harness.
No GO to I8

I8 CHECK THE PUDDLE LAMP GROUND CIRCUIT FOR AN OPEN
  • Ignition OFF.
  • Disconnect DDM C501A (LH puddle lamp).
  • Disconnect PDM C652A (RH puddle lamp).
  • Measure:
    Click to display connectors

      LH Exterior Mirror (China)


    Positive Lead Measurement / Action Negative Lead
      C516-8 Ford Fusion. Interior Lighting. Diagnosis and Testing   C501A-2

    Click to display connectors

      LH Exterior Mirror (Except China)


    Positive Lead Measurement / Action Negative Lead
      C517-8 Ford Fusion. Interior Lighting. Diagnosis and Testing   C501A-2

    Click to display connectors

      RH Exterior Mirror (China)


    Positive Lead Measurement / Action Negative Lead
      C601-8 Ford Fusion. Interior Lighting. Diagnosis and Testing   C652A-2

    Click to display connectors

      RH Exterior Mirror (Except China)


    Positive Lead Measurement / Action Negative Lead
      C626-8 Ford Fusion. Interior Lighting. Diagnosis and Testing   C652A-2

Is the resistance less than 3 ohms?
Yes INSTALL a new door module in question.
REFER to: Driver Door Module (DDM) (419-10 Multifunction Electronic Modules, Removal and Installation).
REFER to: Passenger Door Module (PDM) (419-10 Multifunction Electronic Modules, Removal and Installation).
No REPAIR the circuit.


One Or More Of The Ambient Lighting LEDs Are Inoperative Or Does Not Change Color


Refer to Wiring Diagrams Cell 89 for schematic and connector information.

Normal Operation and Fault Conditions


REFER to: Interior Lighting - Overview (417-02 Interior Lighting, Description and Operation).


REFER to: Interior Lighting - System Operation and Component Description (417-02 Interior Lighting, Description and Operation).


  DTC Fault Trigger Conditions


DTC Description Fault Trigger Conditions
B1465:00 Ambient Lighting Bus 1: No Sub Type Information A continuous memory DTC that sets when the BCM detects a fault in the LIN circuit to the door ambient lighting light emitting diodes (LEDs).
B1467:00 Ambient Lighting Bus 3: No Sub Type Information A continuous memory DTC that sets when the BCM detects a fault in the LIN circuit to the footwell and center console ambient lighting light emitting diodes (LEDs).
U1000:00 Solid State Driver Protection Activated -Driver Disabled: No Sub Type Information This DTC sets when the BCM has temporarily shut down the output driver. The module has temporarily disabled an output because an excessive current draw exists (such as a short to ground). The BCM cannot enable the output until the cause of the short is corrected, the Diagnostic Trouble Codes (DTCs) have been cleared and a successful self-test is run.
U3000:49 Control Module: Internal Electronic Failure This DTC sets when the BCM has permanently shut down the output driver. The module has permanently disabled an output because an excessive current draw fault (such as a short to ground) has exceeded the limits that the BCM can withstand. CORRECT the cause of the excessive current draw before installing a new BCM.

Possible Sources

  • Wiring, terminals or connectors
  • Ambient lighting LED
  • BCM

PINPOINT TEST J : ONE OR MORE OF THE AMBIENT LIGHTING LEDS ARE INOPERATIVE OR DOES NOT CHANGE COLOR
J1 CHECK THE AMBIENT LIGHTING LIGHT EMITTING DIODES (LEDS)
  • Ignition ON.
  • Place the headlamp switch in the parking lamps ON position.
  • Observe the operation of all the ambient lighting light emitting diodes (LEDs).

Are only the front door or the center console and/or footwell ambient lighting light emitting diodes (LEDs) inoperative?
Yes GO to J5
No GO to J2

J2 CHECK FOR VOLTAGE TO THE LED (LIGHT EMITTING DIODE)
  • Ignition OFF.
  • Disconnect Inoperative ambient lighting LED .
  • Ignition ON.
  • Place the headlamp switch in the parking lamps ON position.
  • Measure:
    Click to display connectors

      LH Front Footwell


    Positive Lead Measurement / Action Negative Lead
      C209-1 Ford Fusion. Interior Lighting. Diagnosis and Testing   Ground

    Click to display connectors

      RH Front Footwell


    Positive Lead Measurement / Action Negative Lead
      C266-1 Ford Fusion. Interior Lighting. Diagnosis and Testing   Ground

    Click to display connectors

      Console Front


    Positive Lead Measurement / Action Negative Lead
      C3554-1 Ford Fusion. Interior Lighting. Diagnosis and Testing   Ground

    Click to display connectors

      Console Front Center


    Positive Lead Measurement / Action Negative Lead
      C3555-1 Ford Fusion. Interior Lighting. Diagnosis and Testing   Ground

    Click to display connectors

      Storage Media Bin (China)


    Positive Lead Measurement / Action Negative Lead
      C3553-1 Ford Fusion. Interior Lighting. Diagnosis and Testing   Ground

    Click to display connectors

      Rear Footwell


    Positive Lead Measurement / Action Negative Lead
      C3552-1 Ford Fusion. Interior Lighting. Diagnosis and Testing   Ground

    Click to display connectors

      LH Front Door Handle or Map Pocket


    Positive Lead Measurement / Action Negative Lead
      C510-3 Ford Fusion. Interior Lighting. Diagnosis and Testing   Ground

    Click to display connectors

      RH Front Door Handle or Map Pocket


    Positive Lead Measurement / Action Negative Lead
      C610-3 Ford Fusion. Interior Lighting. Diagnosis and Testing   Ground

    Click to display connectors

      LH Rear Door Handle


    Positive Lead Measurement / Action Negative Lead
      C737-3 Ford Fusion. Interior Lighting. Diagnosis and Testing   Ground

    Click to display connectors

      RH Rear Door Handle


    Positive Lead Measurement / Action Negative Lead
      C837-3 Ford Fusion. Interior Lighting. Diagnosis and Testing   Ground

Is the voltage greater than 11 volts?
Yes GO to J3
No REPAIR the LED voltage supply circuit in question.

J3 CHECK THE LED (LIGHT EMITTING DIODE) GROUND CIRCUIT FOR AN OPEN
  • Measure:
    Click to display connectors

      LH Front Footwell


    Positive Lead Measurement / Action Negative Lead
      C209-1 Ford Fusion. Interior Lighting. Diagnosis and Testing   C209-3

    Click to display connectors

      RH Front Footwell


    Positive Lead Measurement / Action Negative Lead
      C266-1 Ford Fusion. Interior Lighting. Diagnosis and Testing   C266-3

    Click to display connectors

      Console Front


    Positive Lead Measurement / Action Negative Lead
      C3554-1 Ford Fusion. Interior Lighting. Diagnosis and Testing   C3554-3

    Click to display connectors

      Console Front Center


    Positive Lead Measurement / Action Negative Lead
      C3555-1 Ford Fusion. Interior Lighting. Diagnosis and Testing   C3555-3

    Click to display connectors

      Storage Media Bin (China)


    Positive Lead Measurement / Action Negative Lead
      C3553-1 Ford Fusion. Interior Lighting. Diagnosis and Testing   C3553-3

    Click to display connectors

      Rear Footwell


    Positive Lead Measurement / Action Negative Lead
      C3552-1 Ford Fusion. Interior Lighting. Diagnosis and Testing   C3552-3

    Click to display connectors

      LH Front Door Handle or Map Pocket


    Positive Lead Measurement / Action Negative Lead
      C510-3 Ford Fusion. Interior Lighting. Diagnosis and Testing   C510-4

    Click to display connectors

      RH Front Door Handle or Map Pocket


    Positive Lead Measurement / Action Negative Lead
      C610-3 Ford Fusion. Interior Lighting. Diagnosis and Testing   C610-4

    Click to display connectors

      LH Rear Door Handle


    Positive Lead Measurement / Action Negative Lead
      C737-3 Ford Fusion. Interior Lighting. Diagnosis and Testing   C737-4

    Click to display connectors

      RH Rear Door Handle


    Positive Lead Measurement / Action Negative Lead
      C837-3 Ford Fusion. Interior Lighting. Diagnosis and Testing   C837-4

Is the voltage greater than 11 volts?
Yes GO to J4
No REPAIR the ground circuit in question.

J4 CHECK THE AMBIENT LIGHTING LIN (LOCAL INTERCONNECT NETWORK) CIRCUIT FOR AN OPEN
  • Ignition OFF.
  • Turn the parking lamps off.
  • Disconnect BCM C2280D (door light emitting diodes (LEDs)).
  • Disconnect BCM C2280G (center console and footwell light emitting diodes (LEDs)).
  • Measure:
    Click to display connectors

      LH Front Footwell


    Positive Lead Measurement / Action Negative Lead
      C209-2 Ford Fusion. Interior Lighting. Diagnosis and Testing   C2280G-13

    Click to display connectors

      RH Front Footwell


    Positive Lead Measurement / Action Negative Lead
      C266-2 Ford Fusion. Interior Lighting. Diagnosis and Testing   C2280G-13

    Click to display connectors

      Console Front


    Positive Lead Measurement / Action Negative Lead
      C3554-2 Ford Fusion. Interior Lighting. Diagnosis and Testing   C2280G-13

    Click to display connectors

      Console Front Center


    Positive Lead Measurement / Action Negative Lead
      C3555-2 Ford Fusion. Interior Lighting. Diagnosis and Testing   C2280G-13

    Click to display connectors

      Storage Media Bin (China)


    Positive Lead Measurement / Action Negative Lead
      C3553-2 Ford Fusion. Interior Lighting. Diagnosis and Testing   C2280G-13

    Click to display connectors

      Rear Footwell


    Positive Lead Measurement / Action Negative Lead
      C3552-2 Ford Fusion. Interior Lighting. Diagnosis and Testing   C2280G-13

    Click to display connectors

      LH Front Door Handle or Map Pocket


    Positive Lead Measurement / Action Negative Lead
      C510-1 Ford Fusion. Interior Lighting. Diagnosis and Testing   C2280D-38

    Click to display connectors

      RH Front Door Handle or Map Pocket


    Positive Lead Measurement / Action Negative Lead
      C610-1 Ford Fusion. Interior Lighting. Diagnosis and Testing   C2280D-38

    Click to display connectors

      LH Rear Door Handle


    Positive Lead Measurement / Action Negative Lead
      C737-1 Ford Fusion. Interior Lighting. Diagnosis and Testing   C2280D-38

    Click to display connectors

      RH Rear Door Handle


    Positive Lead Measurement / Action Negative Lead
      C837-1 Ford Fusion. Interior Lighting. Diagnosis and Testing   C2280D-38

Is the resistance less than 3 ohms?
Yes INSTALL a new ambient lighting LED in question.
No REPAIR the circuit.

J5 CHECK THE AMBIENT LIGHTING LIN (LOCAL INTERCONNECT NETWORK) FOR AN OPEN
  • Ignition OFF.
  • Turn the parking lamps off.
  • Disconnect BCM C2280D (door light emitting diodes (LEDs)).
  • Disconnect LH Front Door Handle and Map Pocket Ambient Lighting Light Emitting Diodes (LEDs) C510 .
  • Disconnect RH Front Door Handle and Map Pocket Ambient Lighting Light Emitting Diodes (LEDs) C610 .
  • Disconnect LH Rear Door Handle LED C737 .
  • Disconnect RH Rear Door Handle LED C837 .
  • Disconnect BCM C2280G (center console and footwell light emitting diodes (LEDs)).
  • Disconnect LH Front Footwell Ambient Lighting LED C209 (Footwell light emitting diodes (LEDs)).
  • Disconnect Inline C340 (center console light emitting diodes (LEDs)).
  • For door light emitting diodes (LEDs), measure:
    Click to display connectors
    Positive Lead Measurement / Action Negative Lead
      C510-1 Ford Fusion. Interior Lighting. Diagnosis and Testing   C2280D-38
  • For footwell light emitting diodes (LEDs), measure:
    Click to display connectors
    Positive Lead Measurement / Action Negative Lead
      C209-2 Ford Fusion. Interior Lighting. Diagnosis and Testing   C2280G-13
  • For center console light emitting diodes (LEDs), measure:
    Click to display connectors
    Positive Lead Measurement / Action Negative Lead
      C340-32 Ford Fusion. Interior Lighting. Diagnosis and Testing   C2280G-13

Is the resistance less than 3 ohms?
Yes GO to J6
No REPAIR the circuit.

J6 CHECK THE AMBIENT LIGHTING LIN (LOCAL INTERCONNECT NETWORK) FOR A SHORT TO VOLTAGE
  • Connect Inline C340 (center console light emitting diodes (LEDs)).
  • Disconnect RH Front Footwell Ambient Lighting LED C266 and all of the center console ambient lighting light emitting diodes (LEDs) (center console and footwell light emitting diodes (LEDs)).
  • Ignition ON.
  • For door light emitting diodes (LEDs), measure:
    Click to display connectors
    Positive Lead Measurement / Action Negative Lead
      C2280D-38 Ford Fusion. Interior Lighting. Diagnosis and Testing   Ground
  • For footwell and center console light emitting diodes (LEDs), measure:
    Click to display connectors
    Positive Lead Measurement / Action Negative Lead
      C2280G-13 Ford Fusion. Interior Lighting. Diagnosis and Testing   Ground

Is any voltage present?
Yes REPAIR the circuit.
No GO to J7

J7 CHECK THE AMBIENT LIGHTING LIN (LOCAL INTERCONNECT NETWORK) FOR A SHORT TO GROUND
  • Ignition OFF.
  • For door light emitting diodes (LEDs), measure:
    Click to display connectors
    Positive Lead Measurement / Action Negative Lead
      C2280D-38 Ford Fusion. Interior Lighting. Diagnosis and Testing   Ground
  • For footwell and center console light emitting diodes (LEDs), measure:
    Click to display connectors
    Positive Lead Measurement / Action Negative Lead
      C2280G-13 Ford Fusion. Interior Lighting. Diagnosis and Testing   Ground

Is the resistance greater than 10,000 ohms?
Yes GO to J8
No REPAIR the circuit.

J8 CHECK FOR CORRECT BCM (BODY CONTROL MODULE) OPERATION
  • Disconnect and inspect all BCM connectors.
  • Repair:
    • corrosion (install new connector or terminals – clean module pins)
    • damaged or bent pins – install new terminals/pins
    • pushed-out pins – install new pins as necessary
  • Reconnect the BCM connectors. Make sure they seat and latch correctly.
  • Operate the system and determine if the concern is still present.

Is the concern still present?
Yes CHECK OASIS for any applicable service articles: TSB, GSB, SSM or FSA. If a service article exists for this concern, DISCONTINUE this test and FOLLOW the service article instructions. If no service articles address this concern,
Ford Fusion. Interior Lighting. Diagnosis and Testing   Click here to access Guided Routine (BCM).Ford Fusion. Interior Lighting. Diagnosis and Testing Internet Explorer version 11 or greater is required to perform this Pinpoint Test.
No The system is operating correctly at this time. The concern may have been caused by module connections. ADDRESS the root cause of any connector or pin issues. CLEAR the Diagnostic Trouble Codes (DTCs).


    Interior Lighting - System Operation and Component Description. Description and Operation

    S..

    Electrical Distribution

    ..

    Other information:

    Ford Fusion 2013–2020 Owners Manual: Using the Key Blade


    The key cylinder is under a cap on the driver door handle. To remove the cap: Insert the key blade into the slot on the bottom of the handle and apply upward pressure. While maintaining upward pressure, move the cap rearward to release it. Gently remove the key while doing so. To install the cap: Place the cap just forward of the key cylinder. Applying pressure to the cap, move..

    Ford Fusion 2013–2020 Owners Manual: Cross Traffic Alert (IF EQUIPPED)


    WARNING: Do not use the cross traffic alert system as a replacement for using the interior and exterior mirrors or looking over your shoulder before reversing out of a parking space. The cross traffic alert system is not a replacement for careful driving. WARNING: The system may not operate properly during severe weather conditions, for example snow, ice, heavy rain and spray. Always driv..

    Categories

    Child Safety Locks

    When these locks are set, the rear doors cannot be opened from the inside.

    Ford Fusion. Child Safety Locks

    read more

    Copyright © 2024 www.fofusion2.com