Ford Fusion: Body Closures / Hood Alignment. General Procedures
Adjustment
NOTE:
Removal steps in this procedure may contain installation details.
All alignments
-
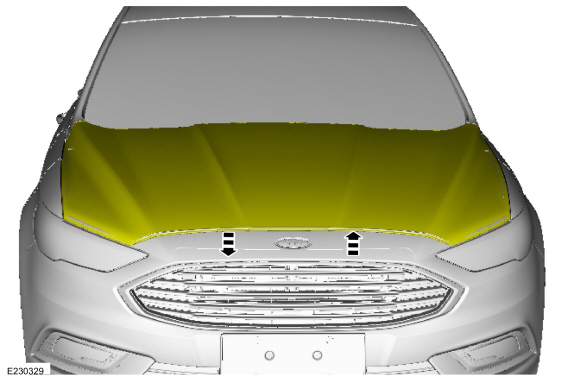
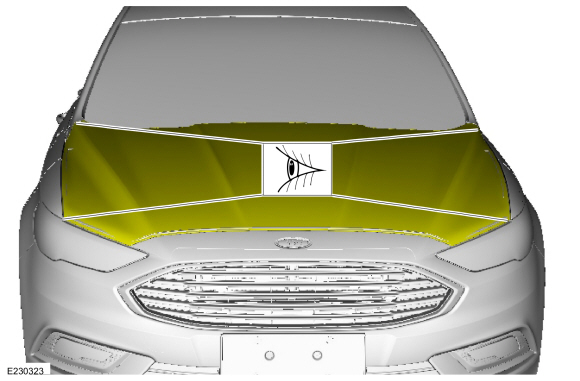
Inspect the hood-to-body dimensions.
Refer to: Body and Frame (501-26 Body Repairs - Vehicle Specific Information and Tolerance Checks, Description and Operation).
-
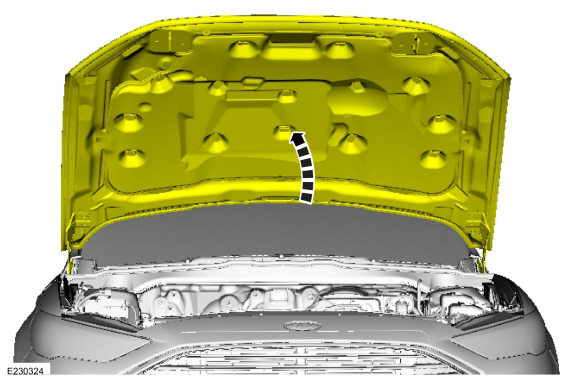
Open the hood.
-
Remove the hood latch.
Refer to: Hood Latch (501-14 Handles, Locks, Latches and Entry Systems, Removal and Installation).
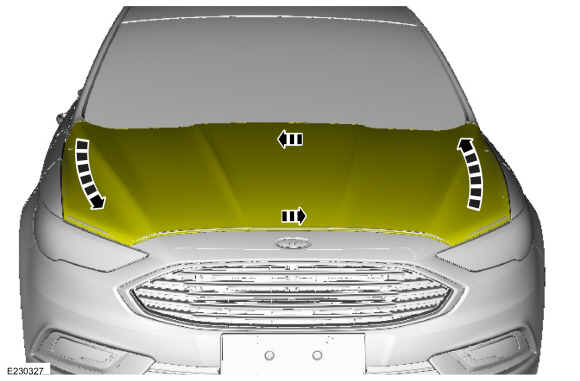
Hood fore and aft, left and right alignments
-
Loosen the nuts enough to permit movement of the hood.
-
Carefully close the hood.
-
Adjust the hood to specification.
Refer to: Body and Frame (501-26 Body Repairs - Vehicle Specific Information and Tolerance Checks, Description and Operation).
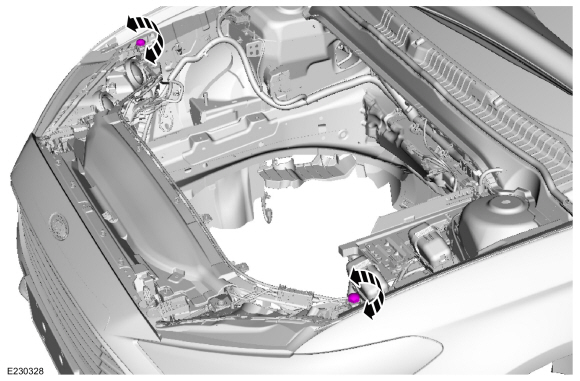
-
Carefully open the hood.
-
Tighten the nuts.
Torque:
18 lb.ft (25 Nm)
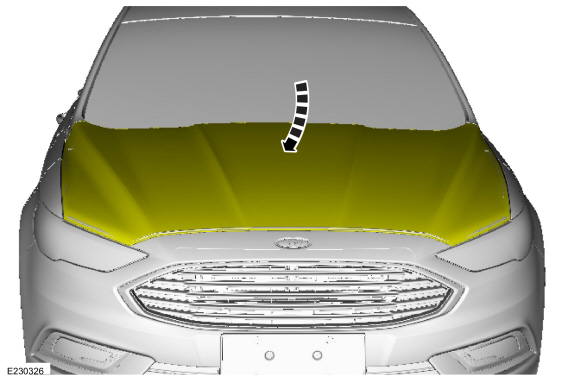
Hood front up and down alignments
-
Adjust the bump stop rubber.
-
Carefully close the hood.
-
Adjust the hood to specification.
Refer to: Body and Frame (501-26 Body Repairs - Vehicle Specific Information and Tolerance Checks, Description and Operation).
All alignments
-
Install the hood latch.
Refer to: Hood Latch (501-14 Handles, Locks, Latches and Entry Systems, Removal and Installation).
-
Inspect the body-to-hood dimensions.
Refer to: Body and Frame (501-26 Body Repairs - Vehicle Specific Information and Tolerance Checks, Description and Operation).
Adjustment
NOTE:
Removal steps in this procedure may contain installation details.
NOTE:
LH shown, RH similar.
All alignments
Check the body to front door dimensions...
Check
Check the body to luggage compartment lid dimensions.
Refer to: Body and Frame (501-26 Body Repairs - Vehicle Specific Information and Tolerance Checks, Description and Operation)...
Other information:
Note: Depending on your vehicle option
package, the controls may look different
from what you see here.
Note: You can switch temperature units
between Fahrenheit and Celsius.
Setting the Blower Motor Speed
Press and release + or - to
adjust
the volume of air circulated in
the vehicle...
B0082:11, B0082:12, B0082:13 and B0082:1A
Refer to Wiring Diagrams Cell 46 for schematic and connector information.
Normal Operation and Fault Conditions
The RCM continuously monitors the passenger seatbelt load limiter circuits for the following faults:
Resistance out of range
Unexpected voltage
Short to ground
Faulted passenger seatbelt load limiter
If a faul..


 Front Door Alignment. General Procedures
 Luggage Compartment Lid Alignment. General Procedures