Ford Fusion: Fuel Charging and Controls - 1.5L EcoBoost (118kW/160PS) – I4 / High-Pressure Fuel Pump. Removal and Installation
Materials
| Name | Specification |
|---|---|
| Engine Oil - SAE 5W-20 - Synthetic Blend Motor Oil XO-5W20-Q1SP |
WSS-M2C945-B1 |
Removal
NOTICE: Do not loosen any fittings or plugs on the high-pressure fuel pump.
-
Release the fuel system pressure.
Refer to: Fuel System Pressure Release (310-00A Fuel System - General Information - 1.5L EcoBoost (118kW/160PS) – I4, General Procedures).
-
Disconnect the battery.
Refer to: Battery Disconnect and Connect (414-01 Battery, Mounting and Cables, General Procedures).
-
-
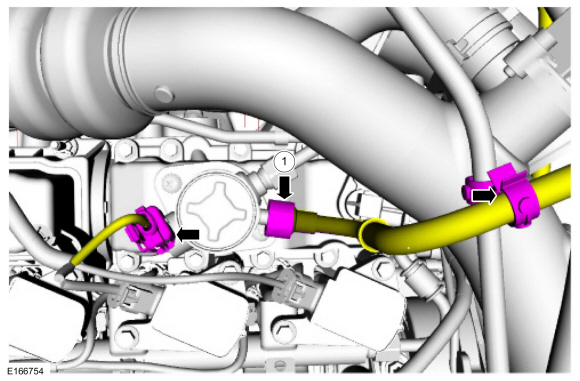
Disconnect the high-pressure fuel pump fuel feed tube spring lock coupling.
Refer to: Spring Lock Couplings (310-00A Fuel System - General Information - 1.5L EcoBoost (118kW/160PS) – I4, General Procedures).
-
Disconnect the high-pressure fuel pump electrical connector.
-
Disconnect the high-pressure fuel pump fuel feed tube spring lock coupling.
 |
-
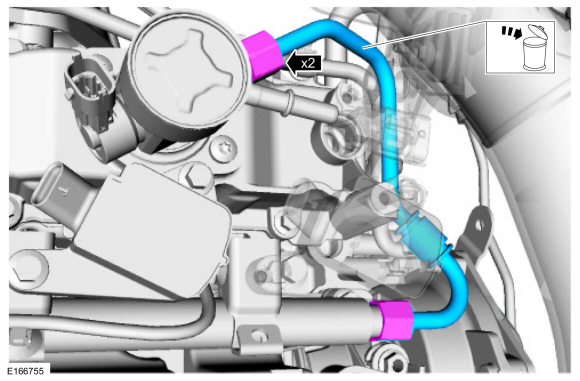
NOTICE: To release the fuel pressure in the high pressure fuel tube, wrap the high-pressure fuel pump flare nut with a shop towel to absorb any residual fuel pressure during the loosening of high-pressure fuel pump flare nut.
Disconnect the high-pressure fuel tube flare nuts. Remove and discard the high-pressure fuel tube.
 |
-
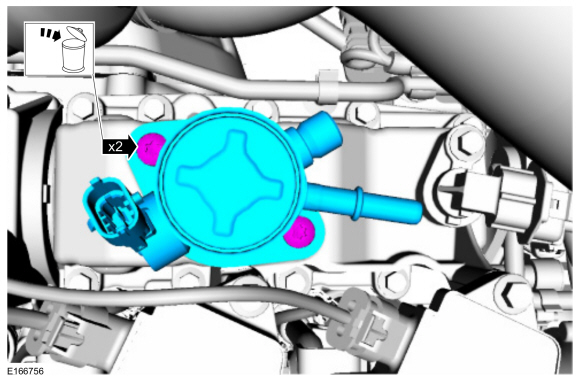
NOTE: Alternately loosen the high-pressure fuel pump bolts one complete revolution at a time.
Remove the high-pressure fuel pump bolts and then remove the high-pressure fuel pump.
 |
-
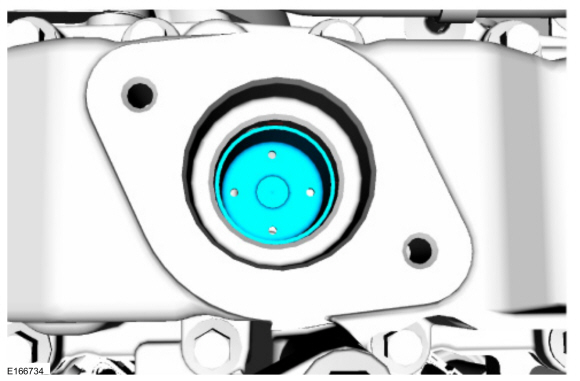
Remove the high-pressure fuel pump drive tappet.
 |
-
Inspect the high-pressure fuel pump tappet. If any flat
spots or scoring are found, especially in the indicated areas, then
inspect the high-pressure fuel pump and the high-pressure fuel pump
tappet drive lobe. Install new components as necessary.
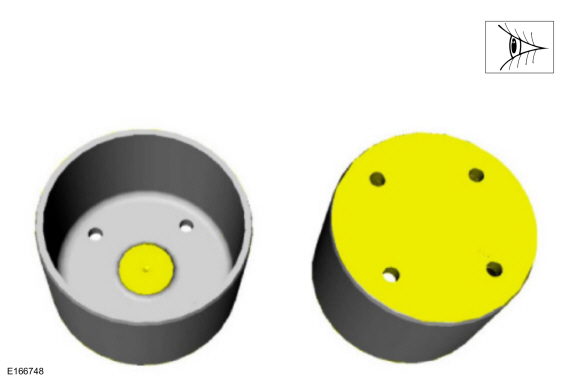 |
Installation
-
The cam lobe for the high-pressure fuel pump must be at BDC for the high-pressure fuel pump installation.
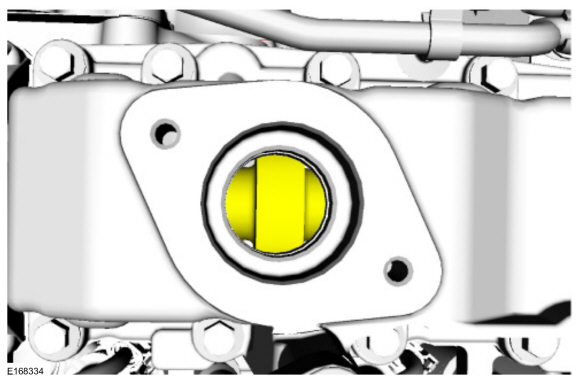 |
-
NOTICE: Only rotate the crankshaft Clockwise (CW) or damage to the engine may occur.
Using the crankshaft pulley bolt, turn the crankshaft until the high-pressure fuel pump cam lobe is at BDC.
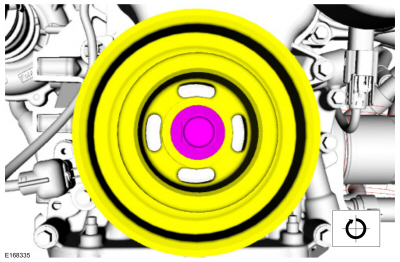 |
-
Apply clean engine oil to the high-pressure fuel pump
drive unit bore and the drive lobe and the roller tappet. Install the
high-pressure fuel pump tappet.
Material: Engine Oil - SAE 5W-20 - Synthetic Blend Motor Oil / XO-5W20-Q1SP (WSS-M2C945-B1)
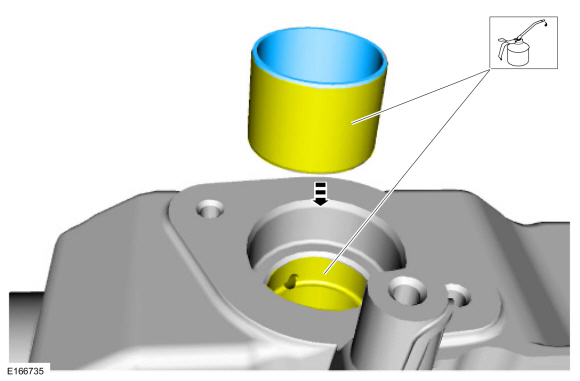 |
-
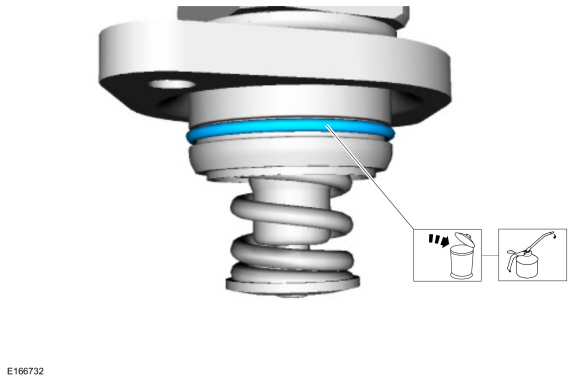
Install a new high-pressure fuel pump O-ring seal. Lubricate with clean engine oil.
Material: Engine Oil - SAE 5W-20 - Synthetic Blend Motor Oil / XO-5W20-Q1SP (WSS-M2C945-B1)
 |
-
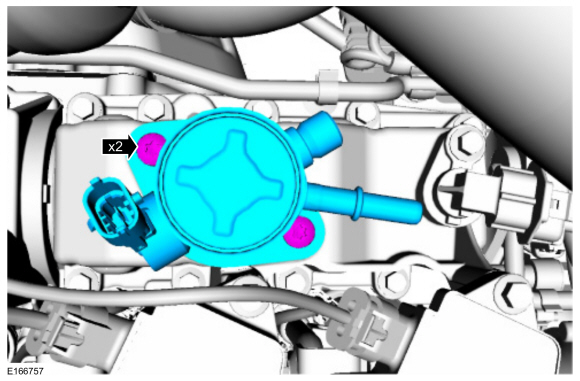
NOTE: Make sure that 2 new high-pressure fuel pump mounting bolts are installed.
Install the high-pressure fuel pump and loosely install the high-pressure fuel pump bolts, alternately tighten each bolt 90° at a time in turn until the torque is achieved.
Torque: 80 lb.in (9 Nm)
 |
-
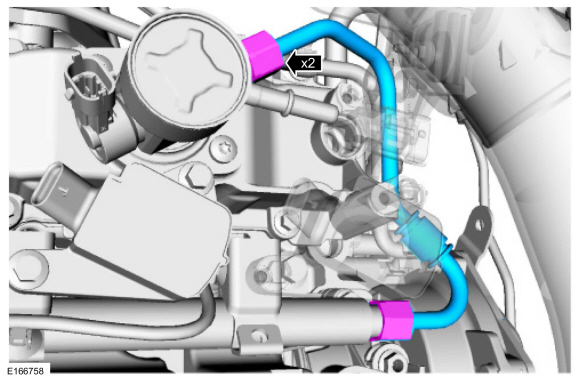
NOTE: Only tighten the 2 high pressure fuel tube flare nuts finger tight at this stage.
NOTE: Make sure that a new high pressure fuel tube is installed.
NOTE: Calculate the correct torque wrench setting for the following torque using the Torque Wrench Adapter Formulas.
Tighten the high-pressure fuel tube flare nuts in the following 3 stages.
Torque:
Stage 1: 15 lb.ft (21 Nm)
Stage 2: Wait 5min
Stage 3: 15 lb.ft (21 Nm)
 |
-
-
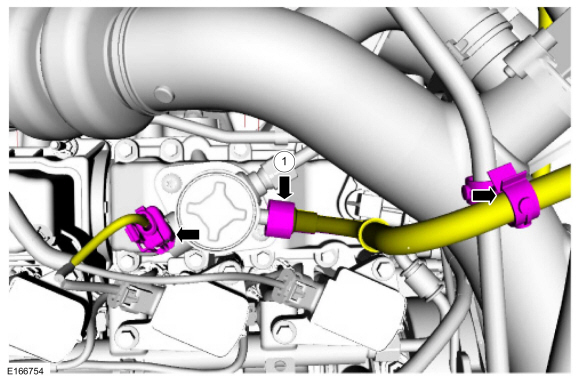
Connect the high-pressure fuel pump fuel feed tube spring lock coupling.
Refer to: Spring Lock Couplings (310-00A Fuel System - General Information - 1.5L EcoBoost (118kW/160PS) – I4, General Procedures).
-
Connect the high-pressure fuel pump electrical connector.
-
Connect the high-pressure fuel pump fuel feed tube spring lock coupling.
 |
-
Connect the battery.
Refer to: Battery Disconnect and Connect (414-01 Battery, Mounting and Cables, General Procedures).
-
Pressurize the fuel system.
Refer to: Fuel System Pressure Release (310-00A Fuel System - General Information - 1.5L EcoBoost (118kW/160PS) – I4, General Procedures).
 Fuel Rail. Removal and Installation
Special Tool(s) /
General Equipment
303-1567Sizer, Teflon SealTKIT-2010C-FLM
307-005
(T59L-100-B)
Slide Hammer
310-205Fuel Injector Brush
310-206Remover, Fuel InjectorTKIT-2009A-FLM
310-206-01Adapter for 310-206
310-207Installer, Fuel Injector Seal AssemblyTKIT-2009A-FLM
Removal
Release the fuel system pressure...
 High-Pressure Fuel Pump Drive Unit. Removal and Installation
Materials
Name
Specification
Flange SealantCU7Z-19B508-A
WSS-M2G348-A11
Motorcraft® Metal Surface Prep WipesZC-31-B
-
Removal
Remove the high-pressure fuel pump...
Other information:
Ford Fusion 2013–2020 Service Manual: Engine Cooling System Flushing. General Procedures
Materials Name Specification Motorcraft® Premium Cooling System FlushVC-1 ESR-M14P7-A Flushing WARNING: Always allow the engine to cool before opening the cooling system. Do not unscrew the coolant pressure relief cap when the engine is operating or the cooling system is hot...
Ford Fusion 2013–2020 Service Manual: Rear Active Park Assist Sensors. Removal and Installation
Removal Remove the rear bumper cover. Refer to: Rear Bumper Cover (501-19 Bumpers, Removal and Installation). Disconnect the electrical connector. Release the tabs. Remove the active park assist sensor...
Categories
- Manuals Home
- 2nd Generation Ford Fusion Owners Manual
- 2nd Generation Ford Fusion Service Manual
- Cylinder Head. Removal and Installation
- Intake Manifold. Removal and Installation
- Electrical
- New on site
- Most important about car
Manual Climate Control
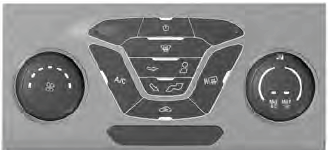
Note: Depending on your vehicle option package, the controls may look different from what you see here.
