Ford Fusion: Front End Sheet Metal Repairs / Fender Apron Panel Reinforcement. Removal and Installation
Ford Fusion 2013–2020 Service Manual / Body and Paint / Body and Paint / Front End Sheet Metal Repairs / Fender Apron Panel Reinforcement. Removal and Installation
Special Tool(s) / General Equipment
| Resistance Spotwelding Equipment | |
| Spherical Cutter | |
| Grinder | |
| 8 mm Drill Bit | |
| MIG/MAG Welding Equipment | |
| Spot Weld Drill Bit | |
| Locking Pliers |
Materials
| Name | Specification |
|---|---|
| Seam Sealer TA-2-B, 3M™ 08308, LORD Fusor® 803DTM |
- |
Removal
-
Follow the health and safety precautions. WARNING:
Before beginning any service procedure in this
section, refer to Safety Warnings in section 100-00 General Information.
Failure to follow this instruction may result in serious personal
injury.
WARNING:
Before beginning any service procedure in this
section, refer to Safety Warnings in section 100-00 General Information.
Failure to follow this instruction may result in serious personal
injury.
Refer to: Health and Safety Precautions (100-00 General Information, Description and Operation).
-
Remove the following items.
Refer to: Fender (501-02 Front End Body Panels, Removal and Installation).
Refer to: Battery Tray (414-01 Battery, Mounting and Cables, Removal and Installation).
Refer to: Front Bumper Cover (501-19 Bumpers, Removal and Installation).
Refer to: Front Door (501-03 Body Closures, Removal and Installation).
-
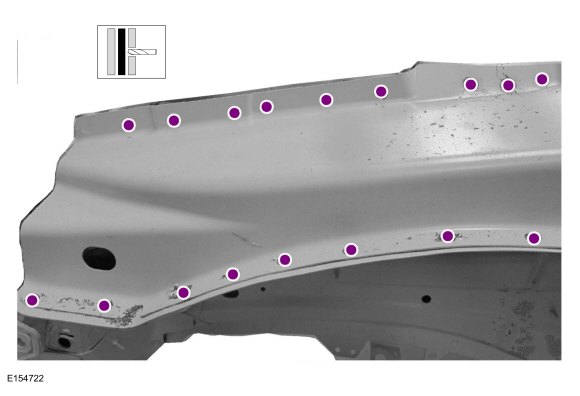
Drill out the spot welds.
Use the General Equipment: Spot Weld Drill Bit
 |
-
Grind welds at rear flange of the apron reinforcement panel and remove the spot welds.
Use the General Equipment: Spot Weld Drill Bit
Use the General Equipment: Grinder
 |
-
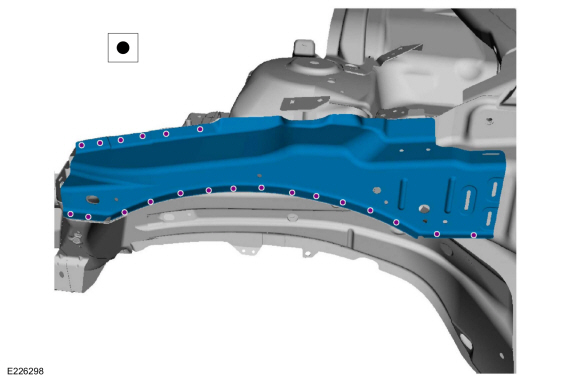
Remove the fender apron reinforcement panel.
 |
-
Drill out the spot welds.
Use the General Equipment: Spot Weld Drill Bit
 |
-
Remove the fender apron reinforcement and bracket.
 |
Installation
-
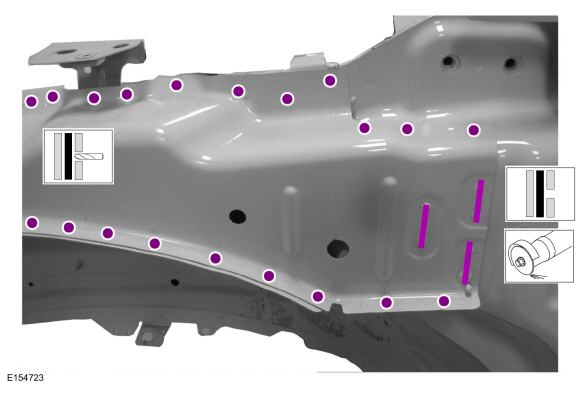
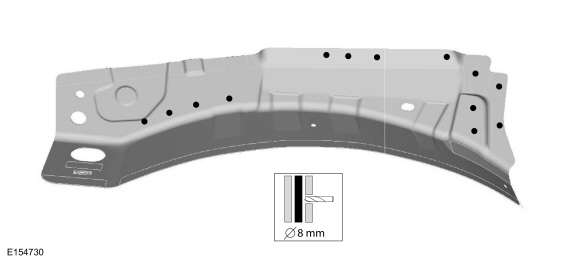
Drill plug welds holes in replacement panel.
Use the General Equipment: 8 mm Drill Bit
 |
-
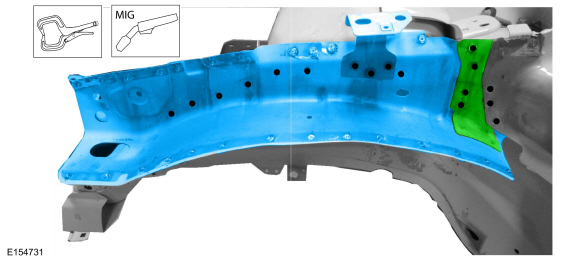
Install and plug weld the fender apron reinforcement bracket.
Use the General Equipment: MIG/MAG Welding Equipment
Use the General Equipment: Locking Pliers
 |
-
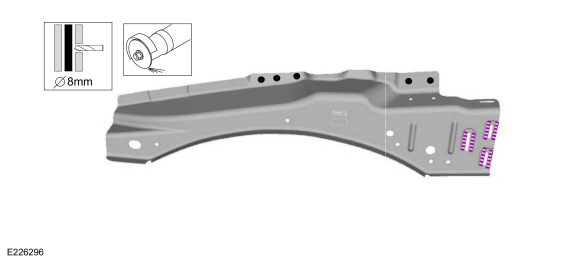
Drill plug weld holes and cut seam weld grooves in replacement panel.
Use the General Equipment: 8 mm Drill Bit
Use the General Equipment: Spherical Cutter
 |
-
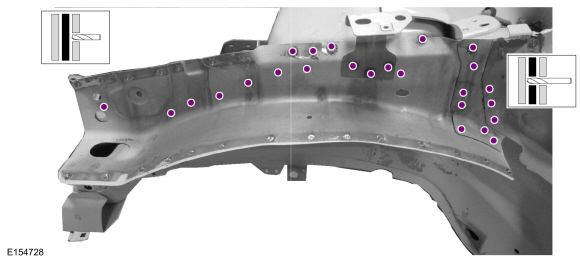
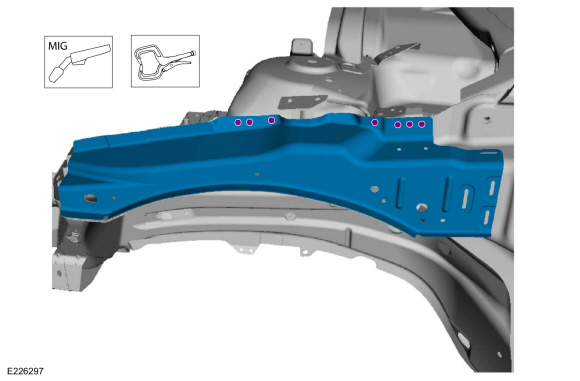
Install the fender apron reinforcement panel and plug welds.
Use the General Equipment: Locking Pliers
Use the General Equipment: MIG/MAG Welding Equipment
 |
-
Install spot welds.
Use the General Equipment: Resistance Spotwelding Equipment
 |
-
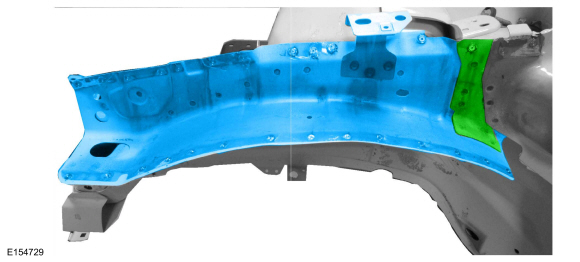
Sealing work: All areas must be sealed to production level.
Material: Seam Sealer / TA-2-B, 3M™ 08308, LORD Fusor® 803DTM
-
Refinish the repair area using a Ford approved paint system.
-
Restore corrosion protection.
Refer to: Corrosion Prevention (501-25 Body Repairs - General Information, General Procedures).
-
Install the following items.
Refer to: Fender (501-02 Front End Body Panels, Removal and Installation).
Refer to: Battery Tray (414-01 Battery, Mounting and Cables, Removal and Installation).
Refer to: Front Bumper Cover (501-19 Bumpers, Removal and Installation).
Refer to: Front Door (501-03 Body Closures, Removal and Installation).
Refer to: Front Door Alignment (501-03 Body Closures, General Procedures).

 Front Crossmember. Removal and Installation
Removal
Remove the underbody shields.
Remove the fasteners and the front crossmember.
Installation
NOTE:
Install and hand tighten all fasteners before tightening to specification...
Other information:
Ford Fusion 2013–2020 Owners Manual: Memory Function
WARNING: Before activating the memory seat, make sure that the area immediately surrounding the seat is clear of obstructions and that all occupants are clear of moving parts. WARNING: Do not use the memory function when your vehicle is moving. This feature recalls the position of the following features: Driver seat...
Ford Fusion 2013–2020 Service Manual: Voice Microphone. Removal and Installation
Removal NOTE: Removal steps in this procedure may contain installation details. WARNING: Before beginning any service procedure in this section, refer to Safety Warnings in section 100-00 General Information. Failure to follow this instruction may result in serious personal injury...
Categories
- Manuals Home
- 2nd Generation Ford Fusion Owners Manual
- 2nd Generation Ford Fusion Service Manual
- Electrical
- Under Hood Overview - 1.5L EcoBoost™, 2.0L EcoBoost™, 2.5L, 2.7L EcoBoost™
- Pre-Collision Assist (IF EQUIPPED)
- New on site
- Most important about car
Power Door Locks
The power door lock control is on the driver and front passenger door panels.

Copyright © 2026 www.fofusion2.com