Ford Fusion: Engine - 1.5L EcoBoost (118kW/160PS) – I4 / Variable Camshaft Timing (VCT) Unit. Removal and Installation
Special Tool(s) /
General Equipment
 |
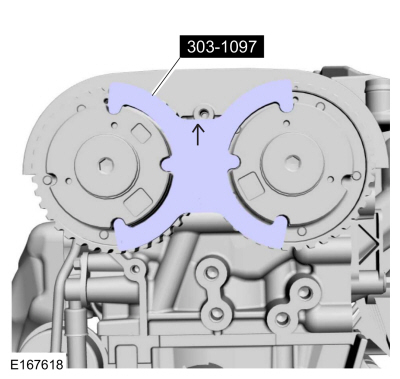
303-1097
Locking Tool, Variable Camshaft Timing Oil Control Unit
TKIT-2010B-FLM
TKIT-2010B-ROW |
 |
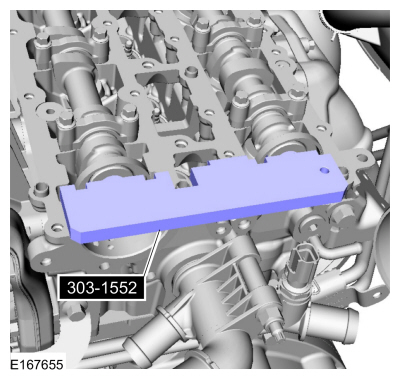
303-1552
Alignment Tool, Camshaft
TKIT-2012A-FL
TKIT-2012A-ROW |
| Hot Air Gun |
| Hose Clamp Remover/Installer |
Materials
| Name |
Specification |
Flange Sealant
CU7Z-19B508-A |
WSS-M2G348-A11
|
Motorcraft® Metal Surface Prep Wipes
ZC-31-B |
-
|
Flange Sealant - Anaerobic
Loctite® 51031 |
WSK-M2G348-A7
|
Removal
NOTICE:
Do not loosen or remove the crankshaft pulley bolt without
first installing the special tools. The crankshaft pulley and the
crankshaft timing sprocket are not keyed to the crankshaft. Before any
repair requiring loosening or removal of the crankshaft pulley bolt, the
crankshaft and camshafts must be locked in place by the special service
tools, otherwise severe engine damage can occur.
NOTE:
During engine repair procedures, cleanliness is extremely
important. Any foreign material, including any material created while
cleaning gasket surfaces, that enters the oil passages, coolant passages
or the oil pan can cause engine failure.
-
Remove the following items:
-
Remove the high-pressure fuel pump.
Refer to: High-Pressure Fuel Pump (303-04A Fuel Charging and Controls - 1.5L EcoBoost (118kW/160PS) – I4, Removal and Installation).
-
Remove the upper air cleaner outlet pipe.
Refer to: Air Cleaner Outlet Pipe (303-12A Intake Air Distribution and Filtering - 1.5L EcoBoost (118kW/160PS) – I4, Removal and Installation).
-
Remove the air cleaner.
Refer to: Air Cleaner (303-12A Intake Air Distribution and Filtering - 1.5L EcoBoost (118kW/160PS) – I4, Removal and Installation).
-
-
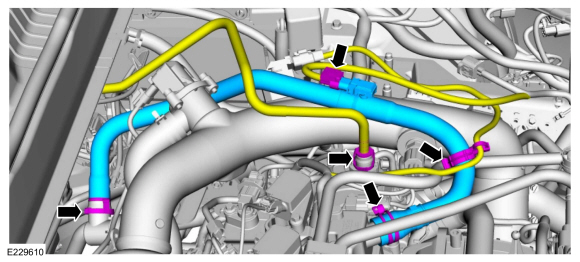
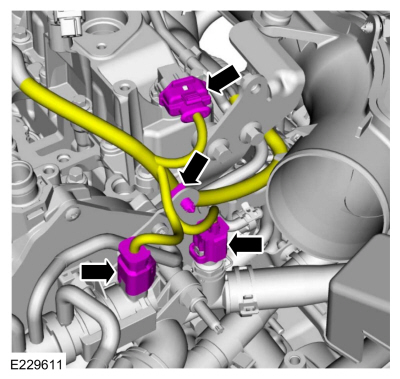
Disconnect the wiring harness electrical connector and retainer.
-
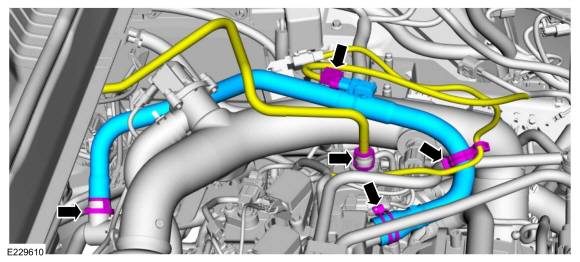
Disconnect the coupling release the clamp and remove the PCV hose.
Use the General Equipment: Hose Clamp Remover/Installer
-
Disconnect and position the brake vacuum hose aside.
-
-
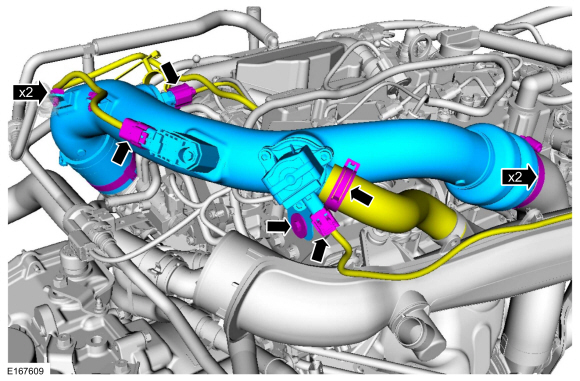
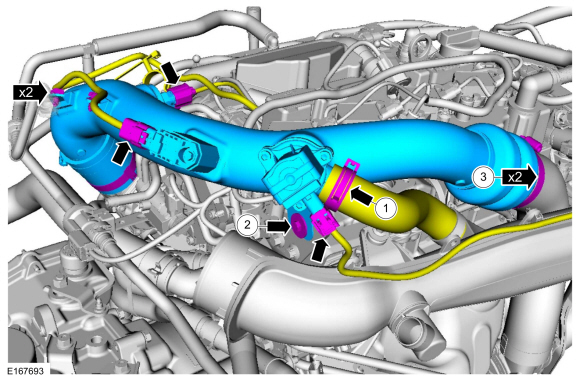
Detach the retainers and disconnect the electrical connectors.
-
Disconnect the TC bypass hose.
-
Loosen the clamps, remove the bolt and the TC outlet pipe.
Use the General Equipment: Hose Clamp Remover/Installer
-
Remove the following items:
-
Remove the valve cover.
Refer to: Valve Cover (303-01A Engine - 1.5L EcoBoost (118kW/160PS) – I4, Removal and Installation).
-
Remove the timing belt.
Refer to: Timing Belt (303-01A Engine - 1.5L EcoBoost (118kW/160PS) – I4, Removal and Installation).
-
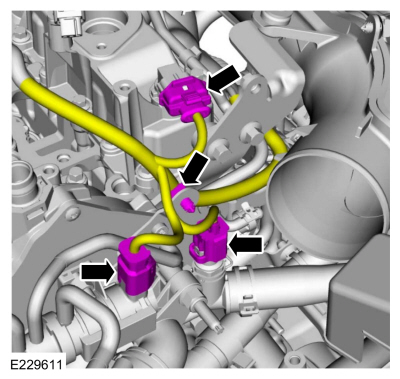
Disconnect the wiring harness electrical connectors and retainer.
-
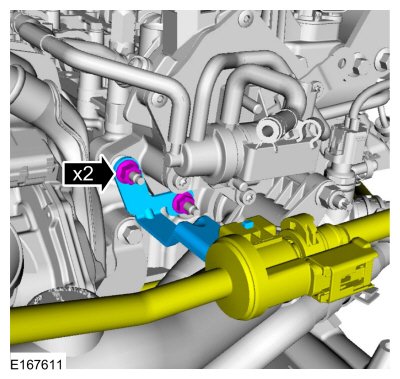
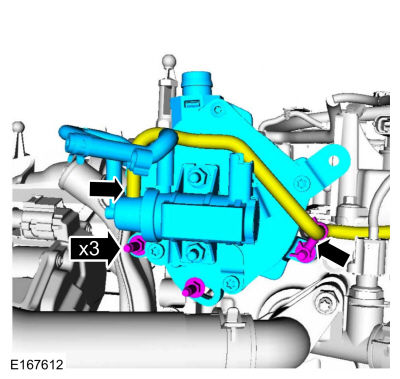
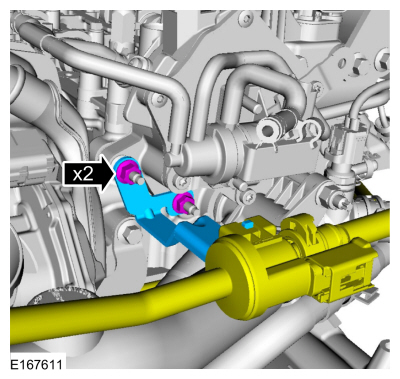
Remove the nuts, bracket and position the EVAP canister purge valve aside.
-
-
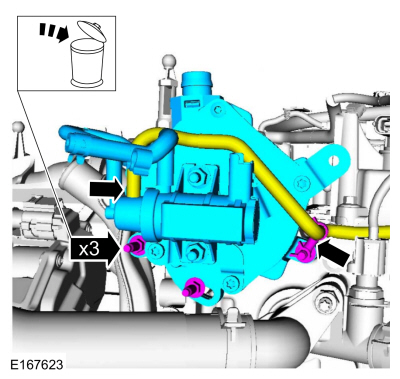
Detach the retainer and disconnect the vacuum hose.
-
Remove the stud bolts and the vacuum pump. Discard the stud bolts.
-
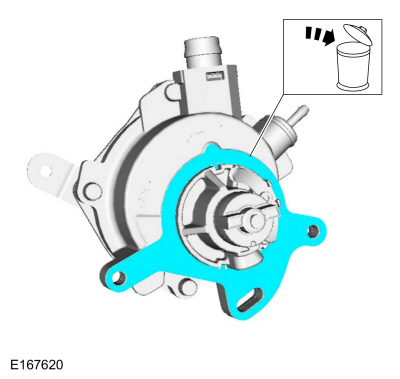
Remove and discard the vacuum pump gasket.
-
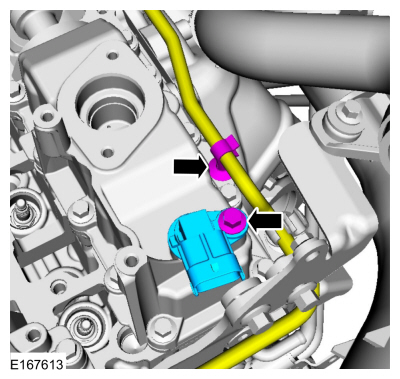
Detach the retainer, remove the bolt and the exhaust CMP sensor.
-
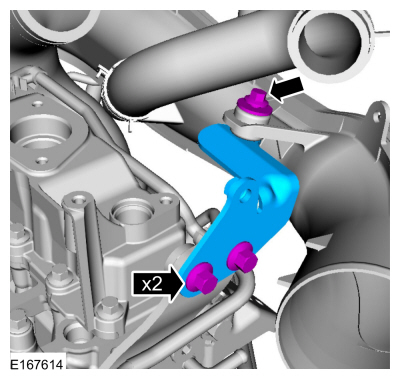
Remove the bolts and the support bracket.
-
-
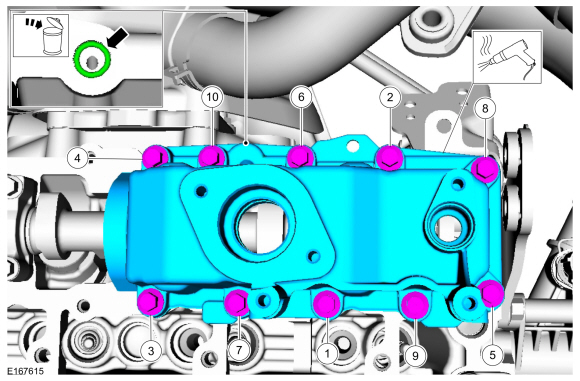
Remove the bolts, heat and break the adhesive bond and remove the high-pressure fuel pump drive unit.
Use the General Equipment: Hot Air Gun
-
Remove and discard the O-ring seal.
-
-
Remove the engine cover mounting stud.
-
Remove the bolts and the stud.
-
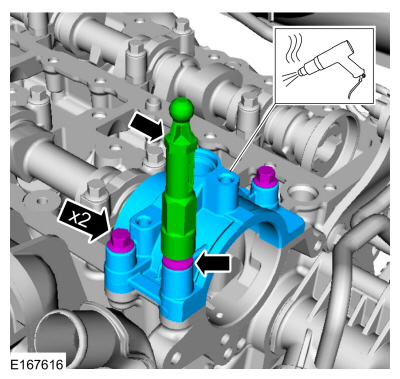
Heat and break the adhesive bond and remove the brake vacuum pump cap.
Use the General Equipment: Hot Air Gun
-
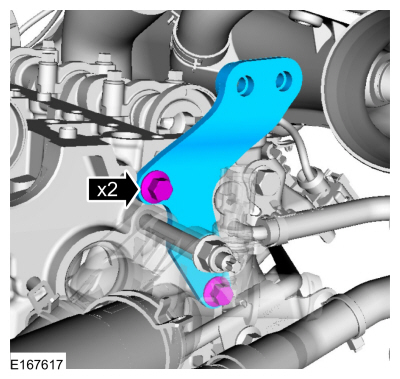
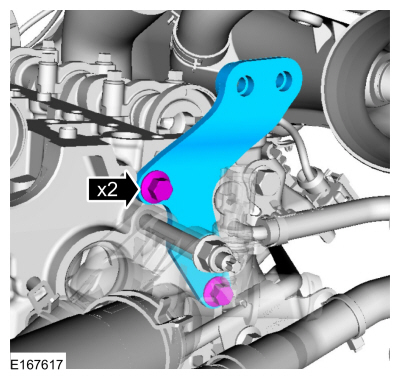
Remove the bolts and the engine lifting bracket.
-
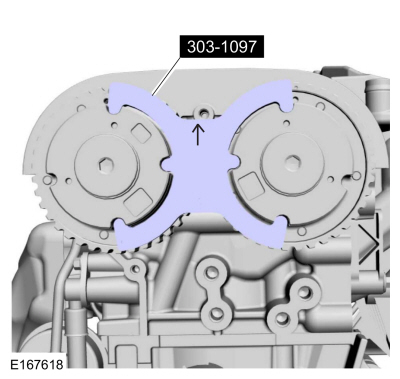
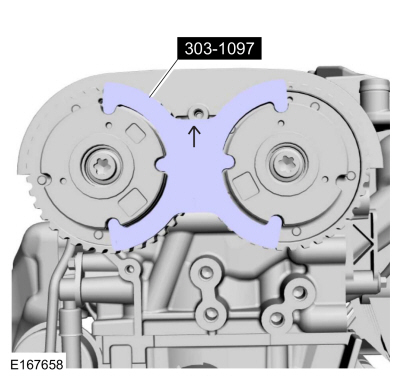
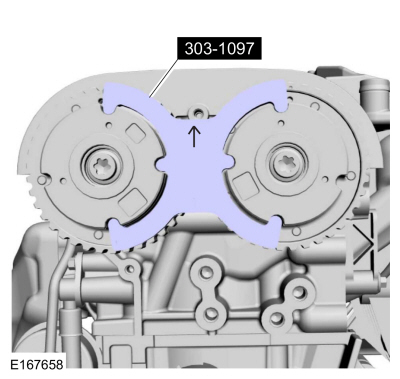
Remove Special Service Tool: 303-1097
Locking Tool, Variable Camshaft Timing Oil Control Unit.
-
NOTE:
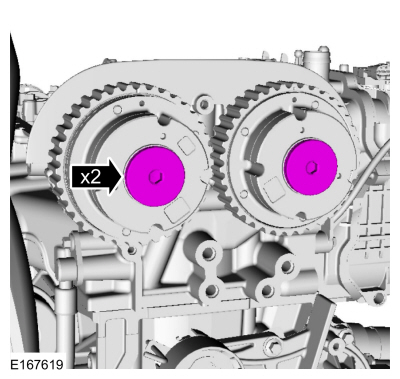
Use an open-ended wrench to hold the camshafts by the hexagon to prevent the camshafts from turning.
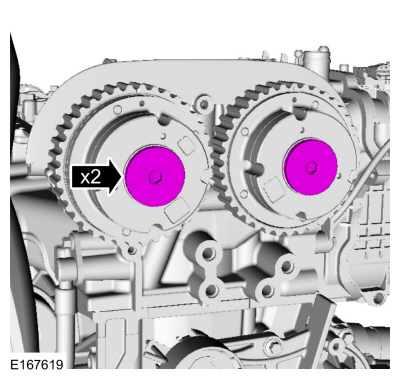
Remove the VCT unit caps.
-
NOTE:
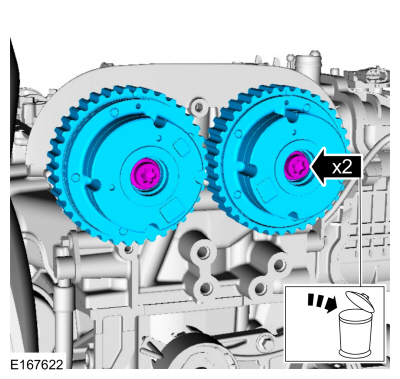
Use an open-ended wrench to hold the camshafts by the hexagon to prevent the camshafts from turning.
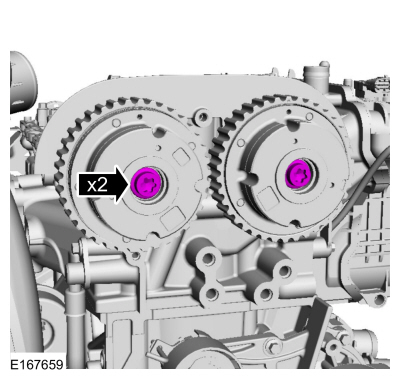
Remove the bolts and the VCT unit. Discard the bolts.
Installation
-
NOTE:
It may be necessary to use an open-ended wrench to turn the camshafts by the hexagon to align the camshafts.
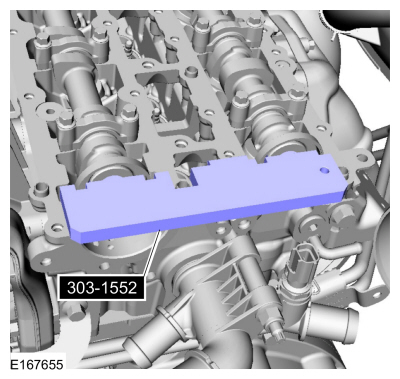
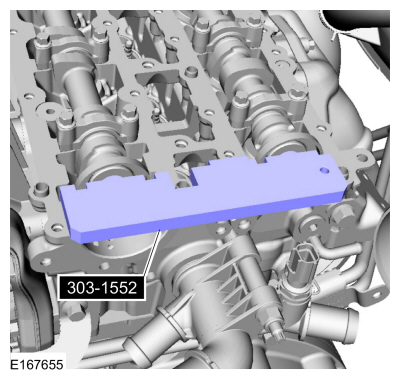
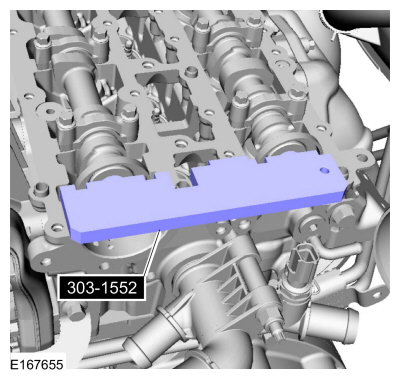
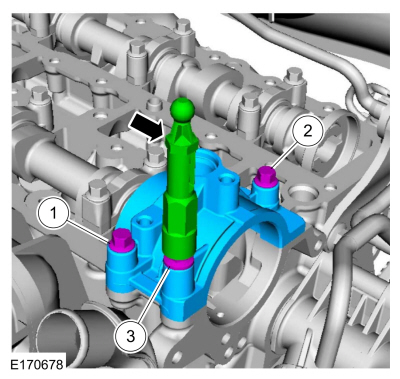
Install Special Service Tool: 303-1552
Alignment Tool, Camshaft.
-
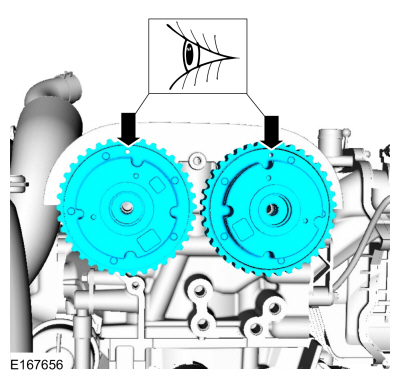
Install the VCT unit at the 12 o'clock position.
-
NOTE:
The timing mark of each VCT unit must be at the 12 o'clock position.
NOTE:
Use an open-ended wrench to hold the camshafts by the hexagon to prevent the camshafts from turning.
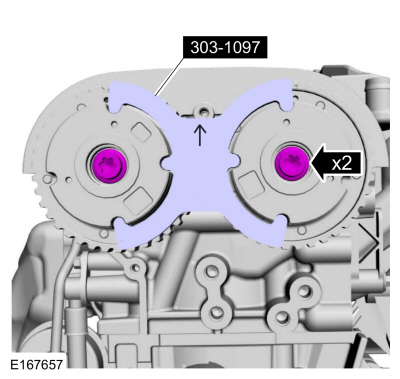
Install the new VCT unit bolts.
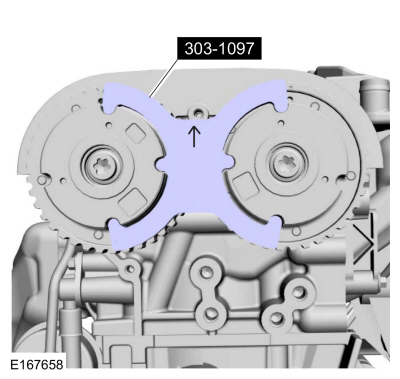
Install Special Service Tool: 303-1097
Locking Tool, Variable Camshaft Timing Oil Control Unit.
Torque:
18 lb.ft (25 Nm)
-
Remove Special Service Tool: 303-1097
Locking Tool, Variable Camshaft Timing Oil Control Unit.
-
Remove Special Service Tool: 303-1552
Alignment Tool, Camshaft.
-
NOTE:
Use an open-ended wrench to hold the camshafts by the hexagon to prevent the camshafts from turning.
Tighten the VCT units bolts.
Torque:
75°
-
NOTE:
The special tool can only be installed if the valve timing is correct.
Install Special Service Tool: 303-1552
Alignment Tool, Camshaft.
-
NOTE:
The timing mark of each VCT unit must be at the 12 o'clock position.
If the special tools cannot be installed, repeat the adjustment according to the preceding steps.
-
Remove Special Service Tool: 303-1097
Locking Tool, Variable Camshaft Timing Oil Control Unit.
-
Remove Special Service Tool: 303-1552
Alignment Tool, Camshaft.
-
NOTE:
Use an open-ended wrench to hold the camshafts by the hexagon to prevent the camshafts from turning.
Install the VCT unit caps.
Torque:
142 lb.in (16 Nm)
-
NOTE:
The timing mark of each VCT unit must be at the 12 o'clock position.
Install Special Service Tool: 303-1097
Locking Tool, Variable Camshaft Timing Oil Control Unit.
-
Install the engine lifting bracket and the bolts.
Torque:
168 lb.in (19 Nm)
-
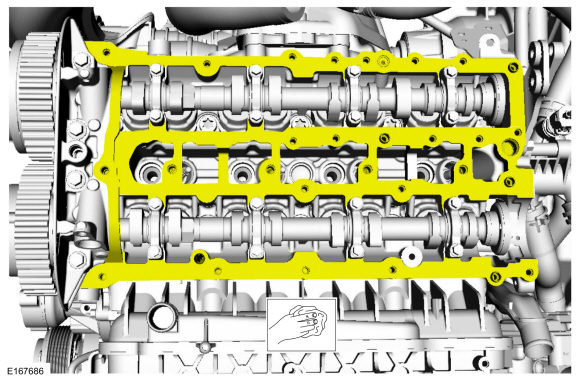
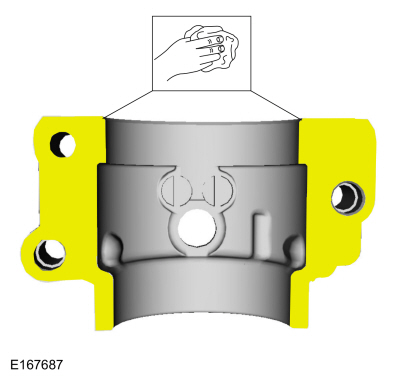
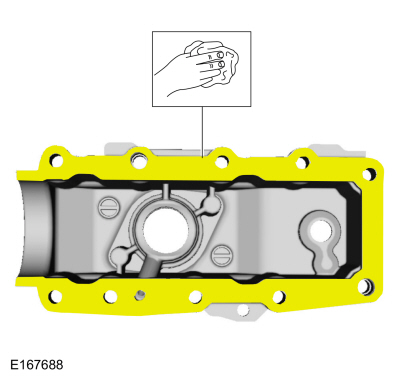
NOTICE:
Do not use metal scrapers, wire brushes, power
abrasive discs or other abrasive means to clean the sealing surfaces.
These tools cause scratches and gouges which make leak paths.
Make sure that the mating faces are clean and free of foreign material.
Material: Motorcraft® Metal Surface Prep Wipes
/ ZC-31-B
-
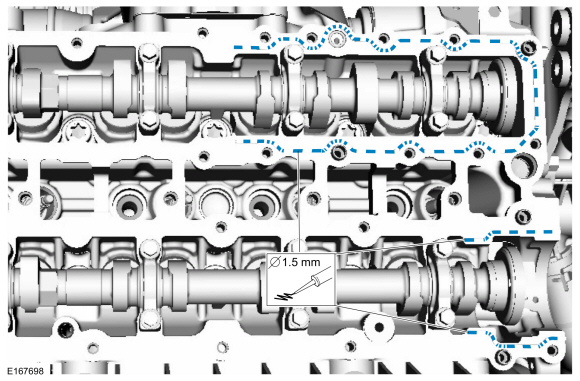
Apply a 1.5 mm (0.059 in) beads of gasket maker as shown.
Material: Flange Sealant
/ CU7Z-19B508-A
(WSS-M2G348-A11)
-
-
Install the brake vacuum pump cap, bolts and the stud.
Torque:
1-3:
Stage 1:
35 lb.in (4 Nm)
Stage 2:
89 lb.in (10 Nm)
-
Install the engine cover mounting stud.
Torque:
44 lb.in (5
Nm)
-
-
Install the new O-ring seal.
-
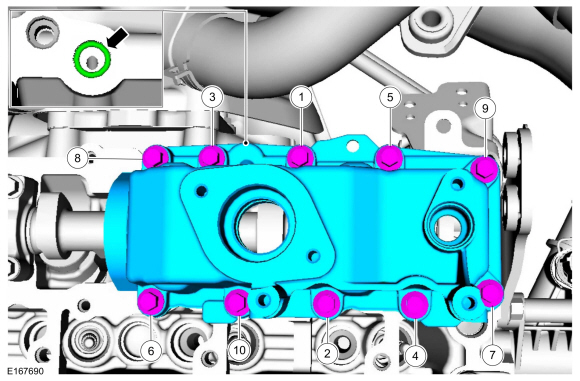
Install the high-pressure fuel pump drive unit and the bolts, tighten in sequence shown in 3 stages.
Torque:
Stage 1:
1-8:
35 lb.in (4 Nm)
Stage 2:
1-8:
124 lb.in (14 Nm)
Stage 3:
9-10:
97 lb.in (11
Nm)
-
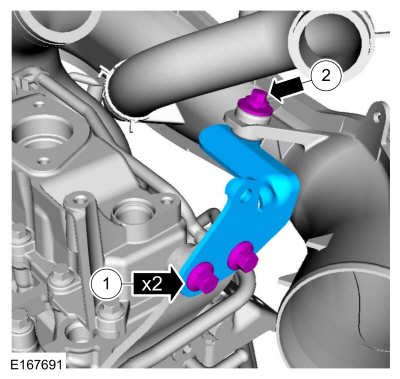
Install the support bracket and the bolts.
Torque:
1:
97 lb.in (11 Nm)
2:
71 lb.in (8
Nm)
-
-
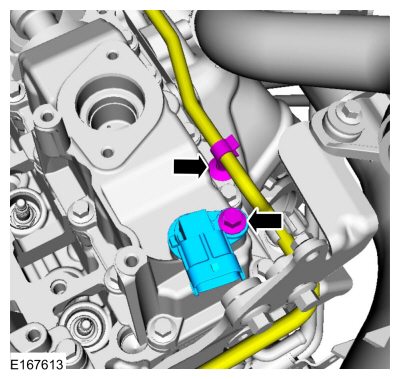
Install the CMP sensor and the bolt.
Torque:
80 lb.in (9 Nm)
-
Position the wiring harness and attach the retainer.
-
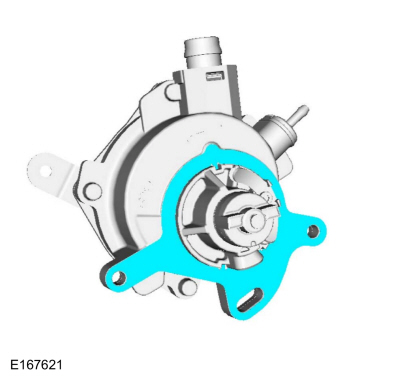
Install the new vacuum pump gasket.
-
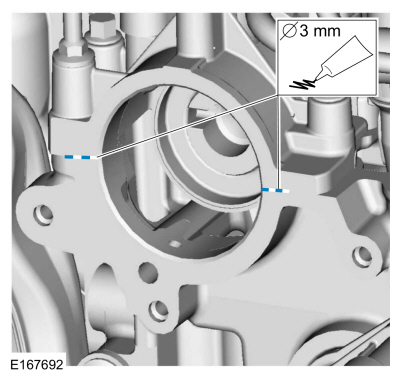
Apply a 3 mm (0.118 in) beads of flange sealant as shown.
Material: Flange Sealant - Anaerobic
/ Loctite® 51031
(WSK-M2G348-A7)
-
NOTE:
Manually align the brake vacuum pump drive key with the camshaft slot before installation.
NOTE:
Install new bolts.
-
Install the vacuum pump and the stud bolts.
Torque:
89 lb.in (10 Nm)
-
Connect the vacuum hose and attach the retainer.
-
Position the EVAP canister purge valve, install the bracket and the nuts.
Torque:
62 lb.in (7 Nm)
-
Connect the wiring harness electrical connectors and retainer.
-
Install the following items:
-
Install the timing belt.
Refer to: Timing Belt (303-01A Engine - 1.5L EcoBoost (118kW/160PS) – I4, Removal and Installation).
-
Install the valve cover.
Refer to: Valve Cover (303-01A Engine - 1.5L EcoBoost (118kW/160PS) – I4, Removal and Installation).
-
-
Install the TC outlet pipe, bolt and tighten the clamps.
Torque:
2:
71 lb.in (8
Nm)
3:
44 lb.in (5
Nm)
-
Connect the TC bypass hose.
Use the General Equipment: Hose Clamp Remover/Installer
-
Attach the wiring harness retainers and connect the electrical connectors.
-
-
Position and connect the brake vacuum hose.
-
Install the PCV hose.
Use the General Equipment: Hose Clamp Remover/Installer
-
Connect the wiring harness electrical connector and retainer.
-
Install the following items:
-
Install the air cleaner.
Refer to: Air Cleaner (303-12A Intake Air Distribution and Filtering - 1.5L EcoBoost (118kW/160PS) – I4, Removal and Installation).
-
Install the upper air cleaner outlet pipe.
Refer to: Air Cleaner Outlet Pipe (303-12A Intake Air Distribution and Filtering - 1.5L EcoBoost (118kW/160PS) – I4, Removal and Installation).
-
Install the high-pressure fuel pump.
Refer to: High-Pressure Fuel Pump (303-04A Fuel Charging and Controls - 1.5L EcoBoost (118kW/160PS) – I4, Removal and Installation).
Special Tool(s) /
General Equipment
Hose Clamp Remover/Installer
Materials
Name
Specification
Flange SealantCU7Z-19B508-A
WSS-M2G348-A11
Motorcraft® Metal Surface Prep WipesZC-31-B
-
Engine Oil - SAE 5W-20 - Synthetic Blend Motor OilXO-5W20-Q1SP
WSS-M2C945-B1
Removal
Release the fuel system pressure...
Special Tool(s) /
General Equipment
300-OTC1585AEPowertrain Lift
300-OTC1819E2,200# Floor Crane, Fold Away
303-1502Lifting Device EngineTKIT-2012A-FLTKIT-2012A-ROW
307-569Disconnect Tool TOC Line (1/2)TKIT-2006U-F/FMTKIT-2006U-FLM/LMTKIT-2006U-ROW1TKIT-2006U-ROW2
Strap Wrench
Adjustable Mounting Arm
Oil Drain Equipment
Hose Clamp Remover/Installer
..
Other information:
Overview
The
perimeter alarm system deters unauthorized entry into the vehicle by
sounding the horn and flashing all the turn signals and interior
courtesy lamps. When an unauthorized entry occurs, the horn and lamps
activate for 30 seconds. After 30 seconds, the horn stops sounding, but
the lamps continue to flash for up to 5 minutes.
The panic alarm operates similar to the perimeter alarm..
Activation
NOTE:
This vehicle is equipped with a brake shift
interlock feature that prevents the vehicle from being moved out of P
when the ignition is in the ON position until the brake pedal is
applied. Proceed with this procedure if the vehicle cannot be moved out
of the P position when the ignition is in the ON position and the brake pedal is applied.
Check for brake shift int..


 Valve Cover. Removal and Installation
 Engine. Removal