Ford Fusion: Roof Opening Panel / Roof Opening Panel Frame. Removal and Installation
Removal
NOTE:
Removal steps in this procedure may contain installation details.
-
If replacing the roof opening panel frame, remove the air deflector.
Refer to: Air Deflector (501-17 Roof Opening Panel, Removal and Installation).
-
Fully close the roof opening panel glass.
-
Remove the roof opening panel glass.
Refer to: Roof Opening Panel Glass (501-17 Roof Opening Panel, Removal and Installation).
-
On both sides, remove the A-pillar trim panel.
Refer to: A-Pillar Trim Panel (501-05 Interior Trim and Ornamentation, Removal and Installation).
-
On both sides, remove the B-pillar trim panel.
Refer to: B-Pillar Trim Panel (501-05 Interior Trim and Ornamentation, Removal and Installation).
-
On both sides, remove the C-pillar upper trim panel.
Refer to: C-Pillar Upper Trim Panel (501-05 Interior Trim and Ornamentation, Removal and Installation).
-
Remove the passenger seat head restraint, position the
passenger seat in the full rearward and full reclined position.
-
Position the driver seat in the full forward and full reclined position.
-
If equipped.
-
Release the upper rear view mirror cover clips.
-
Remove the upper rear view mirror cover.
-
If equipped.
-
Release the lower rear view mirror cover clips by squeezing on the sides.
-
Remove the lower rear view mirror cover.
-
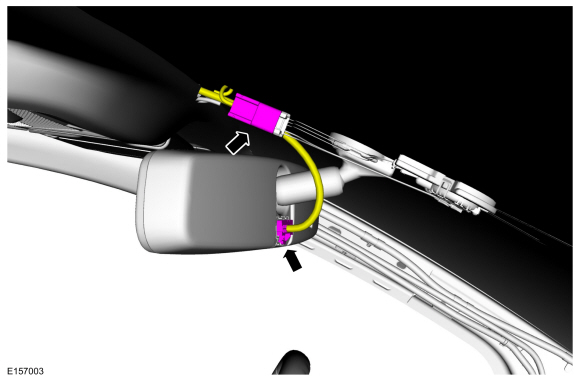
If equipped.
Disconnect the rear view mirror electrical connectors.
-
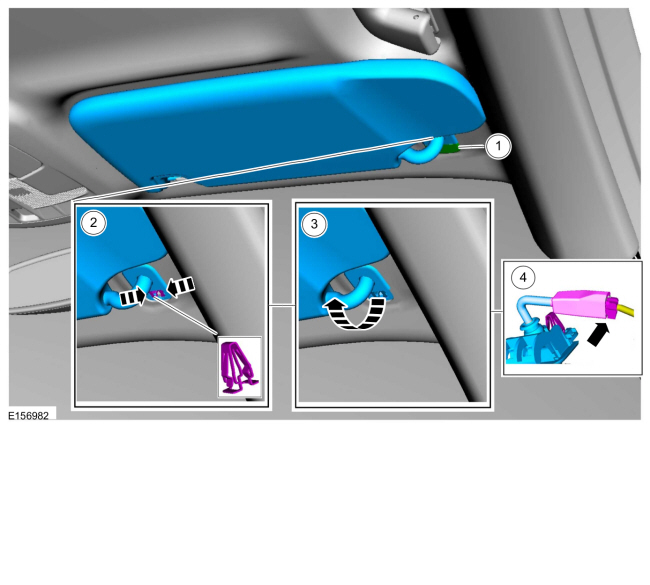
On both sides.
Remove the sun visors.
-
Remove the retainer cap.
-
Release the clip.
-
Remove the sun visor.
-
If equipped.
Disconnect the electrical connector.
-
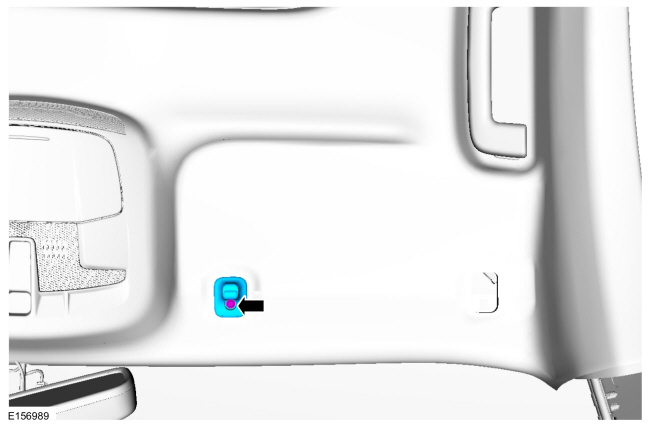
On both sides.
Remove the retainer and the sun visor clip.
-
NOTE:
LH side shown, RH side similar.
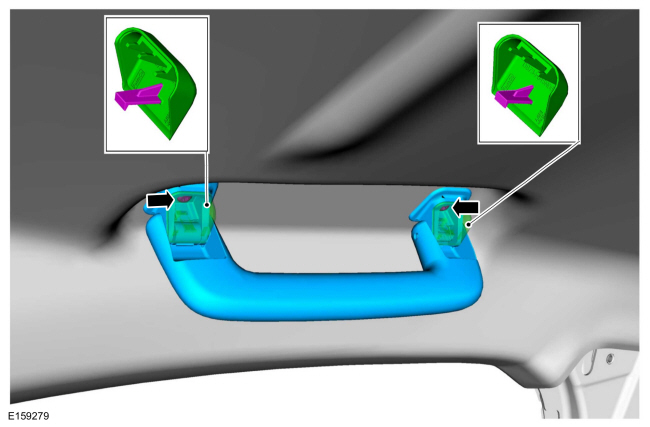
On both sides.
Remove the retainer covers, the retainers and the grab handle.
-
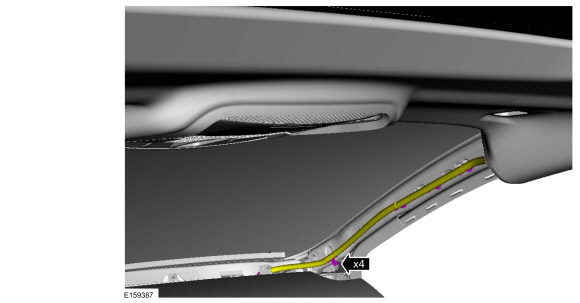
On both sides.
Detach the wire harness retainers.
-
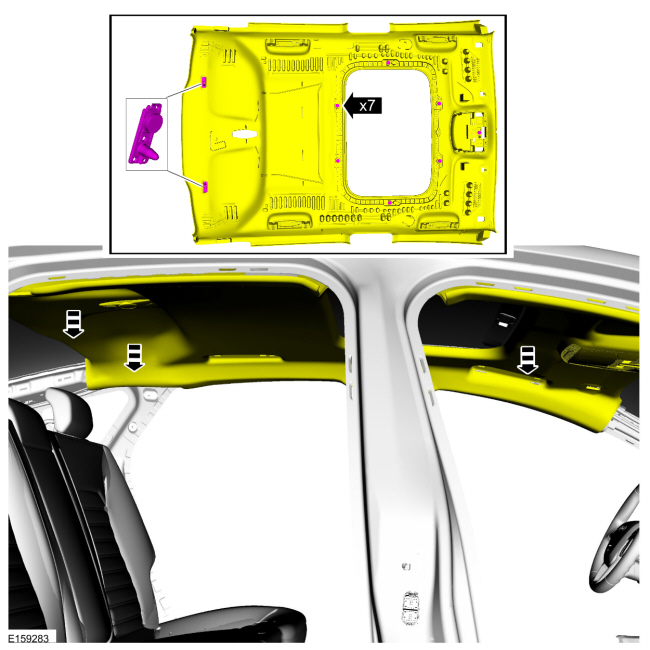
NOTICE:
When releasing the magnets around the roof opening
panel area, pull down on the plastic headliner reinforcement between the
headliner and the roof or damage to the headliner may result.
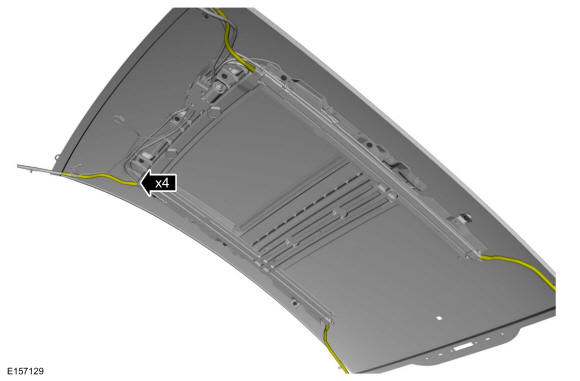
Carefully release the seven magnets and two guide pins and magnets.
-
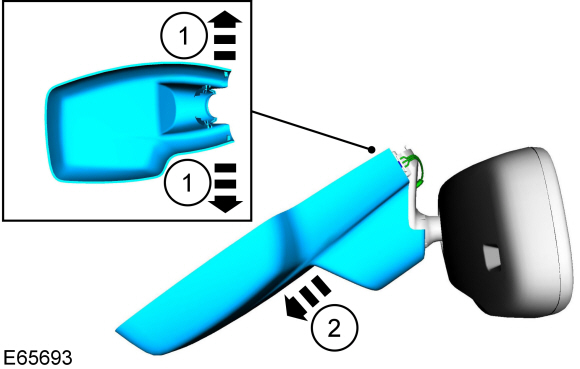
Position the headliner as shown.
-
Disconnect the roof opening panel drain hoses from the corners of the roof opening panel frame.
-
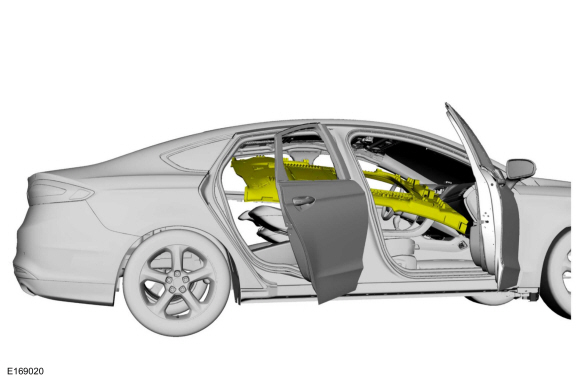
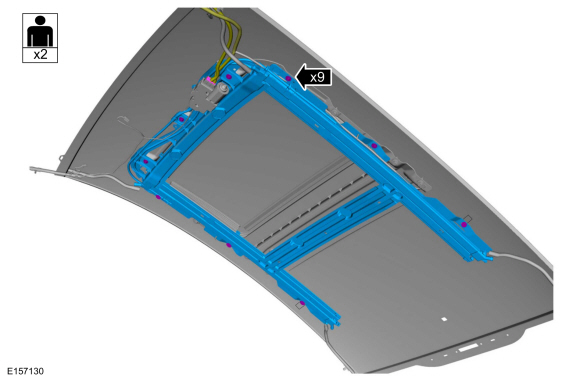
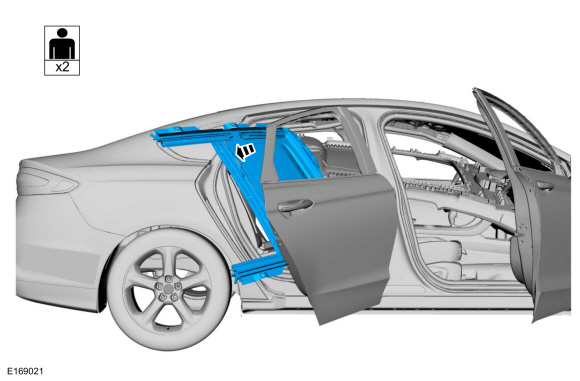
With the help of an assistant.
Disconnect the roof opening panel motor electrical connector, remove the roof opening panel frame bolts.
Torque:
106 lb.in (12 Nm)
-
With the help of an assistant.
Remove the roof opening panel frame.
Installation
-
NOTICE:
The Timing Adjustment must be carried out before the motor is installed.
If a new roof opening panel frame is being installed, transfer the parts in the following order.
-
Carry out the Timing Adjustment and transfer the roof opening panel motor.
Refer to: Timing Adjustment (501-17 Roof Opening Panel, General Procedures).
-
Transfer the roof opening panel blinds.
-
Transfer the trough assembly.
-
Transfer the roof opening panel shield.
-
To install, reverse the removal procedure.
Removal
NOTE:
Removal steps in this procedure may contain installation details.
WARNING:
Before beginning any service procedure in this
section, refer to Safety Warnings in section 100-00 General Information...
Removal
NOTE:
Removal steps in this procedure may contain installation details.
WARNING:
Before beginning any service procedure in this
section, refer to Safety Warnings in section 100-00 General Information...
Other information:
Special Tool(s) /
General Equipment
205-126
(T78P-4851-A)
Holding Fixture, Drive Pinion Flange
Tire Lever
Materials
Name
Specification
Motorcraft® Silicone Gasket and SealantTA-30
WSE-M4G323-A4
Removal
NOTICE:
When replacing the RDU clutch, the ACT coil and yoke are a matched set and must be replaced also...
Materials
Name
Specification
Motorcraft® Ultra-Clear Spray Glass CleanerZC-23
ESR-M14P5-A
Repair
WARNING:
Before beginning any service procedure in this
section, refer to Safety Warnings in section 100-00 General Information...
 Roof Opening Panel Blind. Removal and Installation
 Roof Opening Panel Glass. Removal and Installation