Ford Fusion: Module Configuration / Module Programming. General Procedures
Check
NOTE: Perform the following pre-checks to make sure module programming completes without errors.
-
NOTE: Starting the engine prior to creating a programming session may prevent certain part number information from being inhaled by the IDS. This may cause programming errors in some modules.
Start the programming session in Key ON Engine OFF.
-
Make sure the vehicle battery is fully charged or is connected to a battery charger.
-
Make sure the IDS scan tool is connected to a power source.
-
NOTE: A hardwired internet connection is recommended.
Inspect the Vehicle Communication Module (VCM) and cables for damage. Make sure cables remain connected throughout the programming procedure.
-
Turn off all unnecessary accessories, such as radio,
A/C, climate controlled seats, headlamps, interior and demand lamps.
-
Disconnect any aftermarket accessories, such as remote start, security alarm and power inverter.
-
For Plug-in hybrid and electric vehicles, disconnect the external charge cord from the charge port.
-
Disable Microsoft Windows sleep mode, screensaver and hibernation modes.
Programming
NOTICE: Do not delete the original diagnostic scan tool programming session.
-
Follow all on-screen instructions carefully, especially any key movements IDS directs to perform. Allow the startup and power down routines to complete.
-
Follow the on-screen instructions to complete the
programming process. If programming errors occur, continue to Step 3. If
no programming errors occur, continue to Step 8.
-
NOTE: Perform the following steps when the module programming procedure has resulted in a blank module.
Obtain the original IDS used when the programming error occurred during Module Reprogramming or PMI.
-
Disconnect and reconnect the VCM from the DLC and the IDS.
-
Start a new IDS session.
-
If the IDS can read the VIN, the IDS will default to the failed session.
-
NOTE: Sessions with failed programming will be highlighted in red. If the original session is not listed, click the Recycling bin icon in the lower left corner of the previous session screen to locate any deleted sessions.
If the IDS cannot read the VIN, locate the original failed vehicle programming session.
-
If the IDS can read the VIN, the IDS will default to the failed session.
-
Once the session is loaded, the failed process should resume automatically.
-
If programming does not resume, proceed to the Module
Programming menu and select the process previously attempted, PMI or Module Reprogramming. Follow all on-screen instructions.
-
When the IDS prompts to select certain parameters, click on ALL parameters listed, including items already highlighted.
-
Perform any additional programming steps in the order directed by the IDS to complete the programming process.
Recovery
NOTE: Perform the following steps to return the PCM (Powertrain Control Module) to the factory setting.
-
Start an IDS session. If a previous session is present, select None of the Above.
-
Select No when verifying the information on the Vehicle Specification screen.
-
Enter the Tear Tag into the IDS to identify the vehicle.
NOTE: The Tear Tag is located under the As-Built screen on the Oasis tab on PTS (Professional Technician Society).
-
There will be a second "Vehicle Specification" screen. Verify the information and select YES.
-
When the session is started, Module Programming should automatically begin. If it does not, select PMI from the IDS menu and select PCM.
-
This procedure will only install the latest factory calibration and will not verify if an unauthorized calibration was installed. Following the repair, attach the PCM Filename, Ignition counter and any Diagnostic trouble codes to the repair order for documentation.
 Module Configuration - System Operation and Component Description. Description and Operation
System Operation
Module Programming Menu
Module Programming is listed under the Toolbox tab after starting an IDS session with a vehicle. The module programming menu is disabled when a manual vehicle session is created...

Other information:
Ford Fusion 2013–2020 Service Manual: Anti-Theft Key Programming - Scan Tool. General Procedures
Programming NOTE: Make sure the passive key battery(ies) measure at least 2.5 volts. A passive key with a depleted battery only starts the vehicle when in the backup starting location. The RKE functionality remains inoperative until the key battery is replaced. NOTE: In order to gain module security access, the diagnostic scan tool must have an active Internet connection. A hardwire..
Ford Fusion 2013–2020 Owners Manual: Rear Parking Aid (IF EQUIPPED)
WARNING: The system may not detect objects with surfaces that absorb reflection. Always drive with due care and attention. Failure to take care may result in a crash. WARNING: The system may not detect small or moving objects, particularly those close to the ground. WARNING: To help avoid personal injury, always use caution when in reverse (R) and when using the sensing system. WARNING: T..
Categories
- Manuals Home
- 2nd Generation Ford Fusion Owners Manual
- 2nd Generation Ford Fusion Service Manual
- Electronic Parking Brake (EPB) Service Mode Activation and Deactivation. General Procedures
- Automatic Transmission Fluid Check - 1.5L EcoBoost™/2.0L EcoBoost™/2.5L. Automatic Transmission Fluid Check - 2.7L EcoBoost™
- Engine - 1.5L EcoBoost (118kW/160PS) – I4
- New on site
- Most important about car
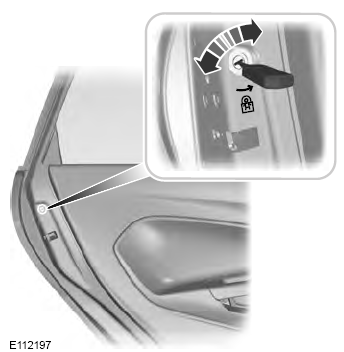
Child Safety Locks
When these locks are set, the rear doors cannot be opened from the inside.