Ford Fusion: Handles, Locks, Latches and Entry Systems / Hood Latch Release Cable. Removal and Installation
Removal
NOTE:
Removal steps in this procedure may contain installation details.
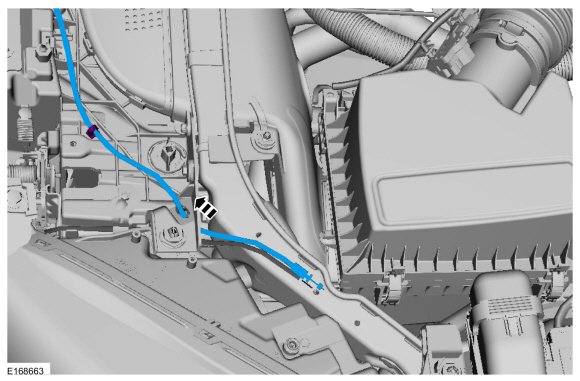
Left front cable
-
Remove the front bumper cover.
Refer to: Front Bumper Cover (501-19 Bumpers)
.
-
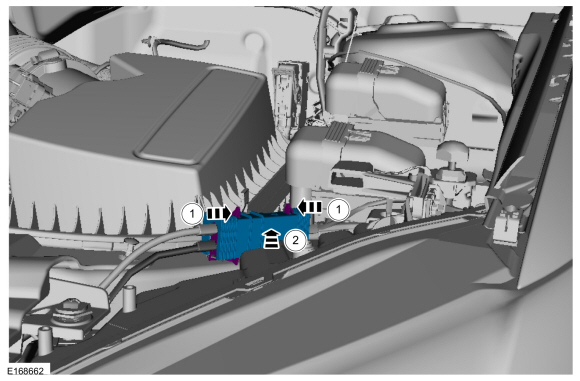
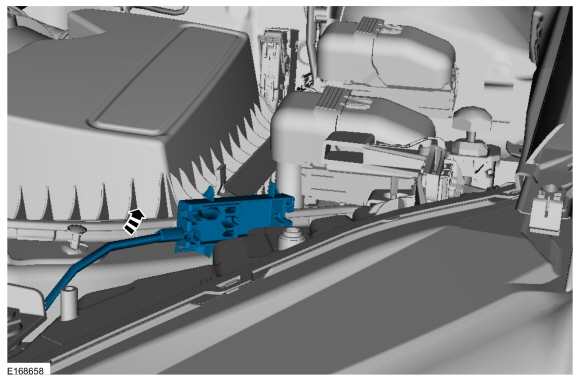
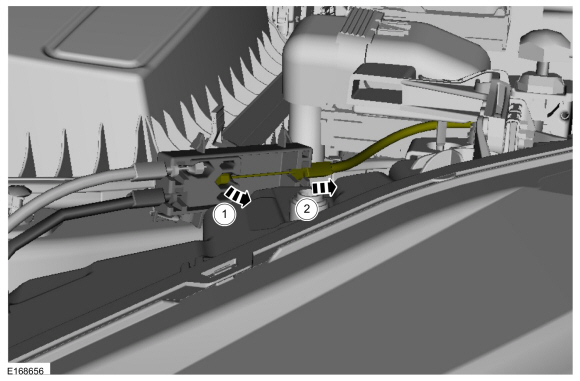
Remove the hood latch release cable junction block cover.
-
Press the retaining tabs inward to release the hood latch release cable junction block cover.
-
Remove the hood latch release cable junction block cover.
-
Release and position aside the rear and right hood latch release cables.
-
Release rear hood latch release cable.
-
Position aside the rear hood latch release cable.
-
Release the right hood latch release cables.
-
Position aside the right hood latch release cable.
-
Detach the left front hood latch release cable from the left front hood latch.
-
Detach the left front hood latch release cable from the left front hood latch.
-
Remove the left front hood latch release cable from the left front hood latch.
-
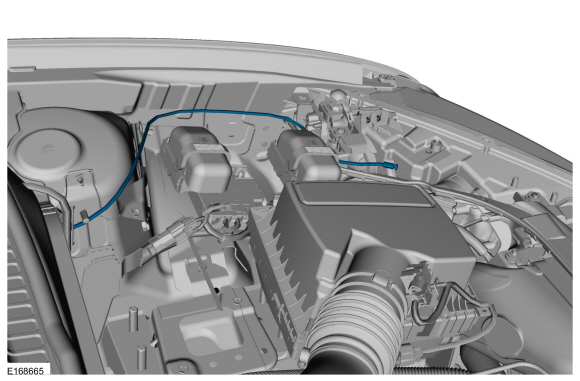
Route the left front hood latch release cable through the core support.
-
Remove the left front hood latch release cable.
Right front cable
-
Remove the front bumper cover.
Refer to: Front Bumper Cover (501-19 Bumpers)
.
-
Remove the right front hood latch release cable from the right front hood latch.
-
Detach the right front hood latch release cable from the right front hood latch.
-
Remove the right front hood latch release cable from the right front hood latch.
-
Route the right front hood latch release cable through the core support.
-
Route the right hood latch release cable from the core support.
-
Remove the hood latch release cable junction block cover.
-
Press the retaining tabs inward to release the hood latch release cable junction block cover.
-
Remove the hood latch release cable junction block cover.
-
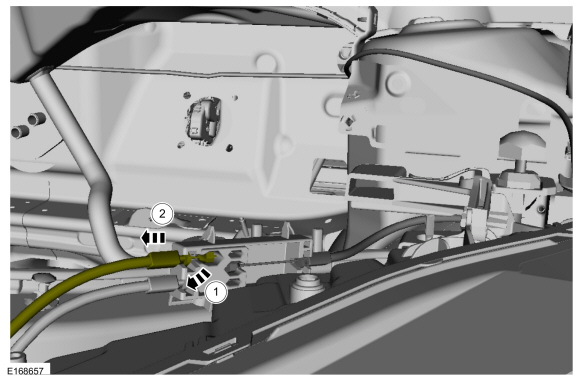
Detach and position aside the right hood latch release cable.
-
Detach the right hood latch release cable.
-
Position aside the right hood latch release cable.
-
Release the routing clip and remove the right hood latch release cable.
Rear Cable
-
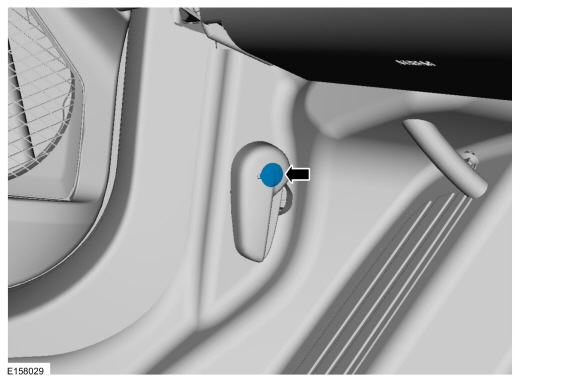
Remove the hood latch release handle access cover.
-
NOTE:
Insert a 10mm 1/4 inch drive socket to release the clips.
Remove the hood latch release handle.
-
Release the hood latch release handle retaining clips.
-
Remove the hood latch release handle.
-
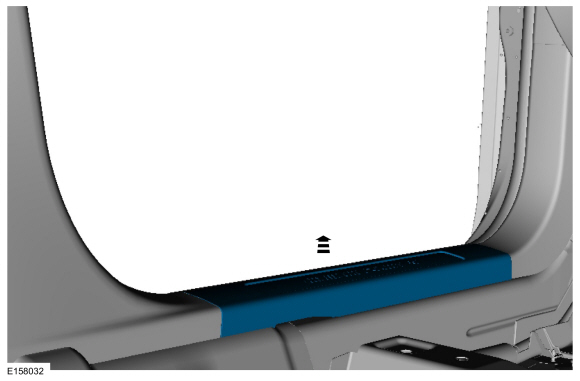
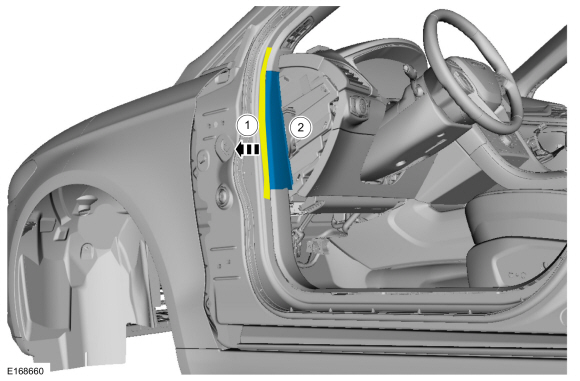
Remove the driver door scuff plate.
-
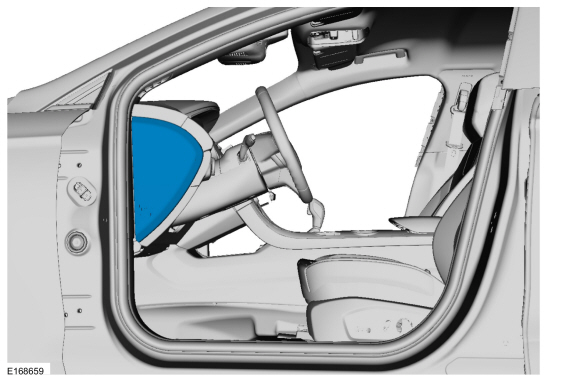
Remove the left side instrument panel cover.
-
Position aside the weatherstrip and remove the cowl trim panel.
-
Position aside the weatherstrip.
-
Remove the cowl trim panel.
-
Remove the left side kick panel and position aside the carpet.
-
Remove the left side kick panel.
-
Position aside the carpet.
-
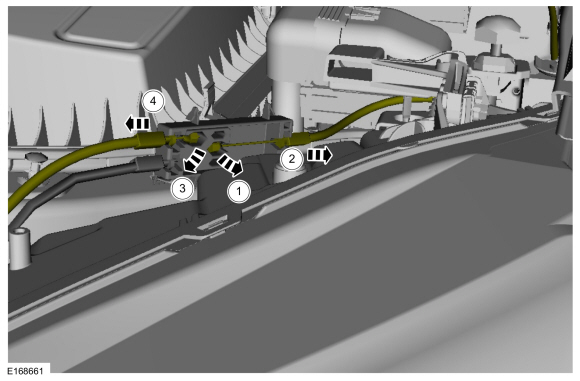
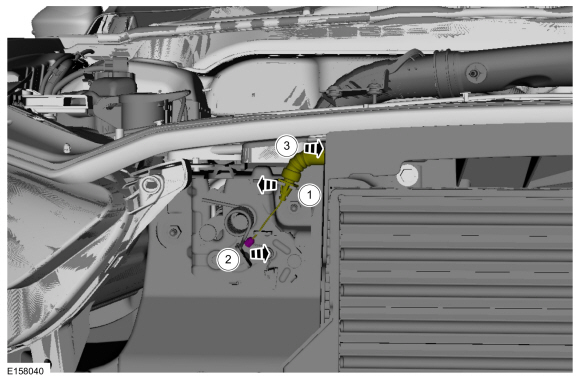
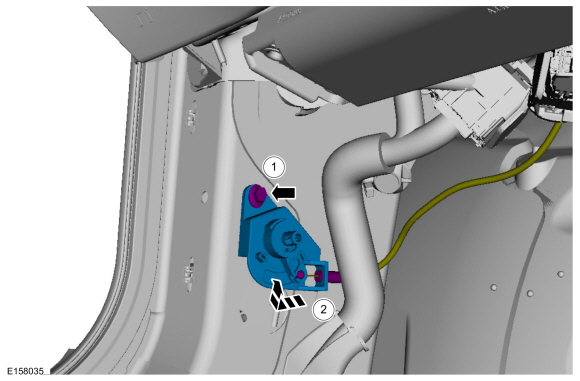
Remove the bolts, hood latch release and disconnect the rear hood latch release cable.
-
Remove the bolts and hood latch release.
-
Disconnect the rear hood latch release cable.
-
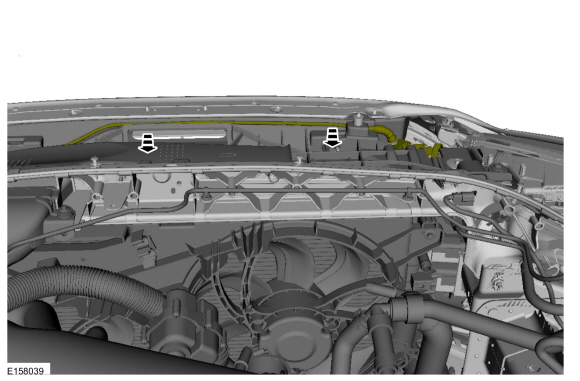
Release the routing clips and route the hood latch release cable through the cowl.
-
Release the routing clips.
-
Route the rear hood latch release cable through the cowl.
-
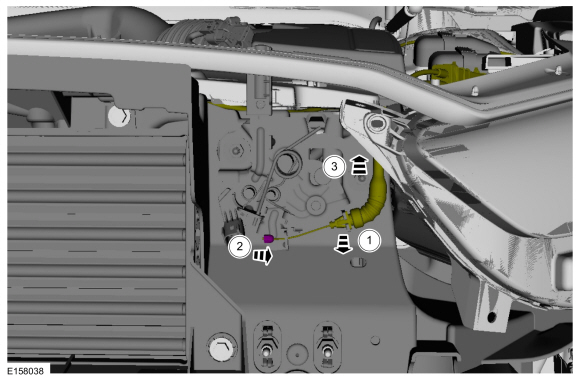
Release the routing clips and route the rear hood latch release cable through the engine compartment.
-
Release the routing clips.
-
Route the rear hood latch release cable through the cowl.
-
Route the rear hood latch release cable through the engine compartment.
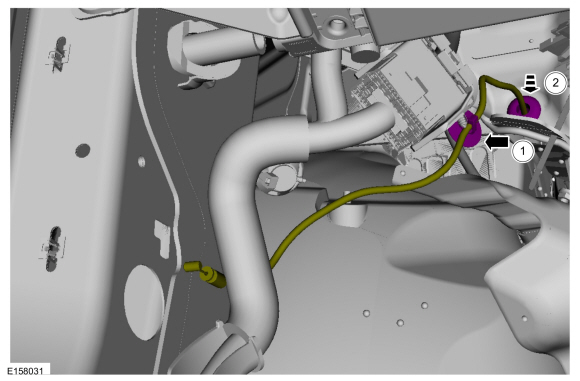
-
Remove the hood latch release cable junction block cover.
-
Press the retaining tabs inward to release the hood latch release cable junction block cover.
-
Remove the hood latch release cable junction block cover.
-
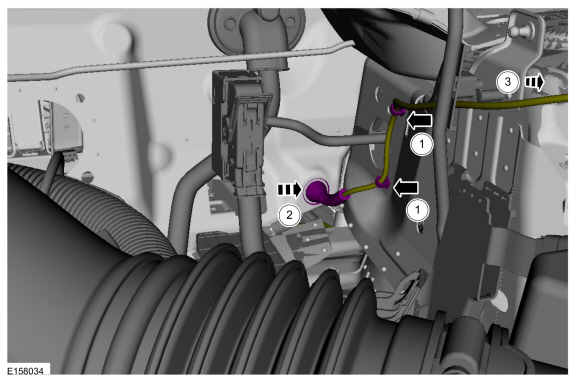
-
Release and position aside the rear hood latch release cable.
-
Release and position aside the rear hood latch release cable.
-
Remove the rear hood latch release cable.
Installation
-
To install, reverse the removal procedure.
Special Tool(s) /
General Equipment
Flat-Bladed Screwdriver
Removal
NOTE:
Removal steps in this procedure may contain installation details...
Removal
NOTE:
Removal steps in this procedure may contain installation details.
Remove the front bumper cover.
Refer to: Front Bumper Cover (501-19 Bumpers, Removal and Installation)...
Other information:
Removal
NOTE:
Left hand (LH) side shown, right hand (RH) side similar.
Remove the luggage compartment lid.
Refer to: Luggage Compartment Lid (501-03)
.
Remove the parcel shelf trim.
Refer to: Parcel Shelf (501-05 Interior Trim and Ornamentation, Removal and Installation)...
Removal
NOTE:
Removal steps in this procedure may contain installation details .
WARNING:
Before beginning any service procedure in this
section, refer to Safety Warnings in section 100-00 General Information.
Failure to follow this instruction may result in serious personal
injury...


 Luggage Compartment Lid Latch. Removal and Installation
 Hood Latch. Removal and Installation