
Ford Fusion: Interior Trim and Ornamentation / Front Door Trim Panel. Removal and Installation
Ford Fusion 2013–2020 Service Manual / Body and Paint / Body and Paint / Interior Trim and Ornamentation / Front Door Trim Panel. Removal and Installation
Removal
NOTE: LH shown, RH similar.
NOTE: Removal steps in this procedure may contain installation details.
-
Release the tabs and remove the door trim panel cover.
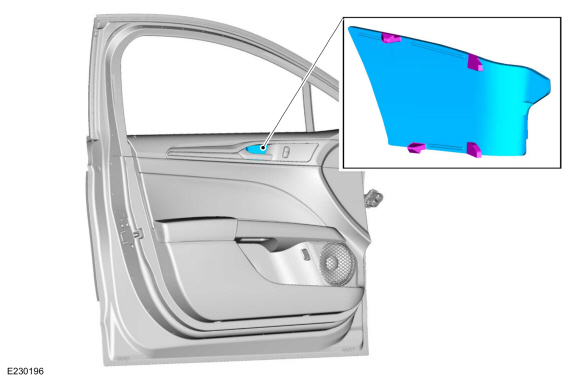 |
-
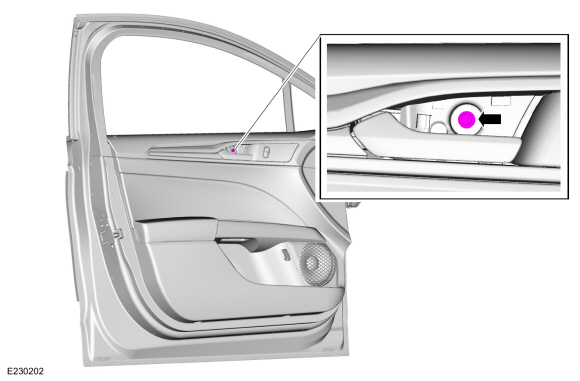
Remove the door trim panel retainer.
Torque: 44 lb.in (5 Nm)
 |
-
Remove the front door window control switch.
Refer to: Front Door Window Control Switch (501-11 Glass, Frames and Mechanisms, Removal and Installation).
-
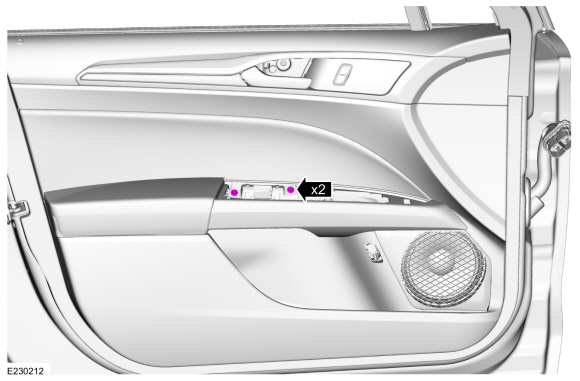
Remove the door trim panel retainers.
 |
-
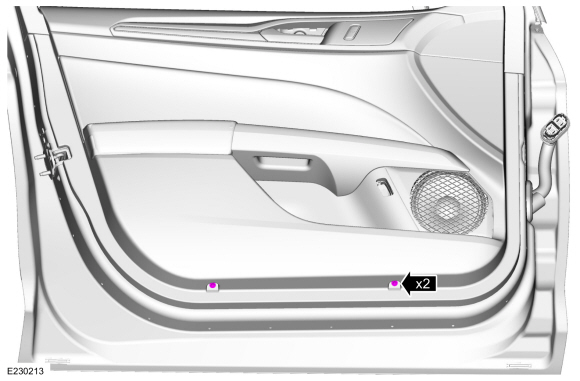
Remove the lower retainers.
 |
-
Release the clips and position aside the door trim panel.
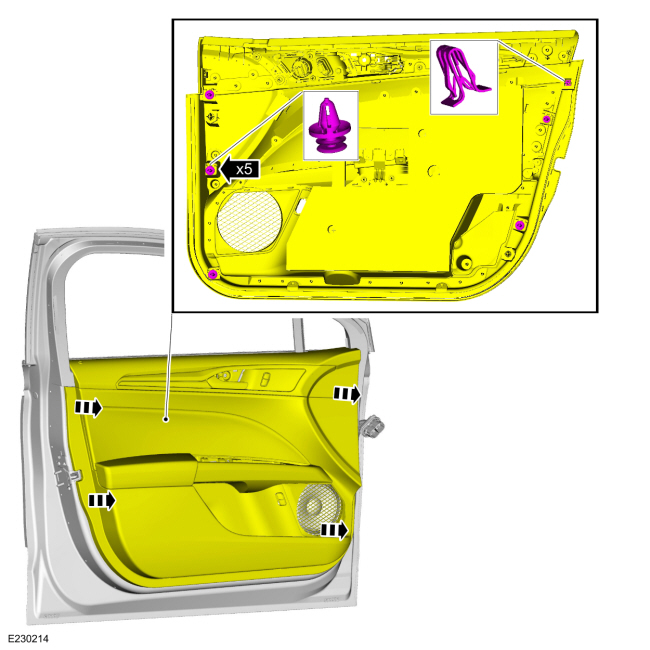 |
-
Remove the front door trim panel.
-
Release the tab and position aside the door latch cable.
-
Disconnect the door lock switch electrical connector.
-
If equipped.
Disconnect the speaker electrical connector.
-
NOTE: Driver side door only.
If equipped.
Disconnect the fuel door unlock switch electrical connector.
-
Lift up and out and remove the door trim panel.
-
Release the tab and position aside the door latch cable.
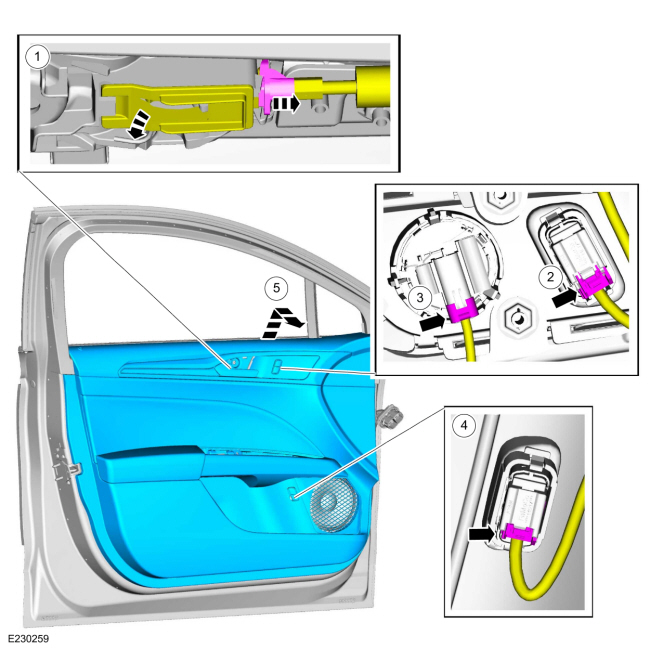 |
Installation
-
NOTE: Transfer parts as necessary.
To install, reverse the removal procedure.
 D-Pillar Trim Panel. Removal and Installation
Special Tool(s) /
General Equipment
Interior Trim Remover
Removal
Release the clips and remove the D-pillar trim panel.
Use the General Equipment: Interior Trim Remover
Installation
To install, reverse the removal procedure...
 Rear Door Trim Panel. Removal and Installation
Removal
NOTE:
LH shown, RH similar.
NOTE:
Removal steps in this procedure may contain installation details.
Remove the rear door window control switch...
Other information:
Ford Fusion 2013–2020 Service Manual: Vehicle Specific Body Construction. Description and Operation
Before cutting or welding, For additional information, refer to: Specifications (501-25 Body Repairs - General Information, Specifications). Bumper Beams Bumper beams are typically constructed of HS (high-strength) or stronger class steel...
Ford Fusion 2013–2020 Service Manual: Fuel System Pressure Release. General Procedures
Pressure release WARNING: Before beginning any service procedure in this section, refer to Safety Warnings in section 100-00 General Information. Failure to follow this instruction may result in serious personal injury. Refer to: Gasoline and Gasoline-Ethanol Fuel Systems Health and Safety Precautions (100-00 General Information, Description and Operation)...
Categories
- Manuals Home
- 2nd Generation Ford Fusion Owners Manual
- 2nd Generation Ford Fusion Service Manual
- Electronic Parking Brake (EPB) Service Mode Activation and Deactivation. General Procedures
- Cylinder Head. Removal and Installation
- Memory Function
- New on site
- Most important about car
Direction Indicators. Interior Lamps
Direction Indicators
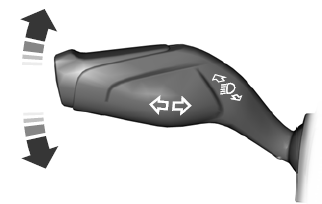
Push the lever up or down to use the direction indicators.

Copyright © 2026 www.fofusion2.com