Ford Fusion: Handles, Locks, Latches and Entry Systems / Front Door Latch. Removal and Installation
Ford Fusion 2013–2020 Service Manual / Body and Paint / Body and Paint / Handles, Locks, Latches and Entry Systems / Front Door Latch. Removal and Installation
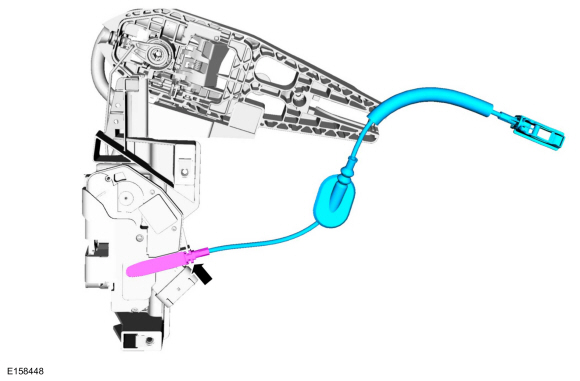
Removal
NOTE: LH side shown, RH side similar.
NOTE: Removal steps in this procedure may contain installation details.
-
Remove the front door window regulator.
Refer to: Front Door Window Regulator (501-11 Glass, Frames and Mechanisms, Removal and Installation).
-
Remove the exterior front door handle.
Refer to: Exterior Front Door Handle (501-14 Handles, Locks, Latches and Entry Systems, Removal and Installation).
-
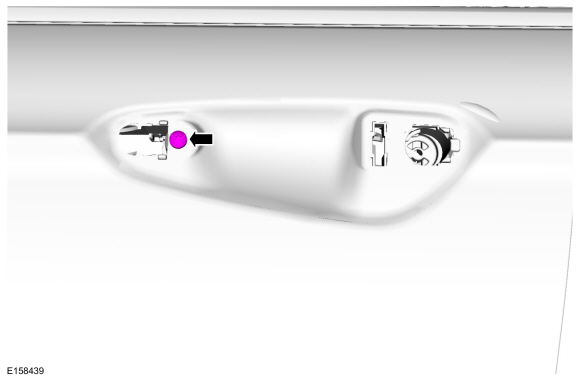
Remove the retainer from the exterior front door handle reinforcement.
Torque: 62 lb.in (7 Nm)
 |
-
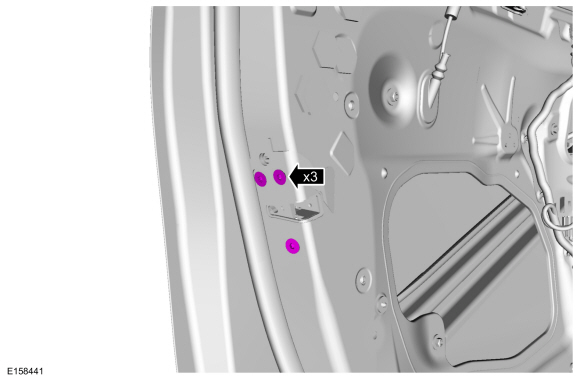
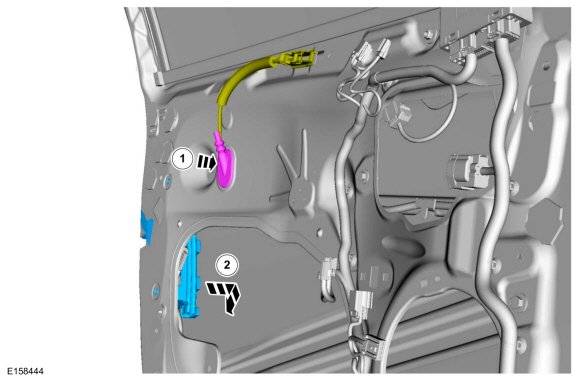
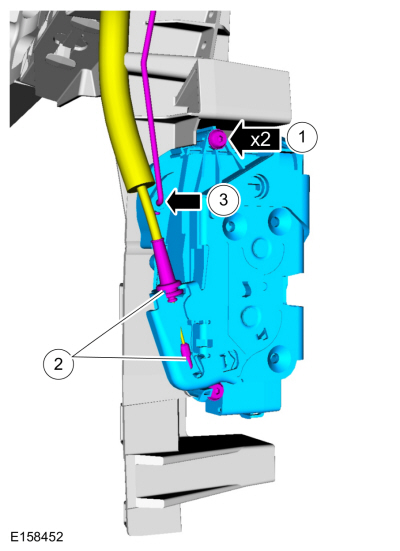
Remove the front door latch retainers.
Torque: 71 lb.in (8 Nm)
 |
-
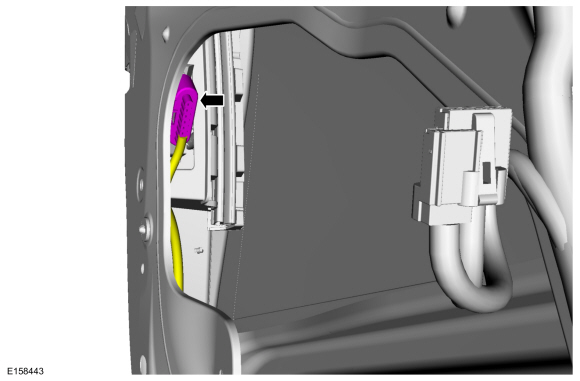
Disconnect the front door latch electrical connector.
 |
-
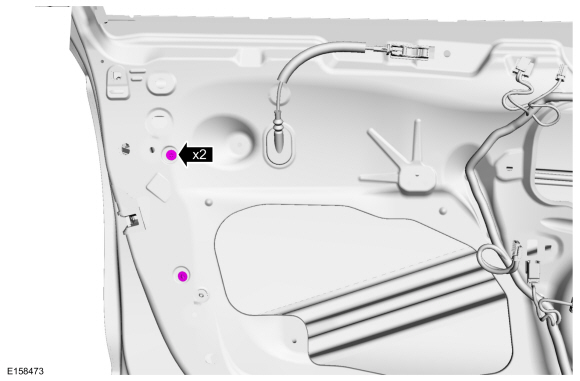
Remove the front door latch window run bolts.
Torque: 106 lb.in (12 Nm)
 |
-
-
Route the interior front door handle cable through the door.
-
Remove the front door latch assembly.
-
Route the interior front door handle cable through the door.
 |
-
NOTE: This step is only necessary when installing a new component.
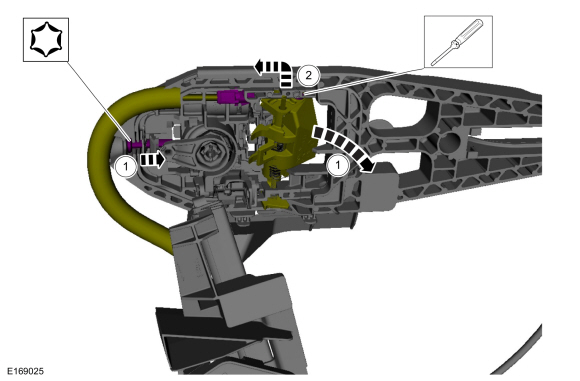
Remove the interior front door handle cable from the front door latch.
 |
-
NOTE: This step is only necessary when installing a new component.
-
While turning the release screw the handle rotates the lever releasing the tension on the cable.
-
Remove the cable eyelet from the lever.
-
While turning the release screw the handle rotates the lever releasing the tension on the cable.
 |
-
NOTE: This step is only necessary when installing a new component.
Remove the front door latch.
-
Remove the retainers from the front door latch.
-
Disconnect the exterior door handle reinforcement cable from the front door latch.
-
Disconnect the lock rod from the front door latch.
-
Remove the retainers from the front door latch.
 |
Installation
-
To install, reverse the removal procedure.
-
NOTE: This step is only necessary when installing a new component.
Install the front door latch.
-
Install the retainers from the front door latch.
-
Connect the exterior door handle reinforcement cable to the front door latch.
-
Connect the lock rod to the front door latch.
-
Install the retainers from the front door latch.
 |
-
NOTE: This step is only necessary when installing a new component.
NOTE: This step must be done correctly or the exterior door handle will not engage the lever on installation.
-
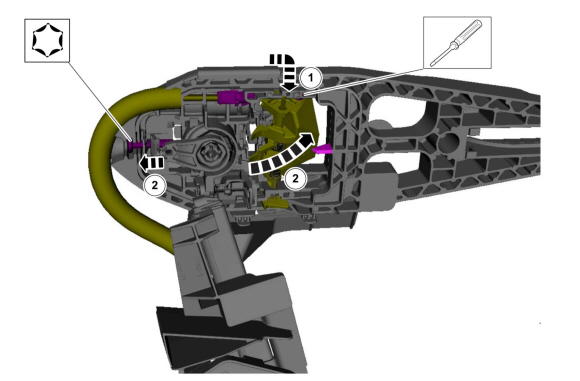
Install the cable eyelet to the lever.
-
While keeping tension on the cable and holding the
handle lever in the engaged position, turn the release screw until the
handle lever is positioned against the stop.
-
Install the cable eyelet to the lever.
 |
-
NOTE: This step is only necessary when installing a new component.
Install the interior front door handle cable to the front door latch.
 |
 Exterior Rear Door Handle. Removal and Installation
Removal
Vehicles with push button start
NOTE:
LH side shown, RH side similar.
Remove the rear door trim panel.
Refer to: Rear Door Trim Panel (501-05 Interior Trim and Ornamentation, Removal and Installation)...
 Rear Door Latch. Removal and Installation
Removal
NOTE:
LHside shown, RH side similar.
NOTE:
Removal steps in this procedure may contain installation details.
Remove the exterior rear door handle...
Other information:
Ford Fusion 2013–2020 Owners Manual: USB Ports. Apps. Supported Media Players, Formats and Metadata Information
USB Ports The USB ports are in the center console or behind a small access door in the instrument panel. This feature allows you to plug in USB media devices, memory sticks, flash drives or thumb drives, and charge devices if they support this feature...
Ford Fusion 2013–2020 Service Manual: Rear Door Upper Moulding. Removal and Installation
Removal NOTE: LH side shown, RH side similar. NOTE: Removal steps in this procedure may contain installation details. NOTICE: Before beginning any service procedure in this section, refer to Safety Warnings in section 100-00 General Information...
Categories
- Manuals Home
- 2nd Generation Ford Fusion Owners Manual
- 2nd Generation Ford Fusion Service Manual
- Garage Door Opener
- Electronic Parking Brake (EPB) Service Mode Activation and Deactivation. General Procedures
- Pre-Collision Assist (IF EQUIPPED)
- New on site
- Most important about car
Power Door Locks
The power door lock control is on the driver and front passenger door panels.

Copyright © 2026 www.fofusion2.com