Ford Fusion: Rear Drive Axle/Differential / Active Torque Coupling Clutch. Removal and Installation
Special Tool(s) / General Equipment
 |
205-126
(T78P-4851-A)
Holding Fixture, Drive Pinion Flange |
| Tire Lever | |
Materials
| Name | Specification |
|---|---|
| Motorcraft® Silicone Gasket and Sealant TA-30 |
WSE-M4G323-A4 |
Removal
NOTICE: When replacing the RDU clutch, the ACT coil and yoke are a matched set and must be replaced also.
NOTICE: When replacing the RDU clutch, the 4X4 control module will need to be reconfigured with the new Active Torque Coupling (ATC) bar code information. If the new bar code information does not match the existing 4X4 control module information, driveline damage or driveability concerns can occur.
NOTE: Removal steps may contain installation instructions.
-
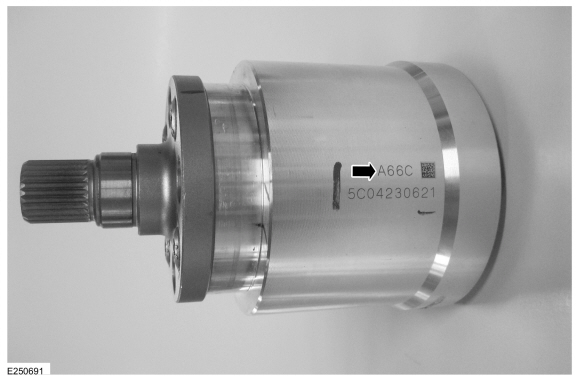
Record the number for PCM (powertrain control module) entry before clutch is replaced.
-
With the vehicle in NEUTRAL, position it on a hoist.
Refer to: Jacking and Lifting - Overview (100-02 Jacking and Lifting, Description and Operation).
-
Remove the driveshaft.
Refer to: Rear Driveshaft (205-01 Driveshaft, Removal and Installation).
-
Disconnect the Active Torque Coupling (ATC) connector.
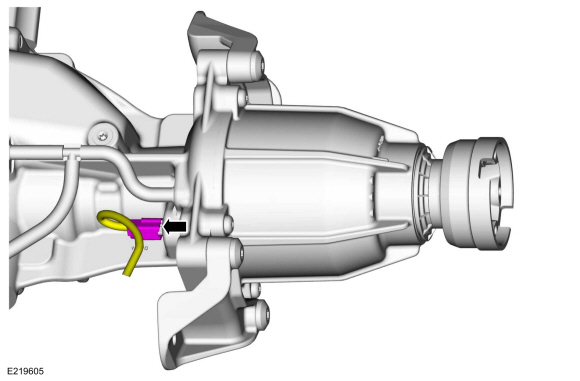 |
-
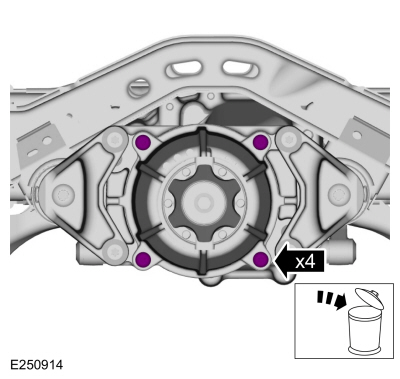
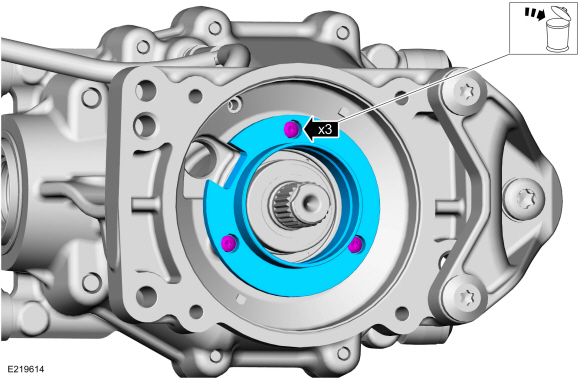
Remove and discard the RDU coupler housing bolts.
Torque: 30 lb.ft (40 Nm)
 |
-
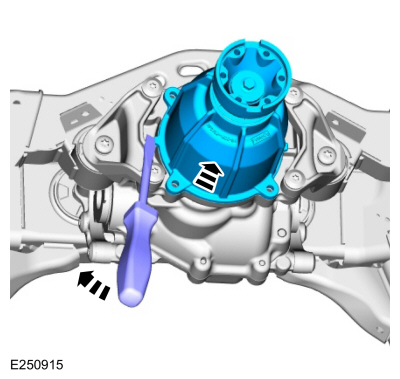
NOTE: When assembling use a 2 mm bead of silicone sealant.
NOTE: The RDU coupler housing should be dry. The presence of fluid in the housing cavity is most likely from a failed / overheated Active Torque Coupling (ATC). Clean any fluid from the housing before assembly.
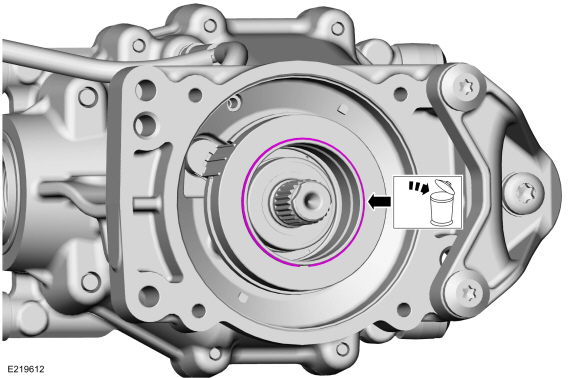
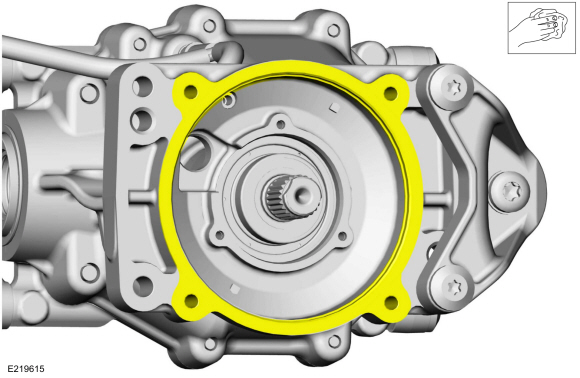
Using a pry bar, remove the RDU coupler housing.
Use the General Equipment: Tire Lever
Material: Motorcraft® Silicone Gasket and Sealant / TA-30 (WSE-M4G323-A4)
 |
-
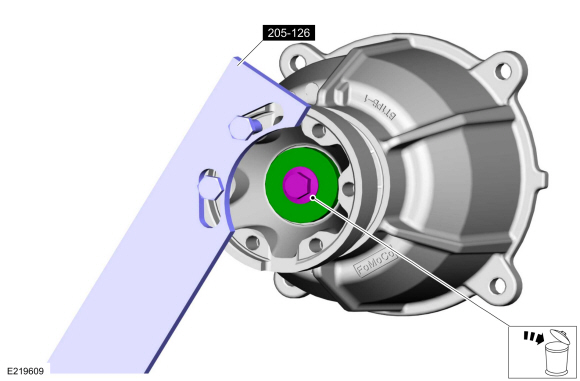
Using the special tool, remove and discard the companion
flange bolt, remove the companion flange washer and the companion
flange.
Use Special Service Tool: 205-126 (T78P-4851-A) Holding Fixture, Drive Pinion Flange.
Torque: 40 lb.ft (54 Nm)
 |
-
Index mark the companion flange and stub shaft.
 |
-
Remove the companion flange.
 |
-
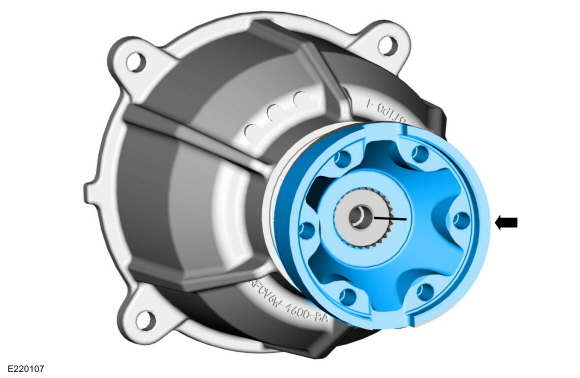
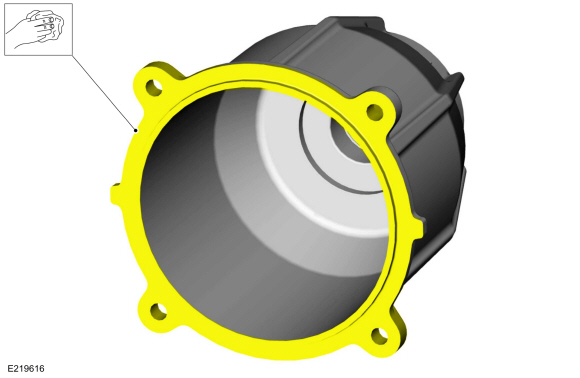
Remove the RDU clutch coupler housing from the Intelligent Torque Controlled Coupling (ITCC).
 |
-
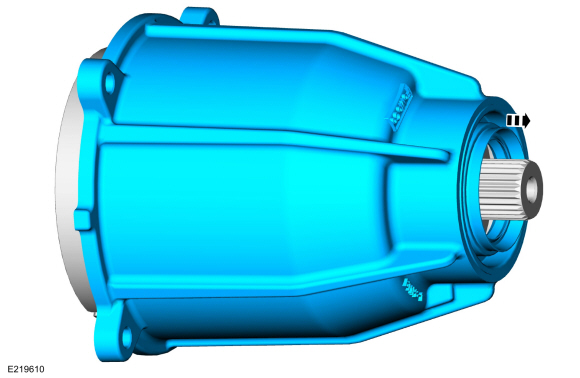
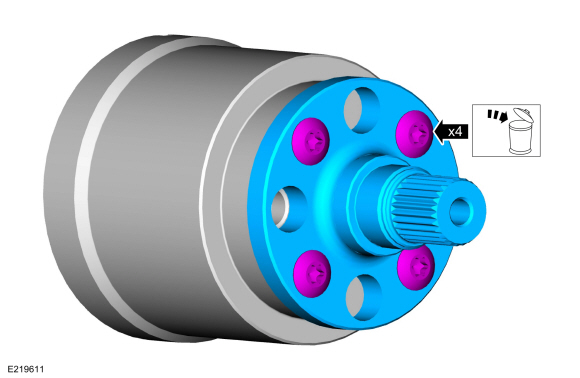
Remove and discard the stub shaft bolts, and remove the stub shaft.
Torque: 43 lb.ft (58 Nm)
 |
-
Remove and discard the Active Torque Coupling (ATC) coil snap ring.
 |
-
NOTE: The ATC coil and the ATC coil yoke must be replaced as a matched set.
Remove the Active Torque Coupling (ATC) coil.
 |
-
NOTE: The ATC coil and the ATC coil yoke must be replaced as a matched set.
Remove and discard the Active Torque Coupling (ATC) coil yoke bolts and remove the Active Torque Coupling (ATC) coil yoke.
Torque: 89 lb.in (10 Nm)
 |
-
Clean the mating surface of the RDU differential housing.
Refer to: RTV Sealing Surface Cleaning and Preparation (303-00 Engine System - General Information, General Procedures).
 |
-
Clean the mating surface of the RDU clutch coupler housing.
Refer to: RTV Sealing Surface Cleaning and Preparation (303-00 Engine System - General Information, General Procedures).
 |
Installation
-
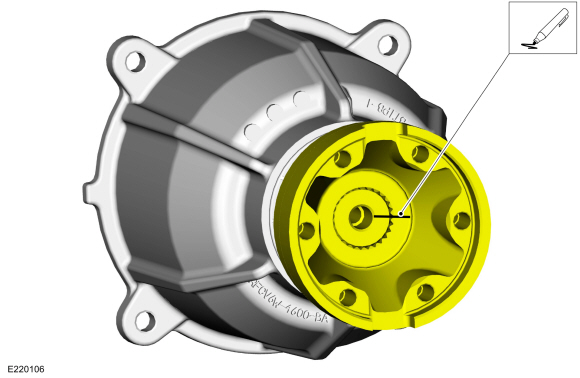
Record the etched 4-digit calibration code from the new RDU clutch coupler.
 |
-
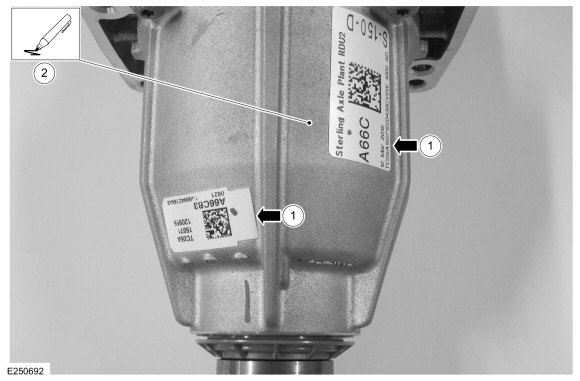
If the new 4-digit calibration code from the RDU
clutch coupler does not match the 4-digit calibration code on the RDU
clutch coupler housing, strike out the existing 4-digit calibration code
on the RDU clutch coupler housing and write the new 4-digit calibration code with permanent felt tip marker.
 |
-
To install, reverse the removal procedure.
 Rear Halfshaft Seal. Removal and Installation
Special Tool(s) /
General Equipment
205-153
(T80T-4000-W)
Handle
205-990Installer, Axle SealTKIT-2012A-FLTKIT-2012A-ROW
Materials
Name
Specification
Motorcraft® SAE 80W-90 Premium Rear Axle LubricantXY-80W90-QL
WSP-M2C197-A
Removal
Remove the rear halfshaft...

Other information:
Ford Fusion 2013–2020 Service Manual: Transmission Cooling - Overview. Description and Operation
Transmission Cooling - 1.5L EcoBoost This vehicle is equipped with an external transmission fluid cooler. The transmission fluid cooler is an oil-to-coolant fluid cooler which is mounted on the left side of radiator. The cooling system also consists of a thermal bypass valve which is mounted on top of the transmission and a transmission fluid warmer mounted on top of the transmission. When ..
Ford Fusion 2013–2020 Service Manual: Front Stabilizer Bar Bushing. Removal and Installation
Removal NOTICE: Suspension fasteners are critical parts that affect the performance of vital components and systems. Failure of these fasteners may result in major service expense. Use the same or equivalent parts if replacement is necessary. Do not use a replacement part of lesser quality or substitute design. Tighten fasteners as specified. NOTE: Removal steps in this procedure may ..
Categories
- Manuals Home
- 2nd Generation Ford Fusion Owners Manual
- 2nd Generation Ford Fusion Service Manual
- Intake Manifold. Removal and Installation
- Powertrain
- Traction Control
- New on site
- Most important about car
Parallel Parking
The system detects available parallel parking spaces and steers your vehicle into the space. You control the accelerator, gearshift and brakes. The system visually and audibly guides you into a parallel parking space.
 Press the button once to search
for a parking space.
Press the button once to search
for a parking space.