Ford Fusion: Side Panel Sheet Metal Repairs / A-Pillar Outer Panel. Removal and Installation
Ford Fusion 2013–2020 Service Manual / Body and Paint / Body and Paint / Side Panel Sheet Metal Repairs / A-Pillar Outer Panel. Removal and Installation
Special Tool(s) / General Equipment
| Resistance Spotwelding Equipment | |
| Hot Air Gun | |
| Air Body Saw | |
| MIG/MAG Welding Equipment | |
| Spot Weld Drill Bit |
Materials
| Name | Specification |
|---|---|
| Metal Bonding Adhesive TA-1, TA-1-B, 3M™ 08115, LORD Fusor® 108B |
- |
| Seam Sealer TA-2-B, 3M™ 08308, LORD Fusor® 803DTM |
- |
Removal
-
Restore vehicle to pre-accident dimensions.
Refer to: Body and Frame (501-26 Body Repairs - Vehicle Specific Information and Tolerance Checks, Description and Operation).
-
Reposition the carpeting and the wiring harness away from the repair area.
-
Remove the following items:
Refer to: Front Door (501-03 Body Closures, Removal and Installation).
Refer to: Fender (501-02 Front End Body Panels, Removal and Installation).
Refer to: Fixed Glass (501-11 Glass, Frames and Mechanisms, General Procedures).
Refer to: Rocker Panel Moulding (501-08 Exterior Trim and Ornamentation, Removal and Installation).
Refer to: A-Pillar Trim Panel (501-05 Interior Trim and Ornamentation, Removal and Installation).
-
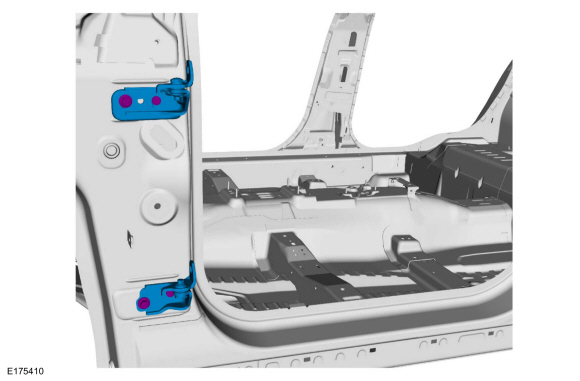
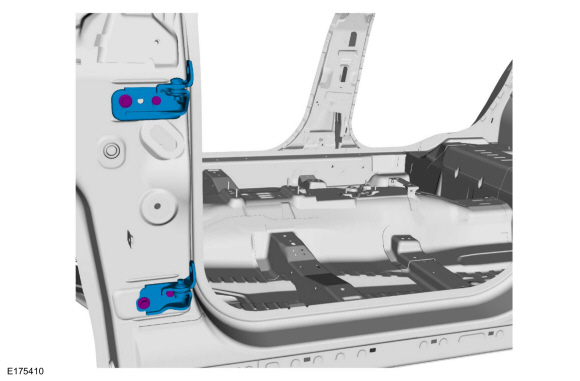
Remove the bolts and the front door hinges.
 |
-
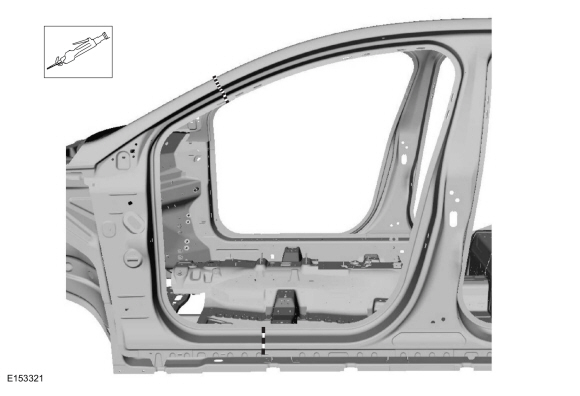
Carefully cut the A-pillar outer panel section.
Use the General Equipment: Air Body Saw
 |
-
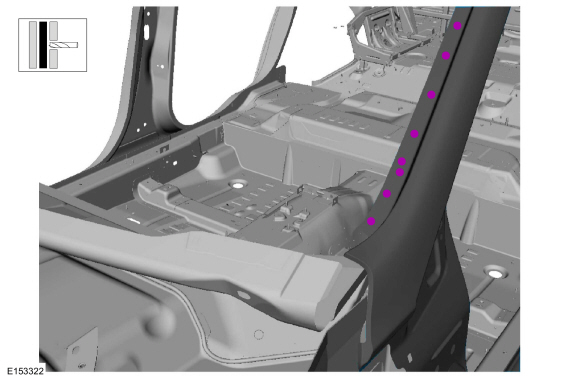
Drill out the spot welds.
Use the General Equipment: Spot Weld Drill Bit
 |
-
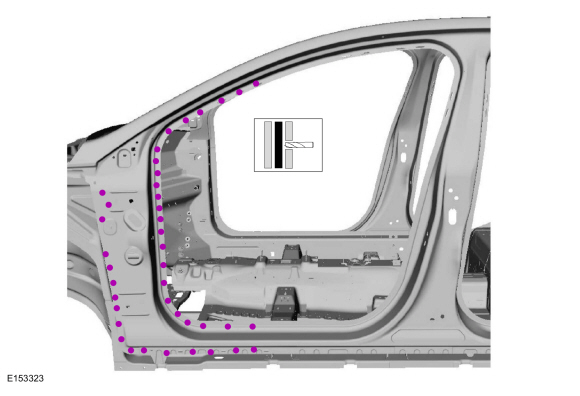
Drill out the spot welds.
Use the General Equipment: Spot Weld Drill Bit
 |
-
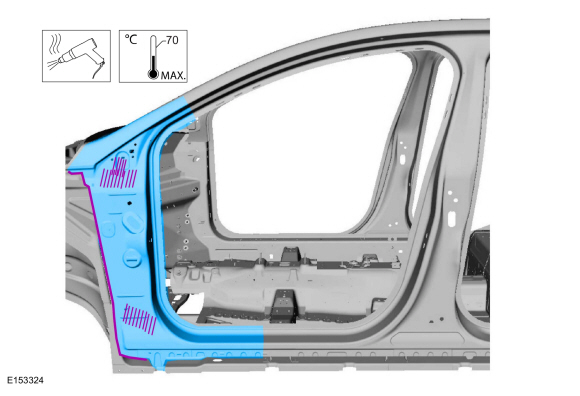
Break the adhesive bond and remove the A-pillar outer panel.
Use the General Equipment: Hot Air Gun
 |
Installation
-
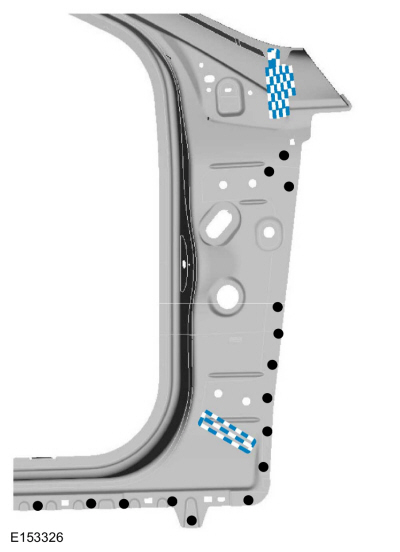
Apply adhesive as indicated.
Material: Metal Bonding Adhesive / TA-1, TA-1-B, 3M™ 08115, LORD Fusor® 108B
 |
-
-
Install and weld the replacement A-pillar outer panel.
Use the General Equipment: MIG/MAG Welding Equipment
-
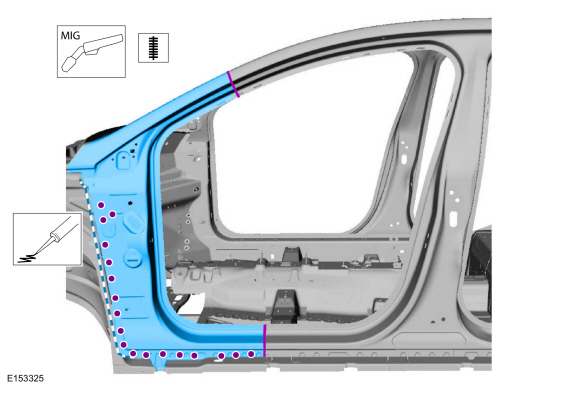
Apply sealer as indicated.
Material: Seam Sealer / TA-2-B, 3M™ 08308, LORD Fusor® 803DTM
-
Install and weld the replacement A-pillar outer panel.
 |
-
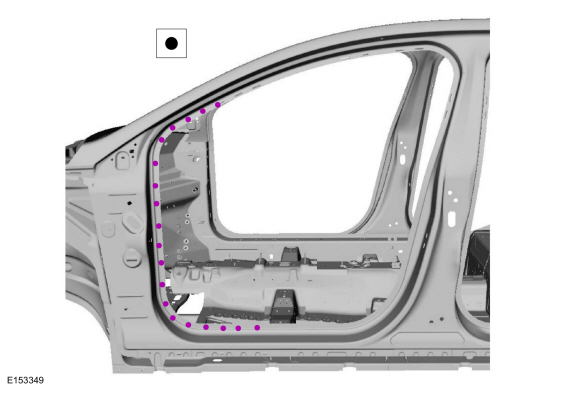
Spot weld the door opening portion of the A-pillar panel.
Use the General Equipment: Resistance Spotwelding Equipment
 |
-
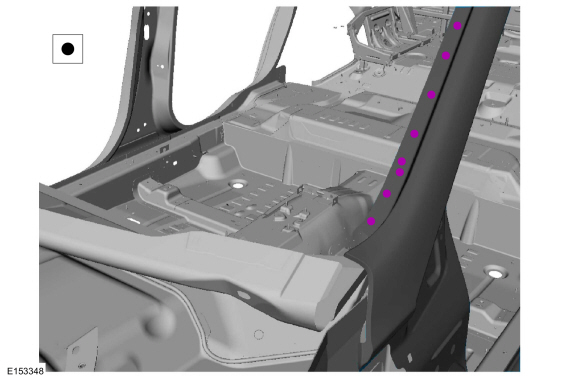
Spot weld the windshield flange area.
Use the General Equipment: Resistance Spotwelding Equipment
 |
-
Finish the repair area using typical metal finishing procedures.
-
Sand and prime repair area using a Ford approved paint system.
-
Sealing work: All areas must be sealed to production level.
Material: Seam Sealer / TA-2-B, 3M™ 08308, LORD Fusor® 803DTM
-
Refinish using a Ford approved paint system.
-
Restore corrosion protection.
Refer to: Corrosion Prevention (501-25 Body Repairs - General Information, General Procedures).
-
Install the front door hinges and the bolts.
Torque:
Upper hinge fasteners: 22 lb.ft (30 Nm)
Lower hinge fasteners: 22 lb.ft (30 Nm)
 |
-
Reposition the carpeting and the wiring harness.
-
Install the following items:
Refer to: Fixed Glass (501-11 Glass, Frames and Mechanisms, General Procedures).
Refer to: Front Door (501-03 Body Closures, Removal and Installation).
Refer to: Fender (501-02 Front End Body Panels, Removal and Installation).
Refer to: Rocker Panel Moulding (501-08 Exterior Trim and Ornamentation, Removal and Installation).
Refer to: A-Pillar Trim Panel (501-05 Interior Trim and Ornamentation, Removal and Installation).
-
Align the front door.
Refer to: Front Door Alignment (501-03 Body Closures, General Procedures).
 A-Pillar Reinforcement. Removal and Installation
Special Tool(s) /
General Equipment
Resistance Spotwelding Equipment
8 mm Drill Bit
MIG/MAG Welding Equipment
Spot Weld Drill Bit
Locking Pliers
Removal
NOTICE:
Battery electric vehicle (BEV), hybrid electric vehicle
(HEV) and plug-in hybrid electric vehicle (PHEV) contain a high-voltage
battery...
Other information:
Ford Fusion 2013–2020 Service Manual: Starting System. Diagnosis and Testing
Inspection and Verification Diagnostics in this manual assume a certain skill level and knowledge of Ford-specific diagnostic practices. REFER to: Diagnostic Methods (100-00 General Information, Description and Operation). Verify the customer concern...
Ford Fusion 2013–2020 Service Manual: Identification Codes. Description and Operation
Vehicle Identification Number (VIN) VIN Locator The VIN is a 17-digit combination of letters and numbers. The VIN is stamped on a metal tab riveted to the instrument panel, top upper left of the dash. The VIN is also found on the VC label. If the VIN plate requires replacement, authorized dealers must contact their respective regional office...
Categories
- Manuals Home
- 2nd Generation Ford Fusion Owners Manual
- 2nd Generation Ford Fusion Service Manual
- Main Control Valve Body. Removal and Installation
- Body Control Module (BCM). Removal and Installation
- Intake Manifold. Removal and Installation
- New on site
- Most important about car
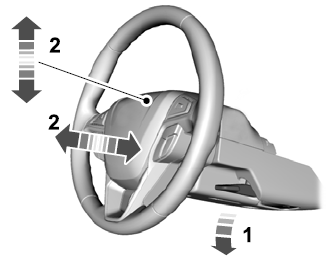
Adjusting the Steering Wheel
WARNING: Do not adjust the steering wheel when your vehicle is moving.
Note: Make sure that you are sitting in the correct position.
Copyright © 2026 www.fofusion2.com

