Ford Fusion: Fuel Charging and Controls - Turbocharger - 1.5L EcoBoost (118kW/160PS) – I4 / Wastegate Control Valve Solenoid. Removal and Installation
Ford Fusion 2013–2020 Service Manual / Powertrain / Engine / Fuel Charging and Controls - Turbocharger - 1.5L EcoBoost (118kW/160PS) – I4 / Wastegate Control Valve Solenoid. Removal and Installation
Removal
NOTICE: Whenever turbocharger air intake system components are removed, always cover open ports to protect from debris. It is important that no foreign material enter the system. The turbocharger compressor vanes are susceptible to damage from even small particles. All components should be inspected and cleaned, if necessary, prior to installation or reassembly.
-
Remove the air cleaner outlet pipe.
Refer to: Air Cleaner Outlet Pipe (303-12A Intake Air Distribution and Filtering - 1.5L EcoBoost (118kW/160PS) – I4, Removal and Installation).
-
-
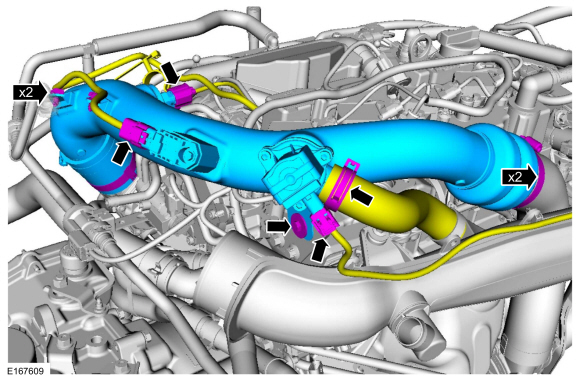
Disconnect the electrical connectors and detach the wiring retainers from the CAC intake pipe.
-
Release the clamp and disconnect the bypass hose from CAC intake pipe.
-
Loosen the CAC intake pipe clamps.
-
Remove the bolt and then remove the CAC intake pipe.
-
Disconnect the electrical connectors and detach the wiring retainers from the CAC intake pipe.
 |
-
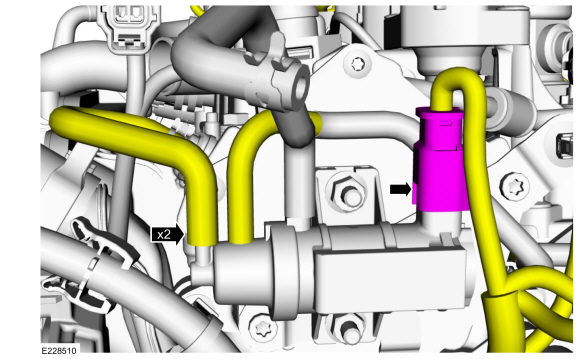
Disconnect the wastegate control valve solenoid hoses
and the wastegate control valve solenoid electrical connector.
 |
-
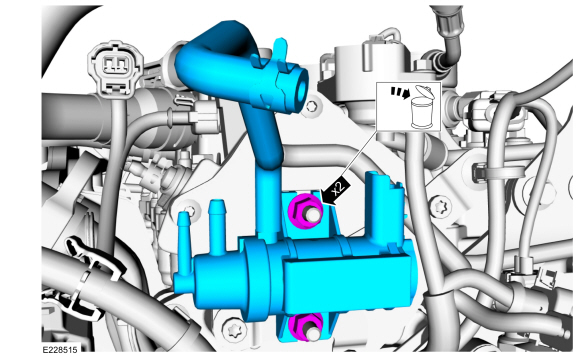
Remove and discard the wastegate control valve solenoid
retaining nuts and then remove the wastegate control valve solenoid.
Torque: 62 lb.in (7 Nm)
 |
Installation
-
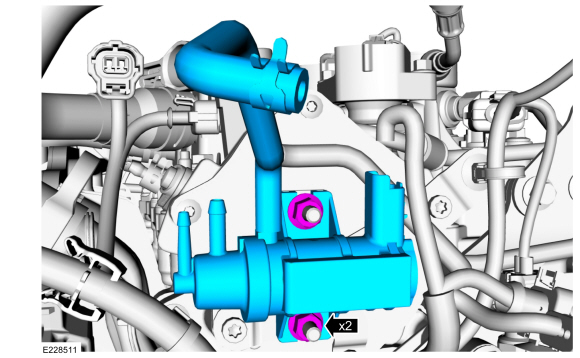
Install the wastegate control valve solenoid, then
install and tighten the new wastegate control valve solenoid retaining
nuts.
Torque: 62 lb.in (7 Nm)
 |
-
Connect the wastegate control valve solenoid hoses and
the wastegate control valve solenoid electrical connector.
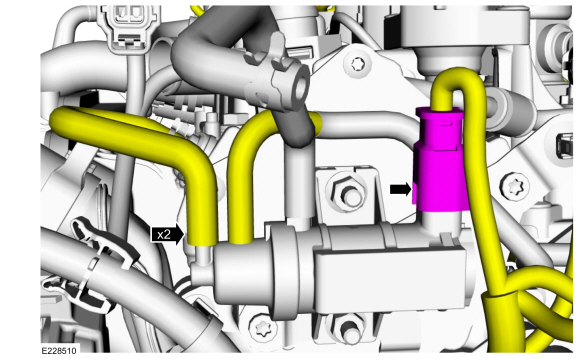 |
-
-
Install the CAC intake pipe and then install and tighten the bolt.
Torque: 71 lb.in (8 Nm)
-
Tighten the CAC intake pipe clamps.
Torque: 44 lb.in (5 Nm)
-
Connect the bypass hose and clamp to the CAC intake pipe.
-
Attach the wiring retainers and then connect the electrical connectors to the CAC intake pipe.
-
Install the CAC intake pipe and then install and tighten the bolt.
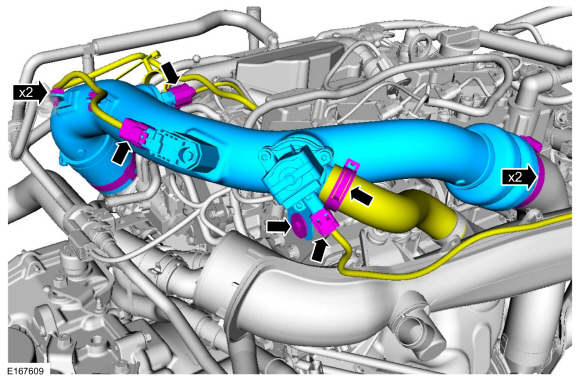 |
-
Install the air cleaner outlet pipe.
Refer to: Air Cleaner Outlet Pipe (303-12A Intake Air Distribution and Filtering - 1.5L EcoBoost (118kW/160PS) – I4, Removal and Installation).
 Turbocharger. Removal and Installation
Special Tool(s) /
General Equipment
Hose Clamp Remover/Installer
Materials
Name
Specification
Motorcraft® Metal Brake Parts CleanerPM-4-A, PM-4-B
-
Removal
NOTICE:
The turbocharger compressor vanes can be damaged by even the
smallest particles...
Other information:
Ford Fusion 2013–2020 Service Manual: Front Seat Cushion Blower Motor. Removal and Installation
Removal All seats Remove the front seat. Refer to: Front Seat (501-10A Front Seats, Removal and Installation). Remove the side shield screws. Remove the side shield. Lift up on the rear of the side shield and pull outward. Push the side shield forward. Disconnect the electrical connector. ..
Ford Fusion 2013–2020 Service Manual: Gasoline and Gasoline-Ethanol Fuel Systems Health and Safety Precautions. Description and Operation
WARNING: Before working on or disconnecting any of the fuel tubes or fuel system components, relieve the fuel system pressure to prevent accidental spraying of fuel. Fuel in the fuel system remains under high pressure, even when the engine is not running. Failure to follow this instruction may result in serious personal injury. WARNING: Do not smoke, carry lighted toba..
Categories
- Manuals Home
- 2nd Generation Ford Fusion Owners Manual
- 2nd Generation Ford Fusion Service Manual
- Powertrain
- Intake Manifold. Removal and Installation
- Pre-Collision Assist (IF EQUIPPED)
- New on site
- Most important about car
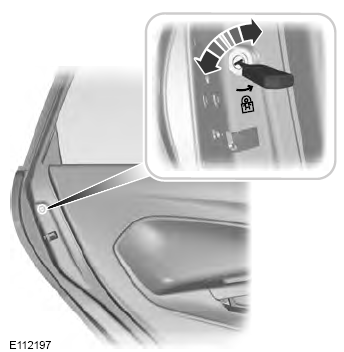
Child Safety Locks
When these locks are set, the rear doors cannot be opened from the inside.
Copyright © 2026 www.fofusion2.com

