Ford Fusion: Front Drive Halfshafts / Specifications
Ford Fusion 2013–2020 Service Manual / Chassis / Driveline / Front Drive Halfshafts / Specifications
Torque Specifications
| Item | Nm | lb-ft | lb-in |
|---|---|---|---|
| Halfshaft support bracket bolts | 48 | 35 | – |

 Front Drive Halfshafts. Diagnosis and Testing
Preliminary Inspection
Visually inspect the CV joints, housing, boots, and clamps for obvious signs of mechanical damage.
If an obvious cause for an observed or reported concern is
found, correct the cause (if possible) before proceeding to the next
step
If the cause is not visually evident, verify the symptom and REFER to Symptom Chart: NVH...
Other information:
Ford Fusion 2013–2020 Service Manual: Ignition Switch - Vehicles With: Push Button Start. Removal and Installation
Special Tool(s) / General Equipment Interior Trim Remover Removal Vehicles with touchscreen display. Remove the FCIM. Refer to: Front Controls Interface Module (FCIM) (415-00 Information and Entertainment System - General Information - Vehicles With: SYNC 3, Removal and Installation)...
Ford Fusion 2013–2020 Service Manual: Handles, Locks, Latches and Entry Systems - System Operation and Component Description. Description and Operation
System Operation System Diagram Item Description 1 Exterior Door Handles 2 BCM 3 Luggage Compartment Lid Release Switches 4 DDM 5 RDM 6 PDM 7 RDM 8 Lock Actuator 9 Lock/Unlock Feedback 10 Left Rear Door Latch 11 Lock Actuator 12 Lock/Unlock Feedback 13 Right Front Door Latch 14 Passive Key 1..
Categories
- Manuals Home
- 2nd Generation Ford Fusion Owners Manual
- 2nd Generation Ford Fusion Service Manual
- Cylinder Head. Removal and Installation
- Starter Motor. Removal and Installation
- Transmission - 1.5L EcoBoost (118kW/160PS) – I4. Removal and Installation
- New on site
- Most important about car
Manual Climate Control
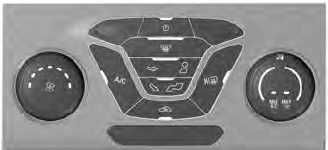
Note: Depending on your vehicle option package, the controls may look different from what you see here.
Copyright © 2026 www.fofusion2.com