Ford Fusion: Engine - 1.5L EcoBoost (118kW/160PS) – I4 / Oil Pump. Removal and Installation
Ford Fusion 2013–2020 Service Manual / Powertrain / Engine / Engine - 1.5L EcoBoost (118kW/160PS) – I4 / Oil Pump. Removal and Installation
Special Tool(s) / General Equipment
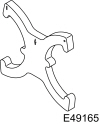 |
303-1097 Locking Tool, Variable Camshaft Timing Oil Control Unit TKIT-2010B-FLM TKIT-2010B-ROW |
Materials
| Name | Specification |
|---|---|
| Motorcraft® Metal Brake Parts Cleaner PM-4-A, PM-4-B |
- |
Removal
-
Remove the crankshaft front seal.
Refer to: Crankshaft Front Seal (303-01A Engine - 1.5L EcoBoost (118kW/160PS) – I4, Removal and Installation).
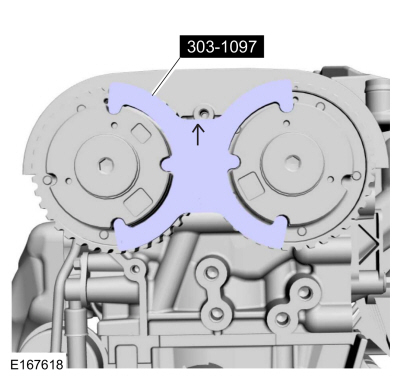
- Remove Special Service Tool: 303-1097 Locking Tool, Variable Camshaft Timing Oil Control Unit.
 |
-
NOTE: There are different length of bolts noted in removal.
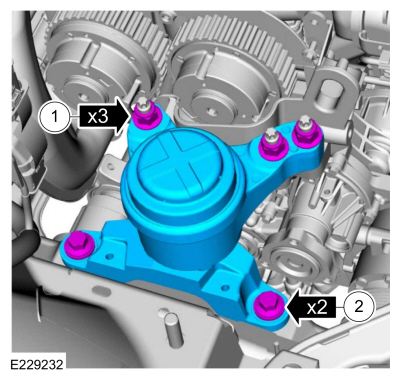
NOTE: Install the engine mount bracket to support the engine during oil pan removal.
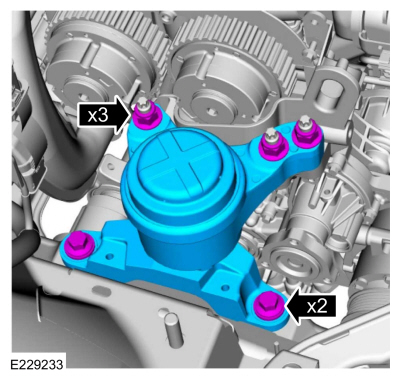
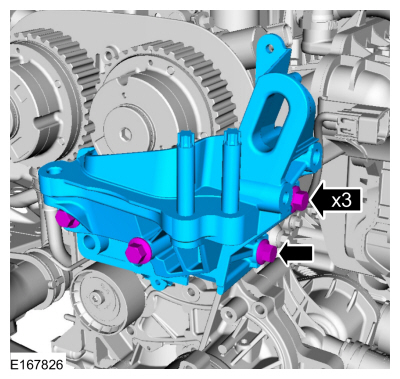
Install the engine mount support bracket and the bolts.
Torque: 41 lb.ft (55 Nm)
 |
-
Install the engine mount stud.
Torque: 89 lb.in (10 Nm)
 |
-
NOTE: Install engine mount to support the engine during oil pan removal.
Install the engine mount, nuts and the bolts.
Torque:
1: 85 lb.ft (115 Nm)
2: 66 lb.ft (90 Nm)
 |
-
Remove the oil pan.
Refer to: Oil Pan (303-01A Engine - 1.5L EcoBoost (118kW/160PS) – I4, Removal and Installation).
-
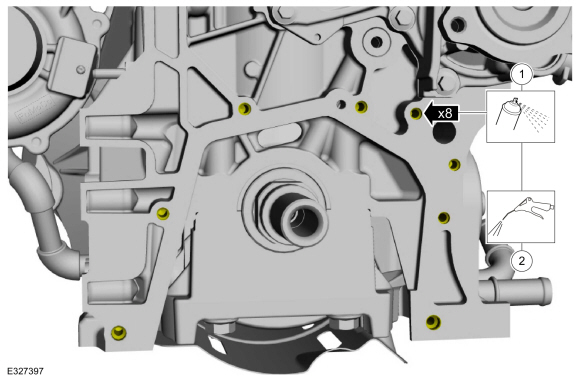
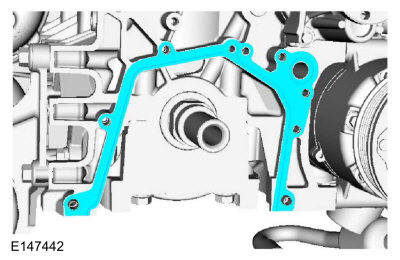
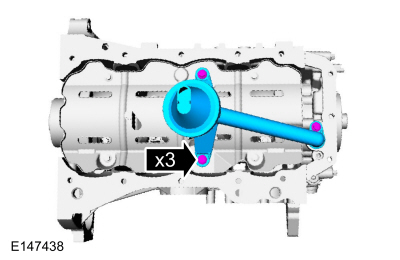
Remove the bolts and the oil pump screen and pickup tube.
 |
-
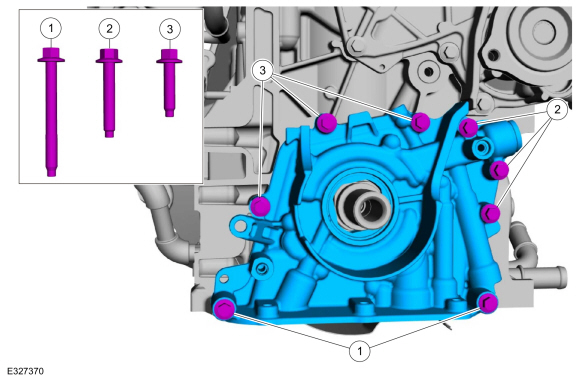
NOTE: Note the position of the 3 different lengths of the bolts for installation.
-
Remove the two M6 x 55 mm bolts.
-
Remove the three M6 x 35 mm bolts.
-
Remove the three M6 x 25 mm bolts and remove the oil pump.
-
Remove the two M6 x 55 mm bolts.
 |
-
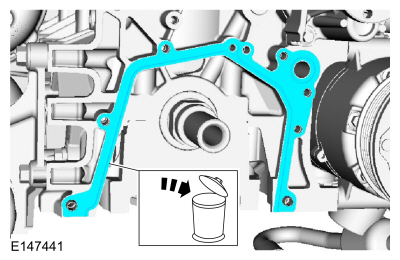
Remove and discard the oil pump gasket.
 |
-
-
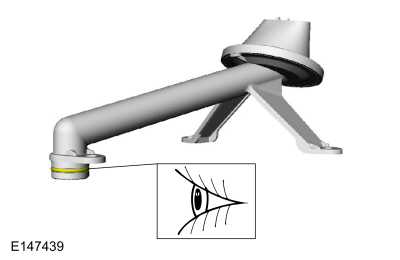
Clean the bolt holes for the oil pump with Motorcraft® Metal Brake Parts Cleaner to remove all residual oil.
Material: Motorcraft® Metal Brake Parts Cleaner / PM-4-A, PM-4-B
-
Use compressed air to remove any brake clean or oil in the oil pump bolt holes.
-
Clean the bolt holes for the oil pump with Motorcraft® Metal Brake Parts Cleaner to remove all residual oil.
 |
Installation
-
Install the new oil pump gasket.
 |
-
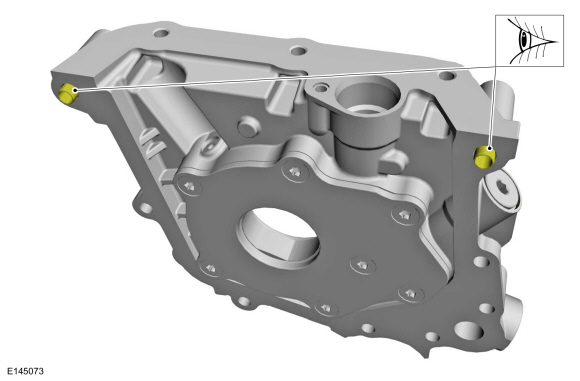
NOTE: Make sure that the locating dowels remain installed.
Inspect the oil pump locating dowels for damage and correct installation.
 |
-
Prime the oil pump. Add 2 tablespoons of clean engine oil to the oil pump and rotate the oil pump by hand.
-
NOTE: Only tighten the bolts finger tight at this stage.
Install the oil pump and follow the steps below. Hand start the bolts.
-
Install the two M6 x 1.00 x 55.0 bolts finger tight.
-
Install the three M6 x 1.00 x 35.0 bolts finger tight.
-
Install the three M6 x 25 bolts finger tight.
-
Install the two M6 x 1.00 x 55.0 bolts finger tight.
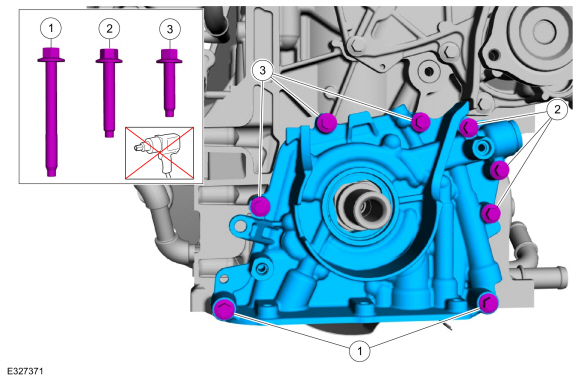 |
-
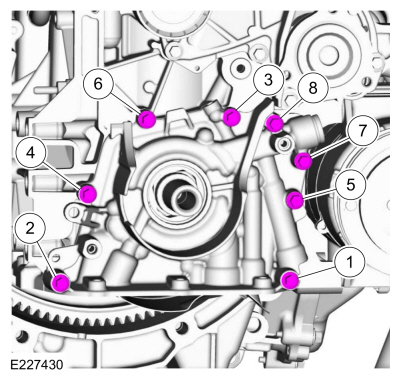
Tighten the oil pump bolts in sequence shown in 2 stages.
Torque:
Stage 1: Tighten bolts 1, 2, 3 and 6: 18 lb.in (2 Nm)
Stage 2: Tighten bolts 1 through 8: 97 lb.in (11 Nm)
 |
-
NOTE: The O-ring seal is to be reused unless damaged.
Inspect the oil pump screen and pickup tube O-ring seal.
 |
-
Install the oil pump screen and pickup tube and the bolts.
Torque: 84 lb.in (9.5 Nm)
 |
-
Install the oil pan.
Refer to: Oil Pan (303-01A Engine - 1.5L EcoBoost (118kW/160PS) – I4, Removal and Installation).
-
Remove the bolts, nuts and the engine mount.
 |
-
Remove the engine mount stud.
 |
-
NOTE: Note the different lengths of the bolts for installation.
Remove the bolts and the engine mount bracket.
 |
- Install Special Service Tool: 303-1097 Locking Tool, Variable Camshaft Timing Oil Control Unit.
 |
-
Install the crankshaft front seal.
Refer to: Crankshaft Front Seal (303-01A Engine - 1.5L EcoBoost (118kW/160PS) – I4, Removal and Installation).
 Oil Pressure Switch. Removal and Installation
Materials
Name
Specification
Engine Oil - SAE 5W-20 - Synthetic Blend Motor OilXO-5W20-Q1SP
WSS-M2C945-B1
Removal
With the vehicle in NEUTRAL, position it on a hoist...
 Timing Belt. Removal and Installation
Special Tool(s) /
General Equipment
303-1097Locking Tool, Variable Camshaft Timing Oil Control UnitTKIT-2010B-FLMTKIT-2010B-ROW
303-1550Alignment Tool, Crankshaft Vibration DamperTKIT-2012A-FLTKIT-2012A-ROW
303-393-02Adapter for 303-393TKIT-2012A-FLTKIT-2012A-ROW
303-393ALocking Tool, FlywheelTKIT-2012A-FLTKIT-2012A-ROW
303-748Locking Tool, CrankshaftTKIT-2010B-F..
Other information:
Ford Fusion 2013–2020 Service Manual: Diagnostic Trouble Code Charts. Diagnosis and Testing
Master DTC Index ABS Module REFER to: Anti-Lock Brake System (ABS) and Stability Control (206-09 Anti-Lock Brake System (ABS) and Stability Control, Diagnosis and Testing). APIM With SYNC, REFER to: Information and Entertainment System (415-00B) . With SYNC 3/Touchscreen display, REFER to: Information and Entertainment Sy..
Ford Fusion 2013–2020 Service Manual: Side Curtain Airbag. Removal and Installation
Removal NOTE: Removal steps in this procedure may contain installation details. WARNING: Turn the ignition OFF and wait one minute to deplete the backup power supply. Ignition must remain OFF until repair is complete. Failure to follow this instruction may result in serious personal injury or death in the event of an accidental deployment. If a SRS fault is present, con..
Categories
- Manuals Home
- 2nd Generation Ford Fusion Owners Manual
- 2nd Generation Ford Fusion Service Manual
- Pre-Collision Assist (IF EQUIPPED)
- Under Hood Overview - 1.5L EcoBoost™, 2.0L EcoBoost™, 2.5L, 2.7L EcoBoost™
- Powertrain
- New on site
- Most important about car
Manual Climate Control
Note: Depending on your vehicle option package, the controls may look different from what you see here.
Copyright © 2026 www.fofusion2.com